
Let’s make a homemade Father’s day card for dad! Kids of all ages will be able to make this shirt and tie card for Father’s day. This homemade card is easy to make and uses only basic craft supplies. You can make this homemade Father’s day card at home or even in the classroom.

Homemade Father’s Day Card
Father’s day is here and let’s show dad how much we love him and how much he means to us by making him a homemade card. This card is cute, easy to make, budget-friendly and both little kids and big kids can make this Father’s day craft.
Kids will be able to explore measuring, tracing, cutting, colors, and even origami while making this card. So without further ado, let’s make dad a card for Father’s day.
This post contains affiliate links.
Related: Check out our Printable Father’s Day Bucket List Keepsake!
Supplies Needed For This Homemade Father’s Day Card
- Decorated Paper or Construction Paper
- Ruler
- Pencil
- Glue
- Marker
- Scissors
How To Make This Homemade Father’s Day Card
Step 1
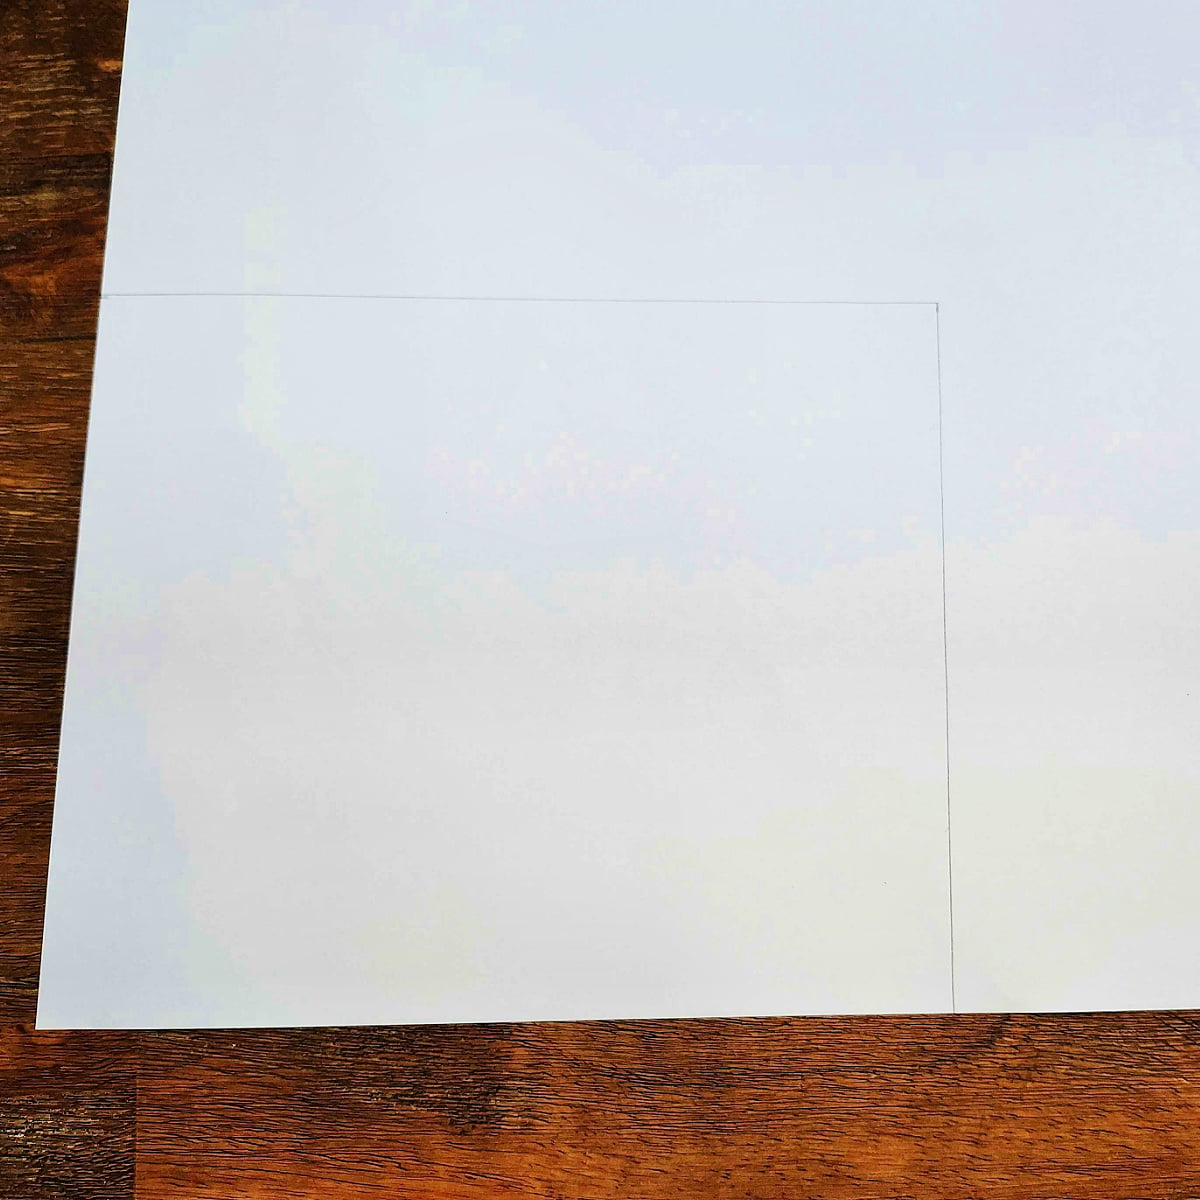
On the paper you will be using for the shirt, flip it to the back and measure out 6.5 inches x 9 inches. That should be the inches of the rectangle. Cut it out.
Step 2

Fold it in half hot dog style.
Step 3
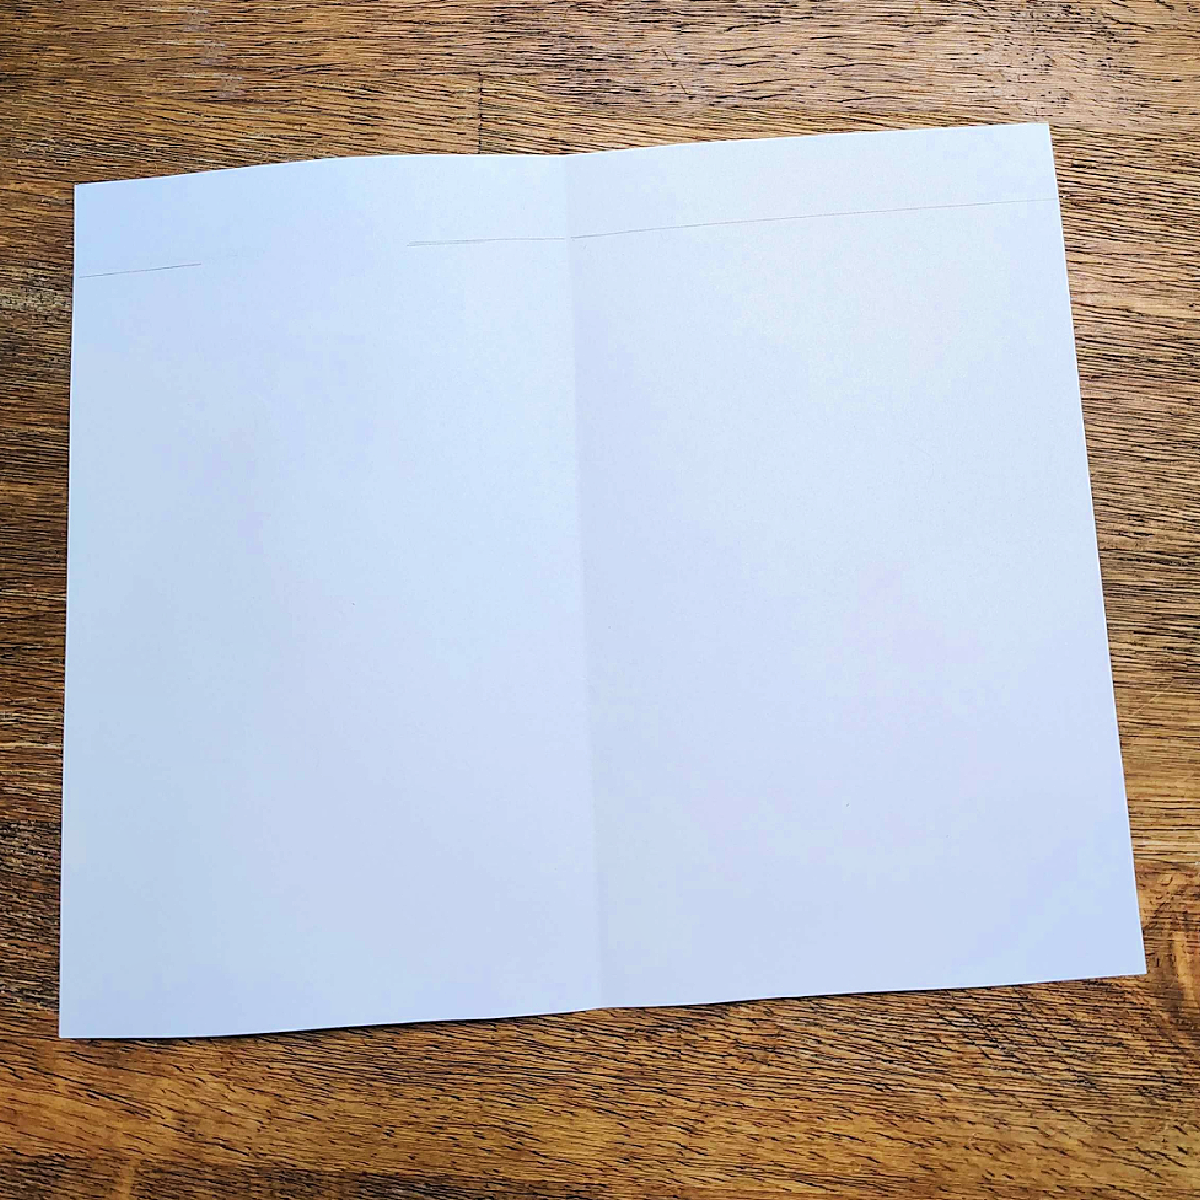
Measure about half an inch down. On the right side the line needs to go all the way across. On the left the right and left side should have a line.
Cut off the rectangle from the right side and just cut over the lines on the left.
Step 4
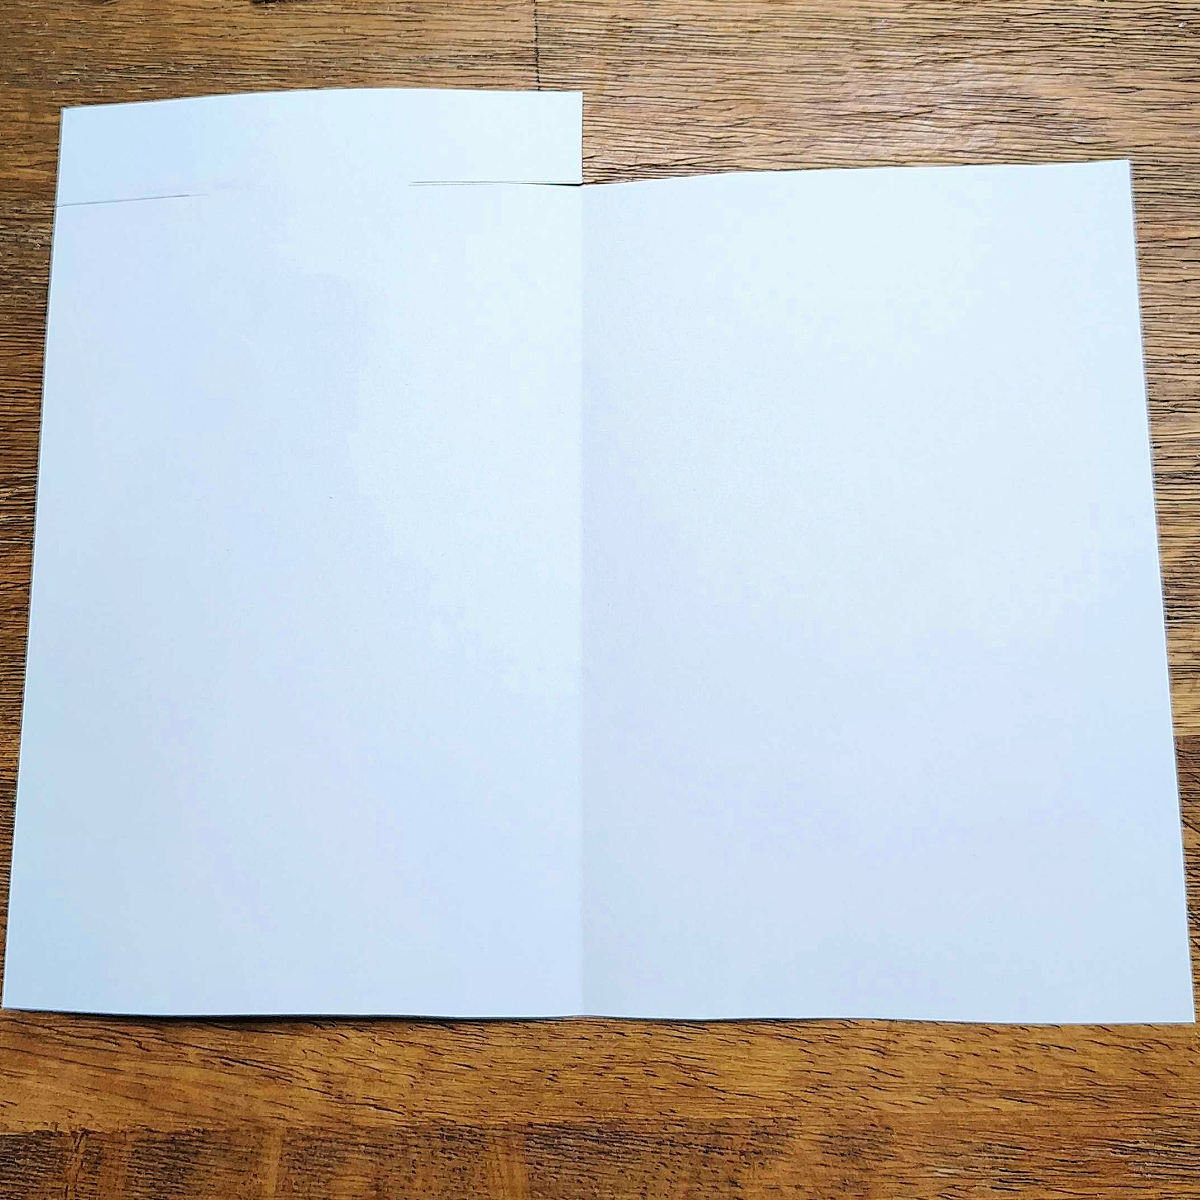
Fold the tabs you cut over the front. This will make the collar of your shirt.
Step 5
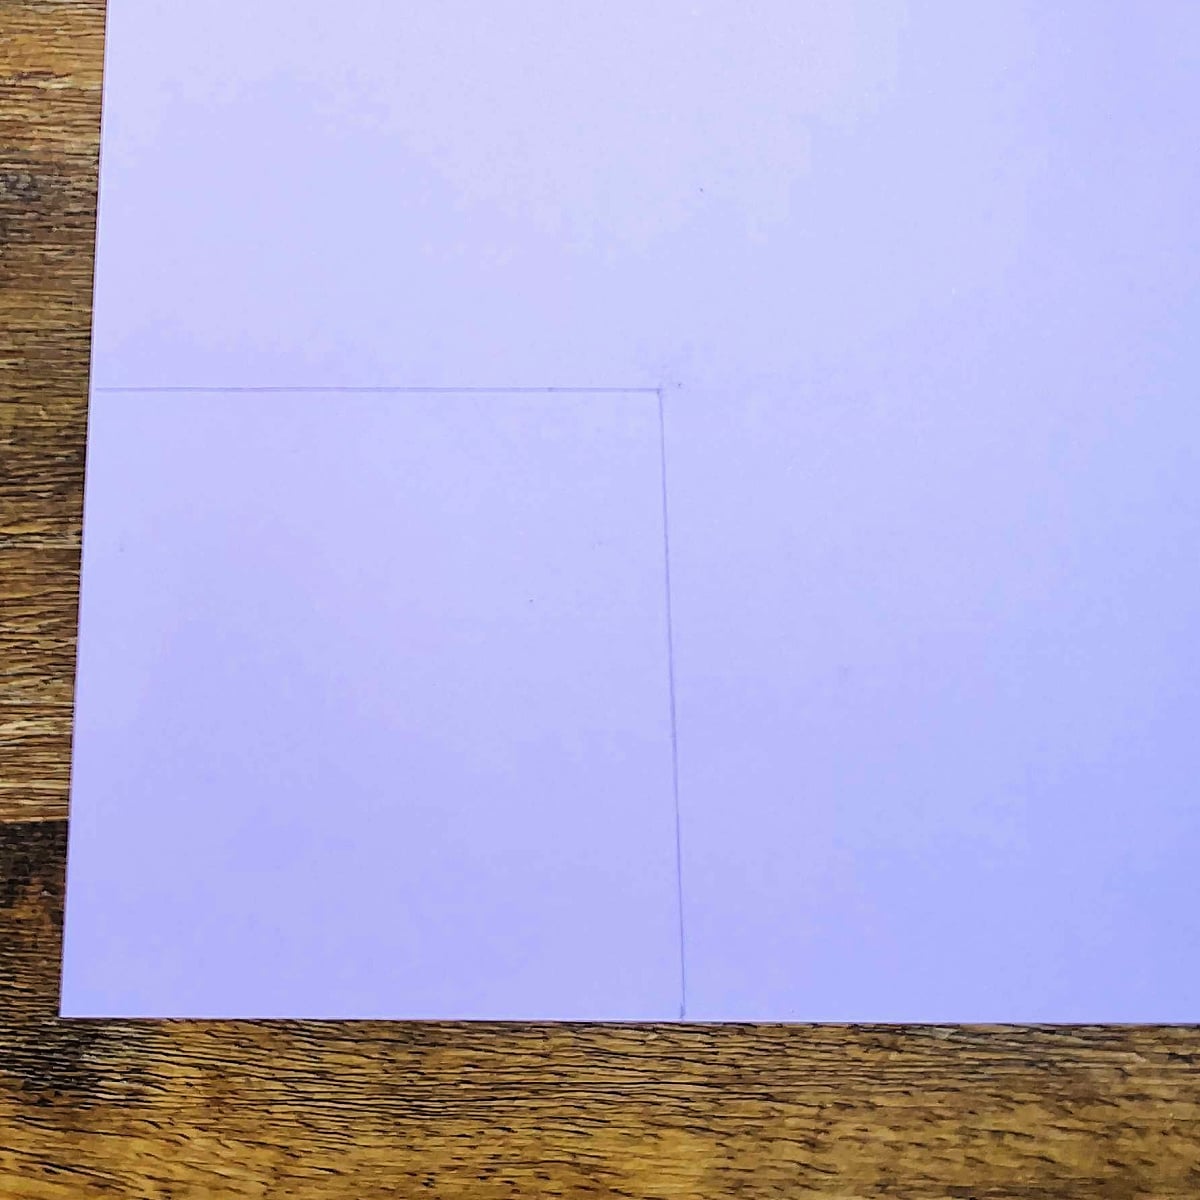
Take a second piece of paper, we used purple, and measured 3.5 inches on each side making a square. Cut it out.
Step 6
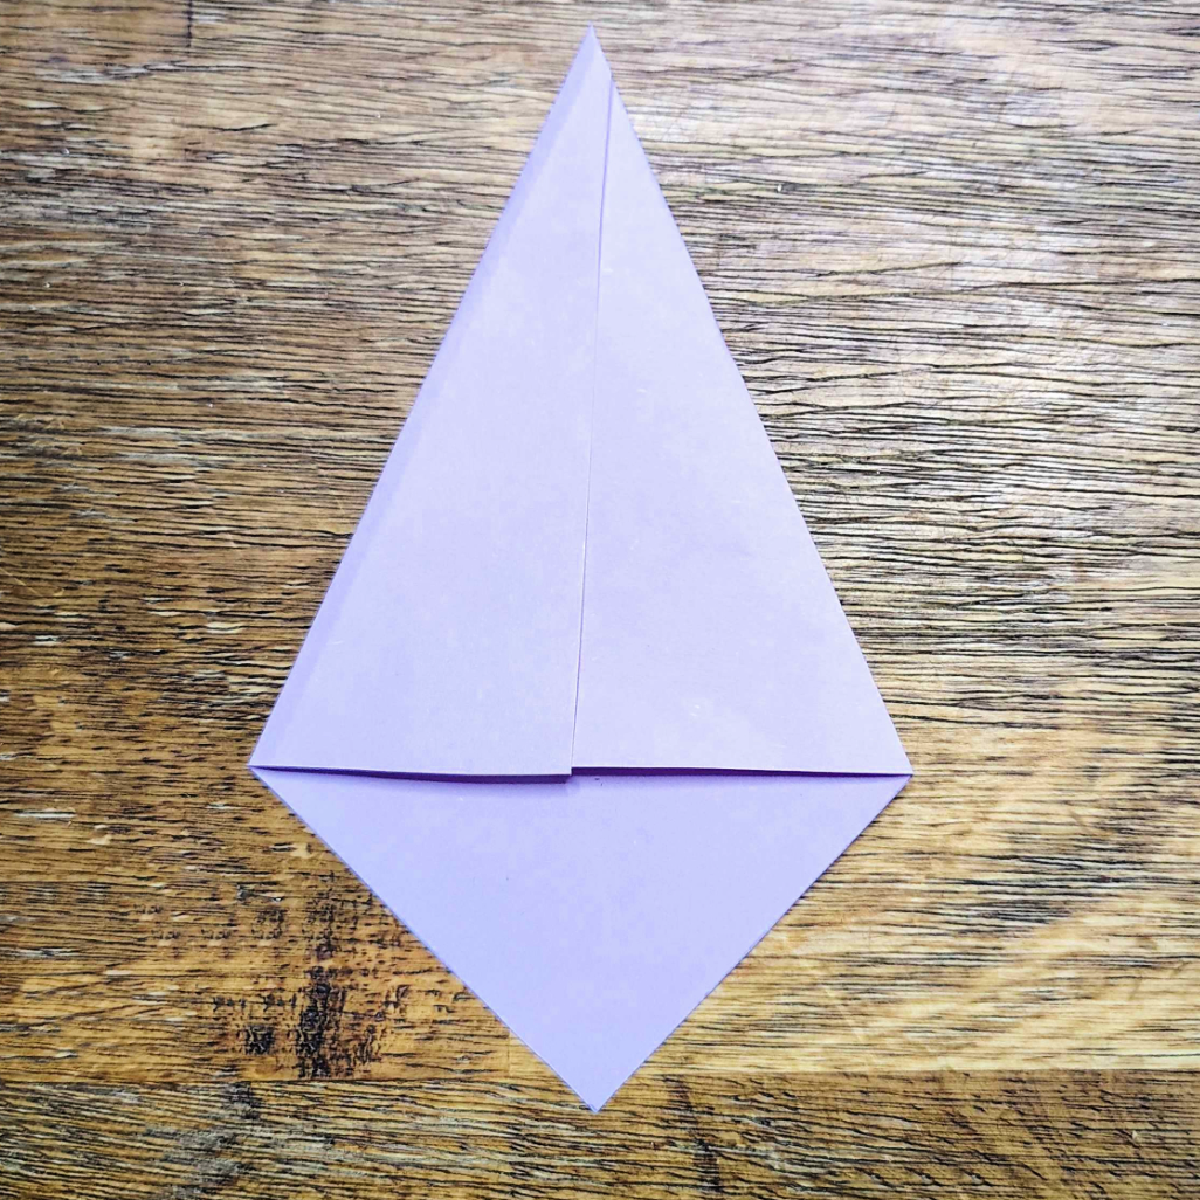
Flip the square so it’s a diamond and fold the sides into make a triangle at the top.
Step 7
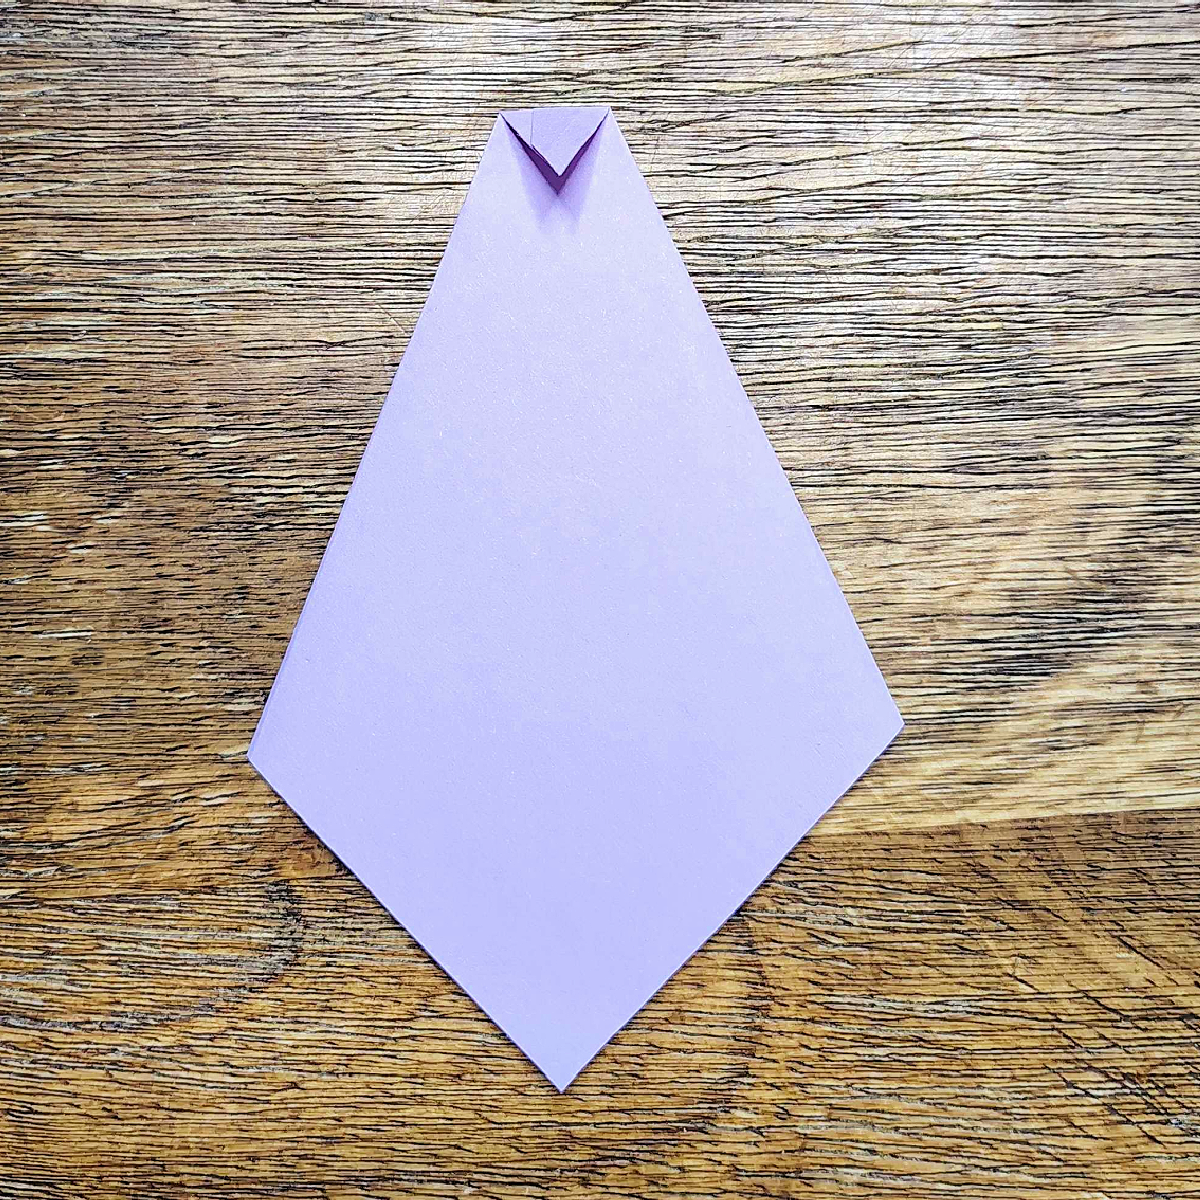
Flip it over and fold the point down.
Step 8
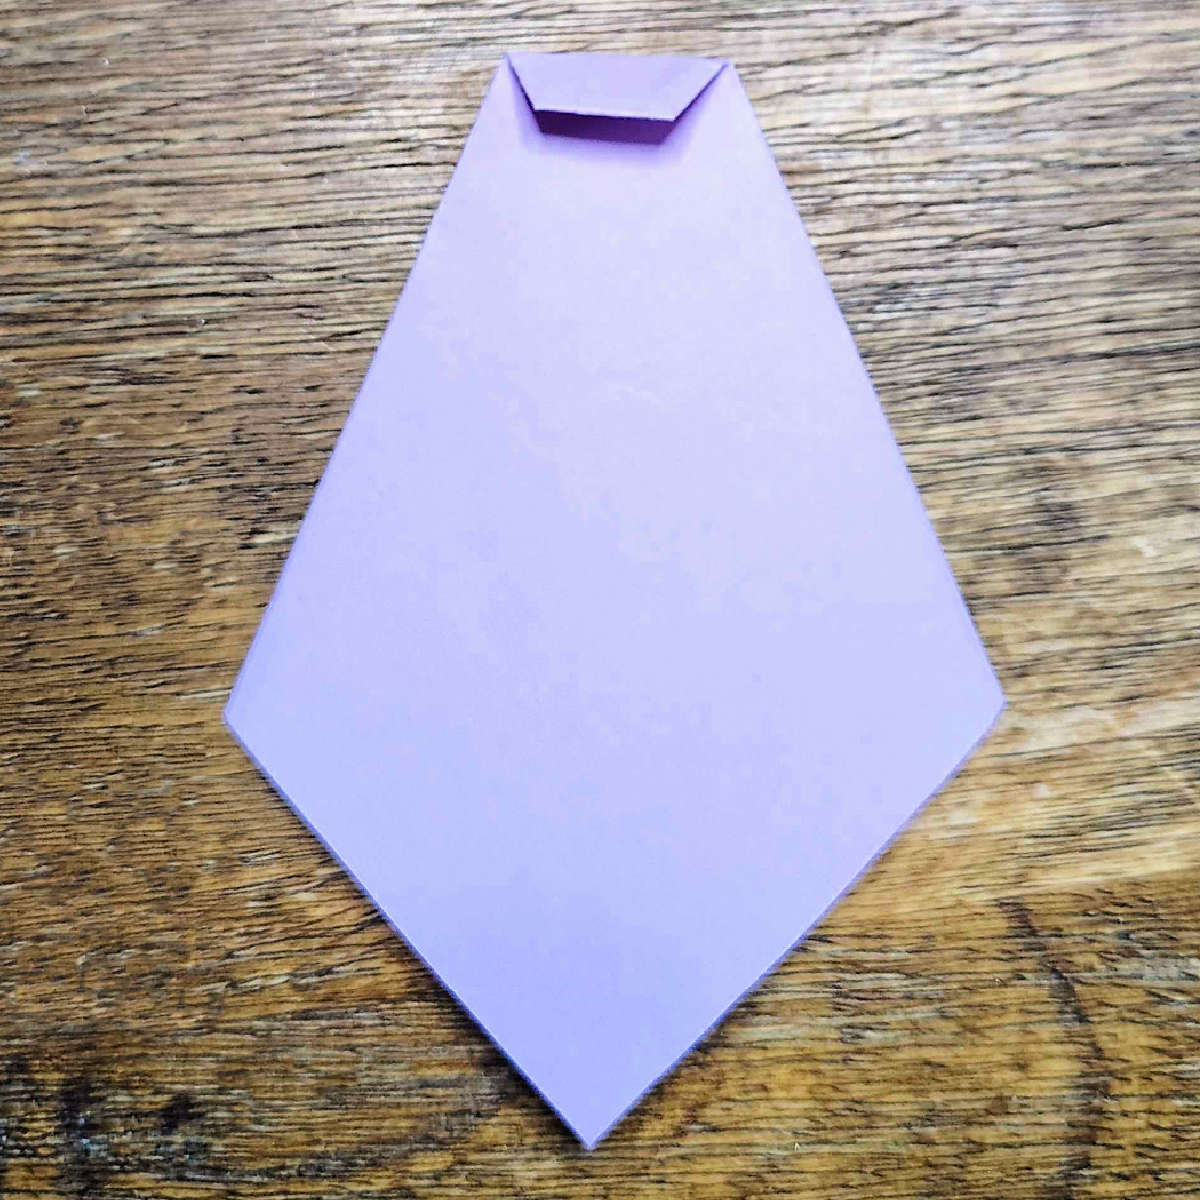
Flip it one more time.
Step 9
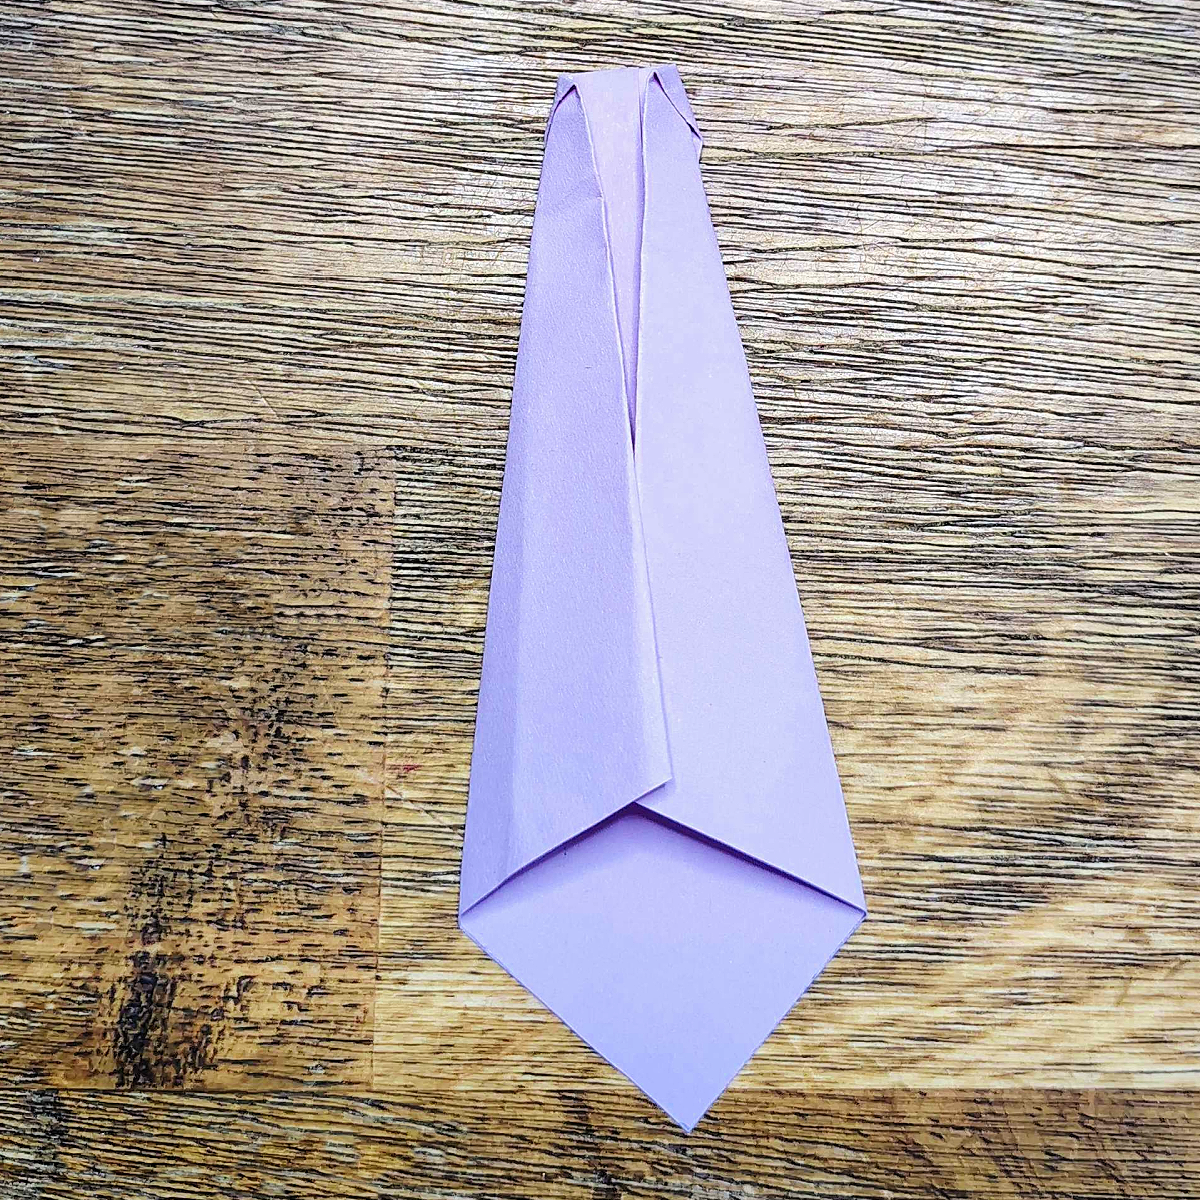
Flip the tie over again to the back sides and flip each side over so they meet in the middle. They don’t have to overlap, ours did. You just want the tie smaller.
Step 10
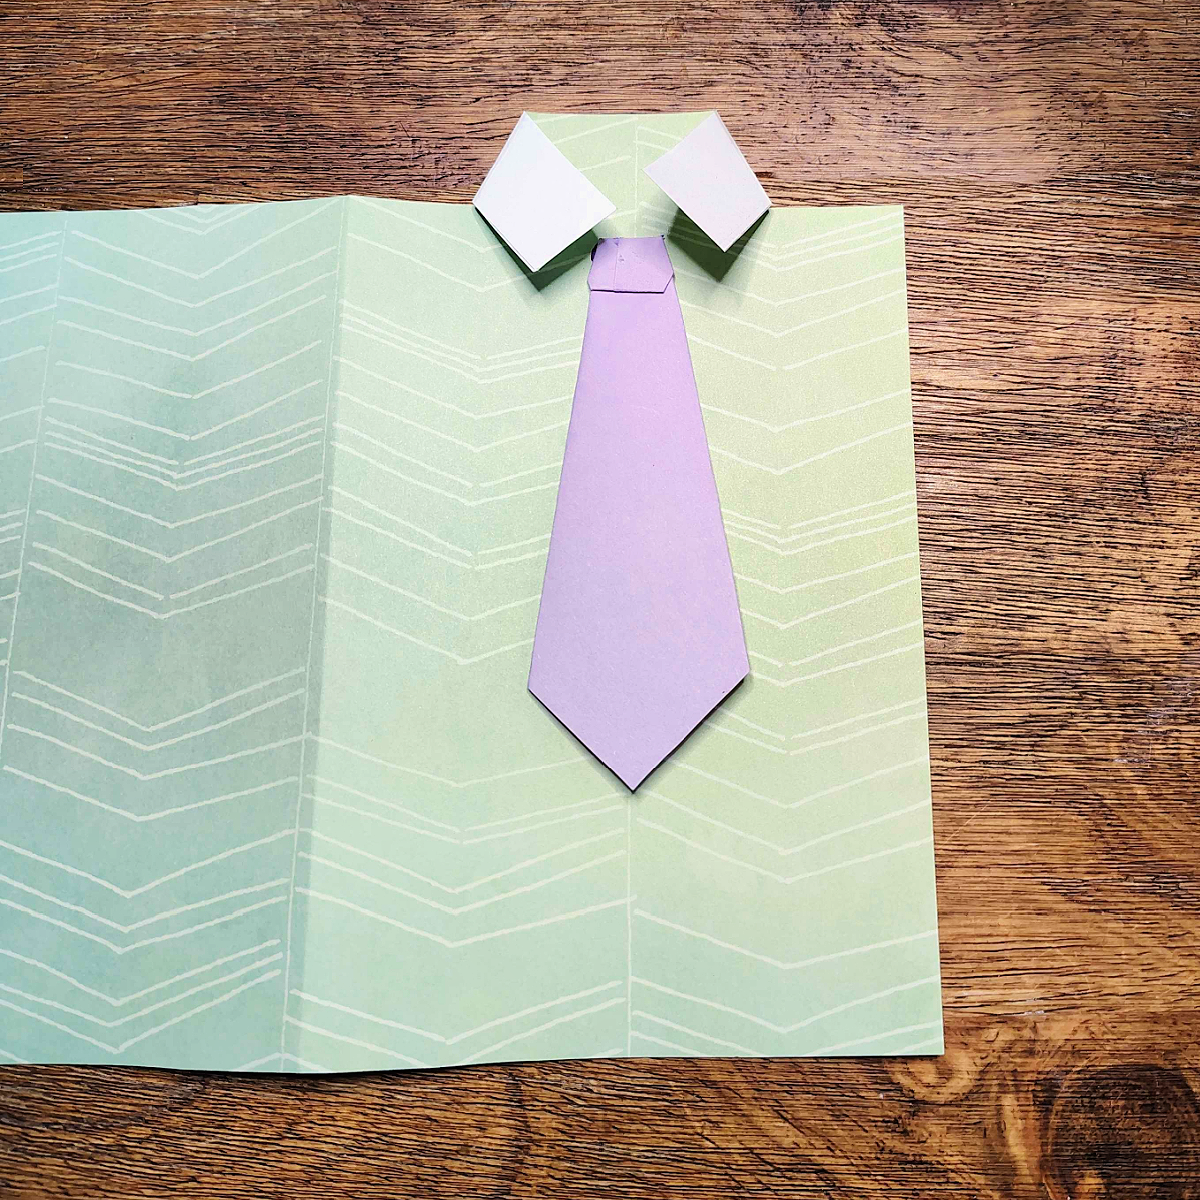
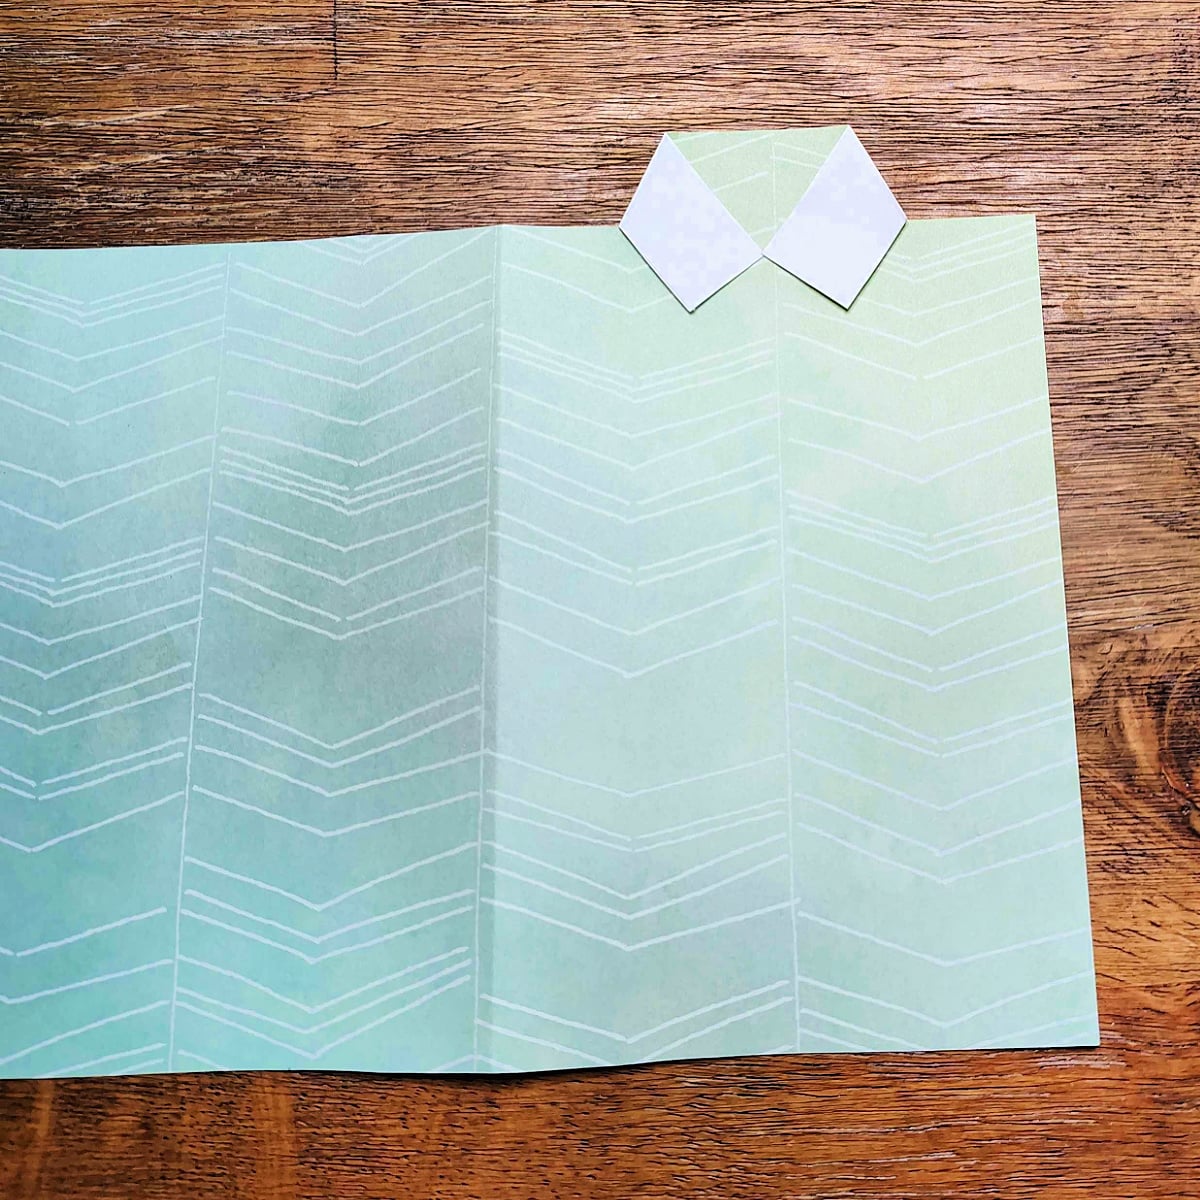
Glue your tie to the shirt.
Step 11
Glue the collar down.
Step 12
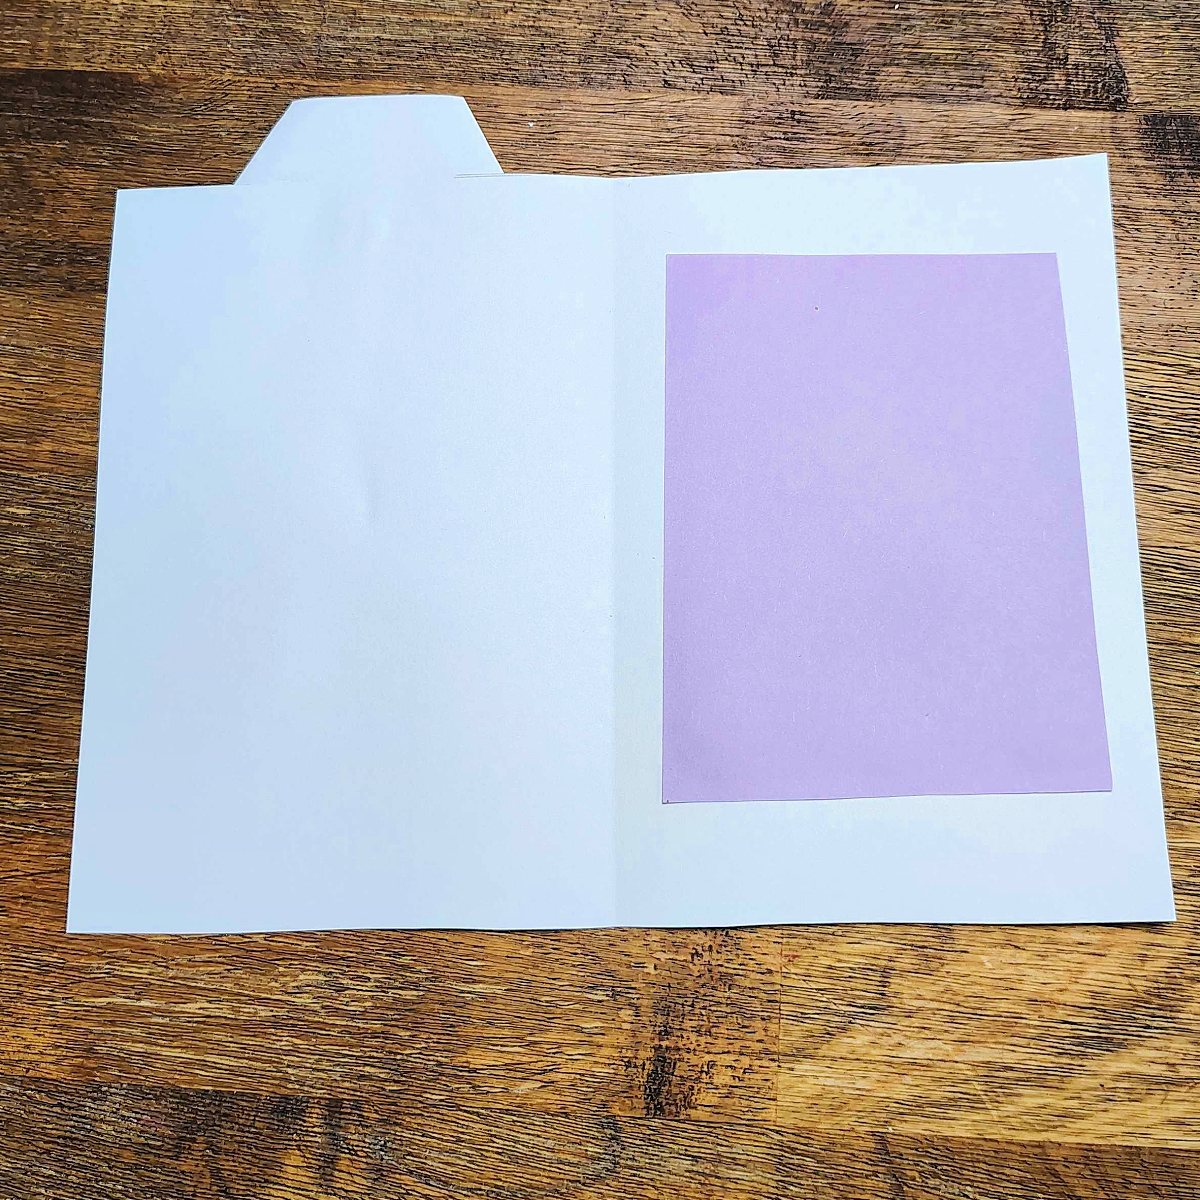
Using the other paper cut out a rectangle so that it fits most of the inside of your card.
Step 13
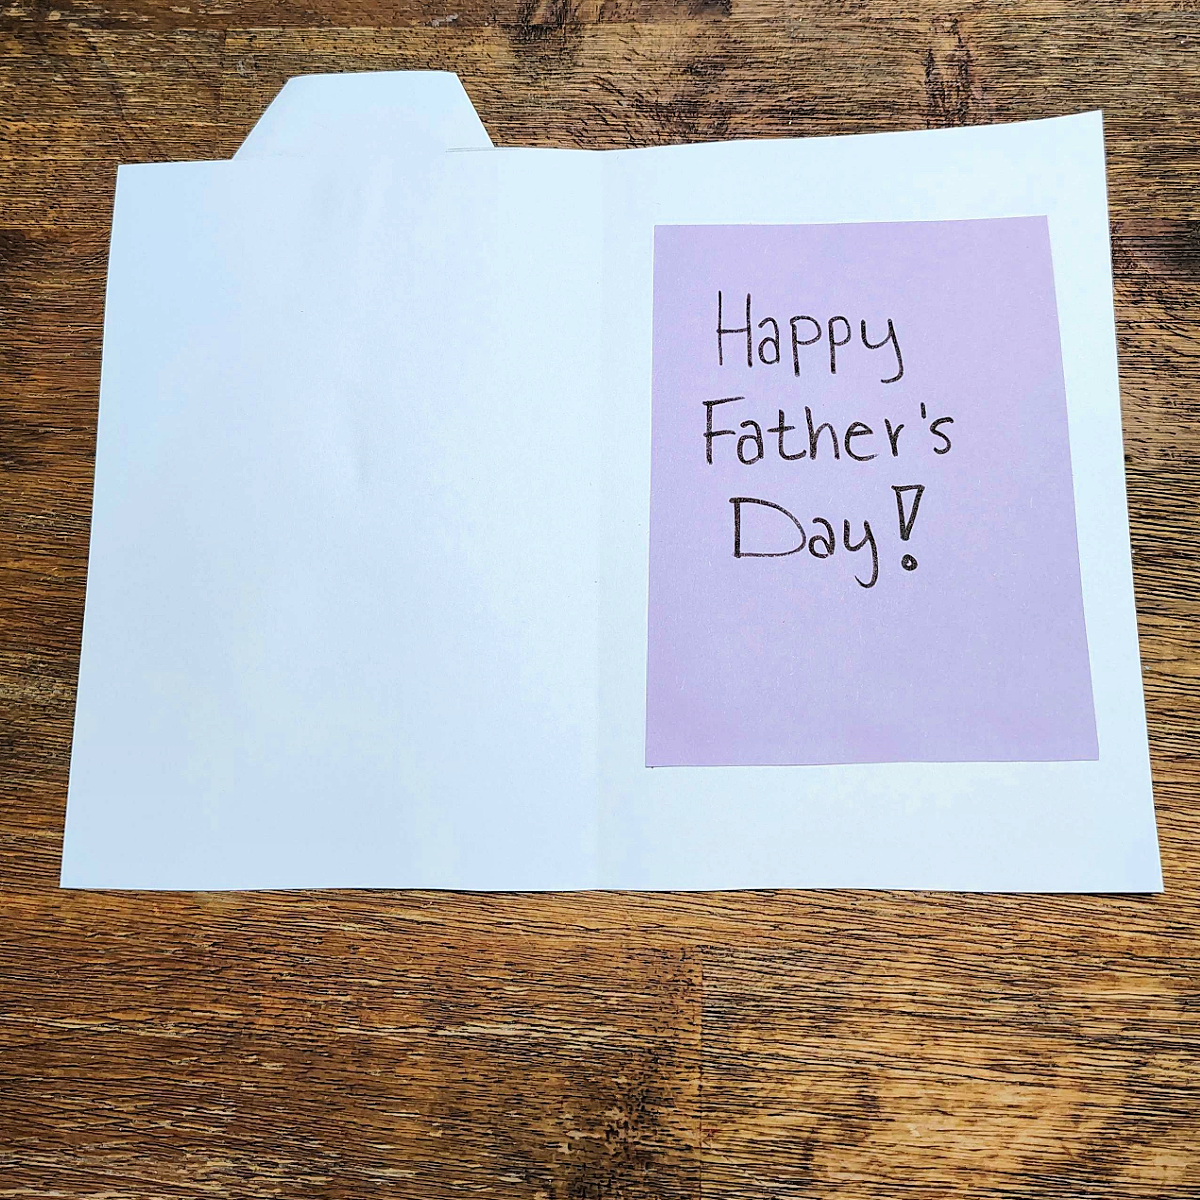
Write Happy Father’s day and other loving words!
Our Experience With This Father’s Day Homemade Card Craft
We love Father’s Day. Father’s day is a day that tends to get overlooked I think, and so I wanted to do something special especially since my kids adore their father.
And he is a hardworking man who provides, protects, and always makes time for the kids regardless of how tired he is. And what better way to say I love you than with a homemade card.
We are pairing this with the gift we bought him, the gifts the kids made him, and the cake we are going to surprise him with! Happy Father’s day to all the wonderful fathers!
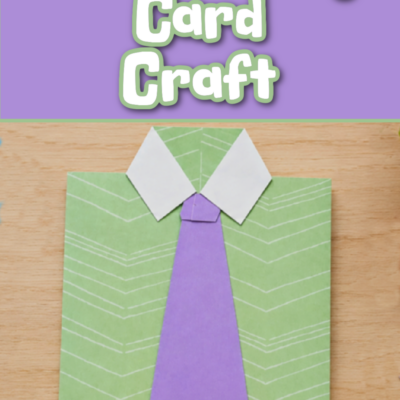
Tie and Shirt Father's Day Card
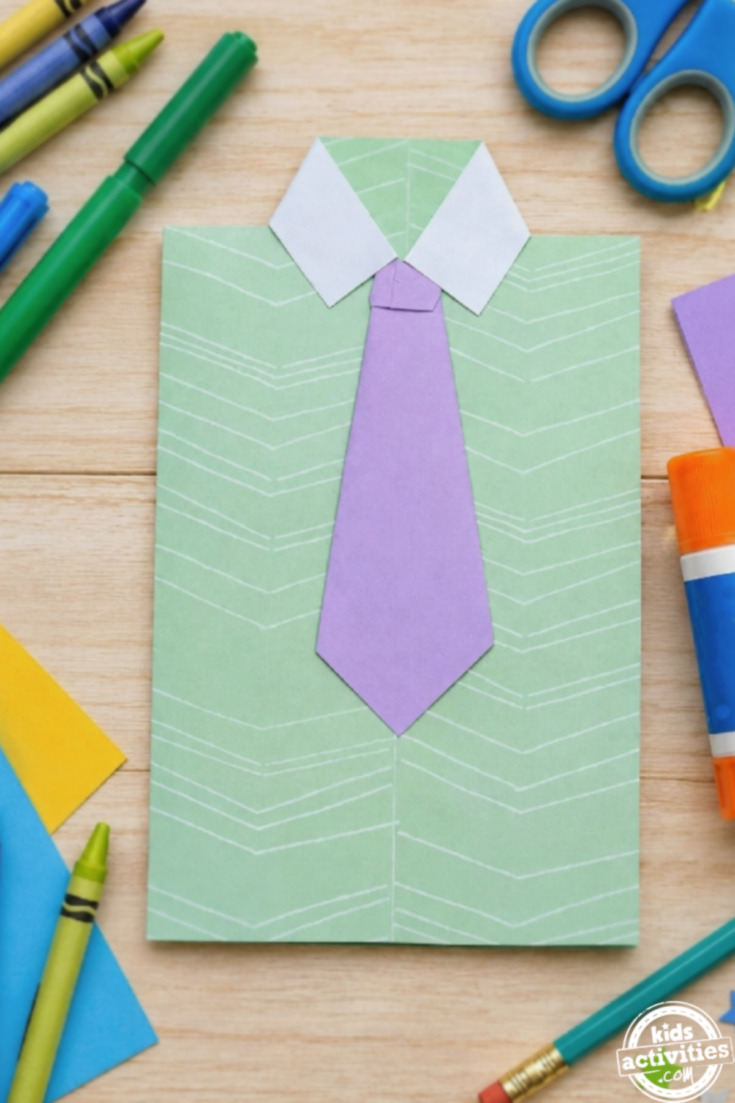
Use basic craft supplies to create a super cute Father's day card using crafting paper, glue, a marker, and origami!
Materials
Instructions
- On the paper you will be using for the shirt, flip it to the back and measure out 6.5 inches x 9 inches. That should be the inches of the rectangle. Cut it out.
- Fold it in half hot dog style.
- Measure about half an inch down. On the right side the line needs to go all the way across. On the left the right and left side should have a line. Cut off the rectangle from the right side and just cut over the lines on the left.
- Fold the tabs you cut over the front. This will make the collar of your shirt.
- Take a second piece of paper, we used purple, and measured 3.5 inches on each side making a square. Cut it out.
- Flip the square so it’s a diamond and fold the sides into make a triangle at the top.
- Flip it over and fold the point down.
- Flip it one more time.
- Flip the tie over again to the back sides and flip each side over so they meet in the middle. They don’t have to overlap, ours did. You just want the tie smaller.
- Glue your tie to the shirt.
- Glue the collar down.
- Using the other paper cut out a rectangle so that it fits most of the inside of your card.
- Write Happy Father’s day and other loving words!
More Father’s Day Ideas From Kids Activities Blog
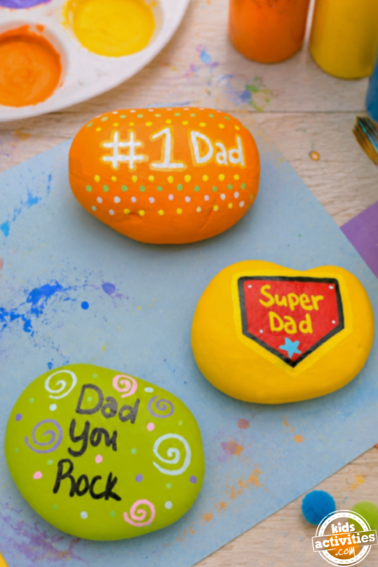
- Tell dad he is the best father with these 75+ {Amazing} Fathers Day Ideas
- Printable Fathers Day cards for kids
- Father’s Day Stepping Stone is a great way to tell dad he is the most amazing dad
- Make dad a Homemade Father’s Day Mouse Pad Craft
- We have Free Printable Fathers Day Cards
- Dad will love these 5 Father’s Day Recipes Made on the Grill
- Check out The Perfect Father’s Day Gift is a Fun Kit Gift!
- Here is a 5 Things I Love About Dad Printable
- This dad snapped a picture the moment he became a dad, see this video!
- Check out our big collection of homemade gifts kids can make!
- And let’s make some fun fathers day desserts for dad.
- Learn how to make a Father’s day tie for Dad!
And if you are having fun making colorful gifts, check out the big collection of tie dye patterns you can make with your kids.
How did your homemade Father’s day card turn out?


0