
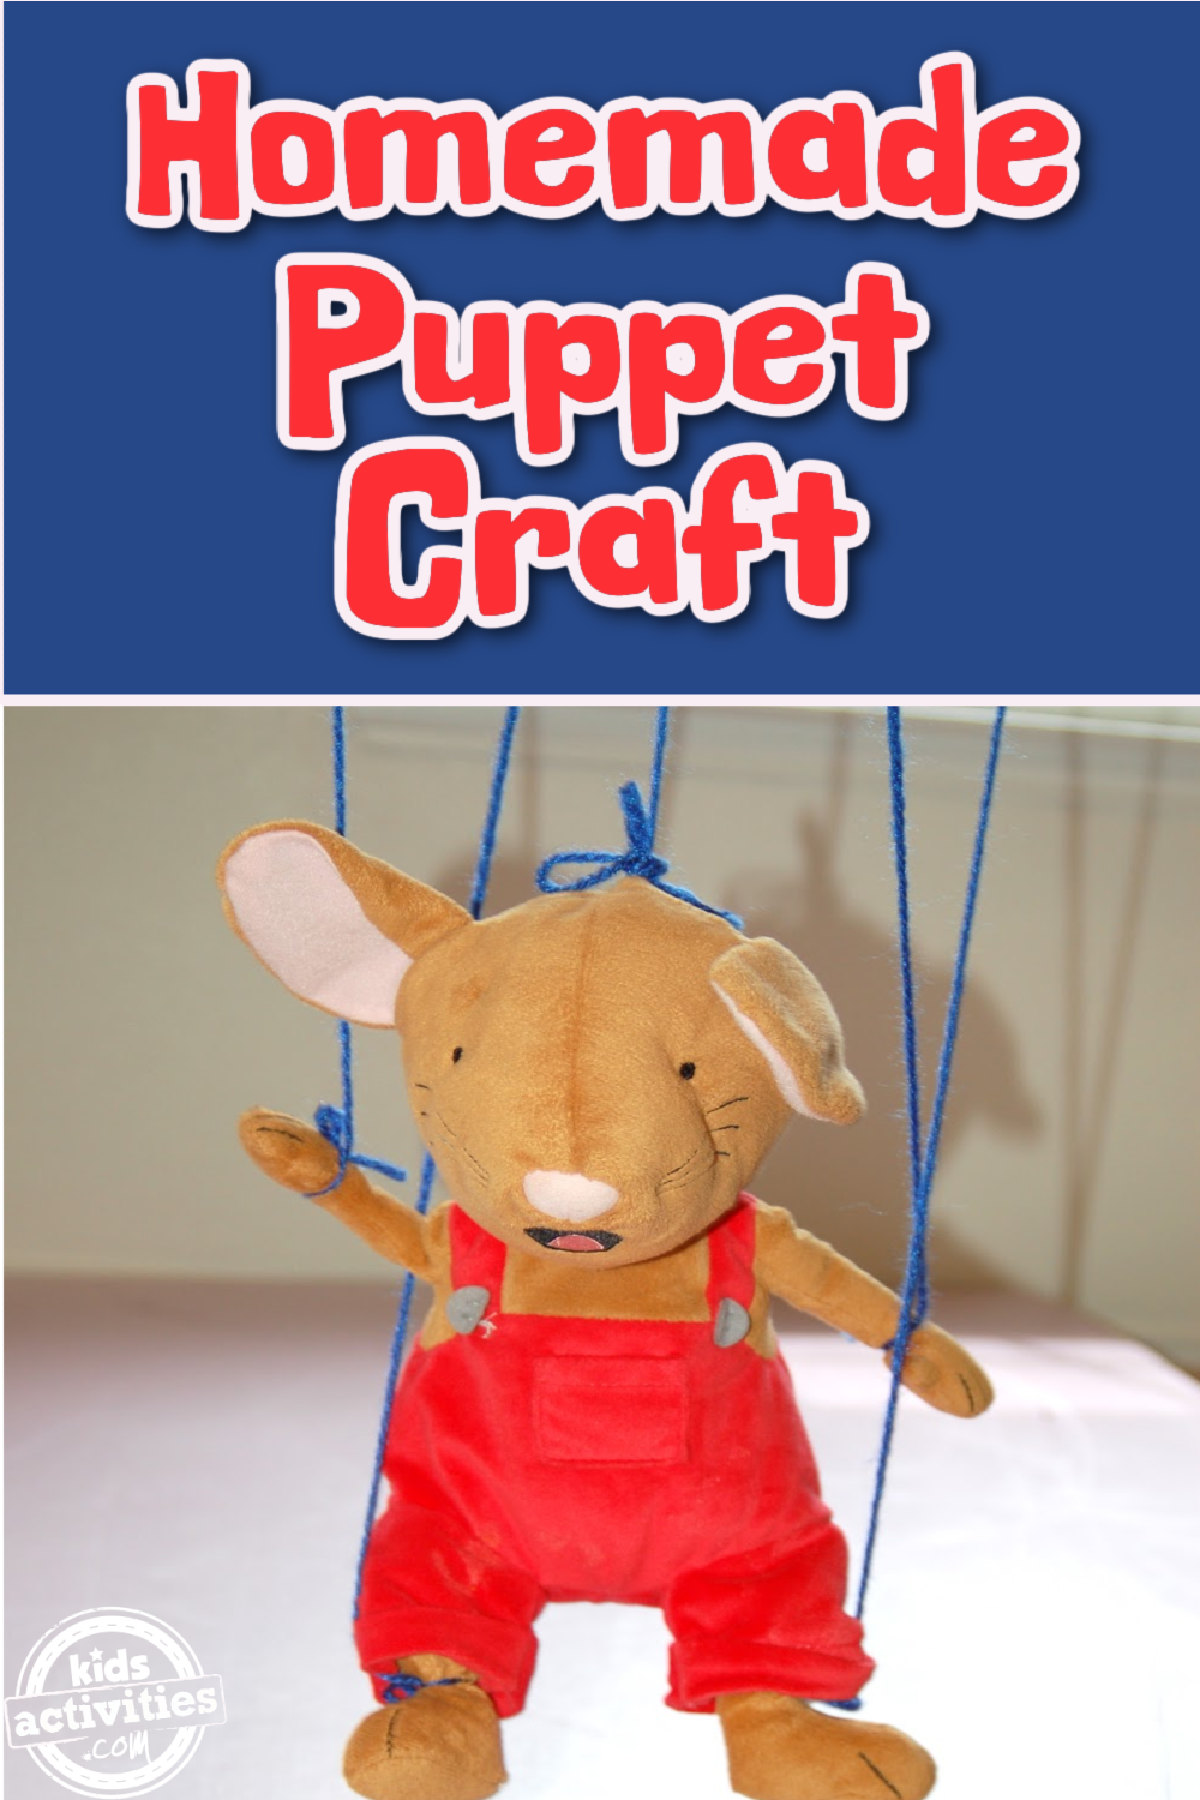
Today we’re making a DIY marionette. Kids of all ages will love this DIY marionette craft. The best part is you only need basic craft supplies and a stuffed animal to make your own puppet that you can make dance and move. It’s simple, fun, and promotes pretend play! Make this DIY marionette craft at home or in the classroom.
What Is A Marionette?
A marionette is a type of puppet! It’s a puppet that is controlled and moved from above using wires or even strings that are attached to it’s arms and legs and manipulated by a hand piece.
DIY Marionette
I think most kids have seen a marionette if they’re seen the movie Pinocchio. He was a wooden puppet of course, but we’re using stuffed animals! Yes, stuffed animals can easily become a marionette.
Kids will not only be able to create their own puppet, but will practice fine motor skills, hand eye coordination, and even explore pretend play once they finish this craft. This DIY marionette craft is great for younger kids and older kids alike. Though younger children may need some assistance. So, without further ado, let’s make our own marionette.
This post contains affiliate links.
Related: Learn how to make an owl paper bag puppet.
Supplies Needed To Make This DIY Marionette Craft

- 2 Wooden Rulers
- Yarn
- Stuffed Animals
- Scissors
How To Do This DIY Marionette Craft
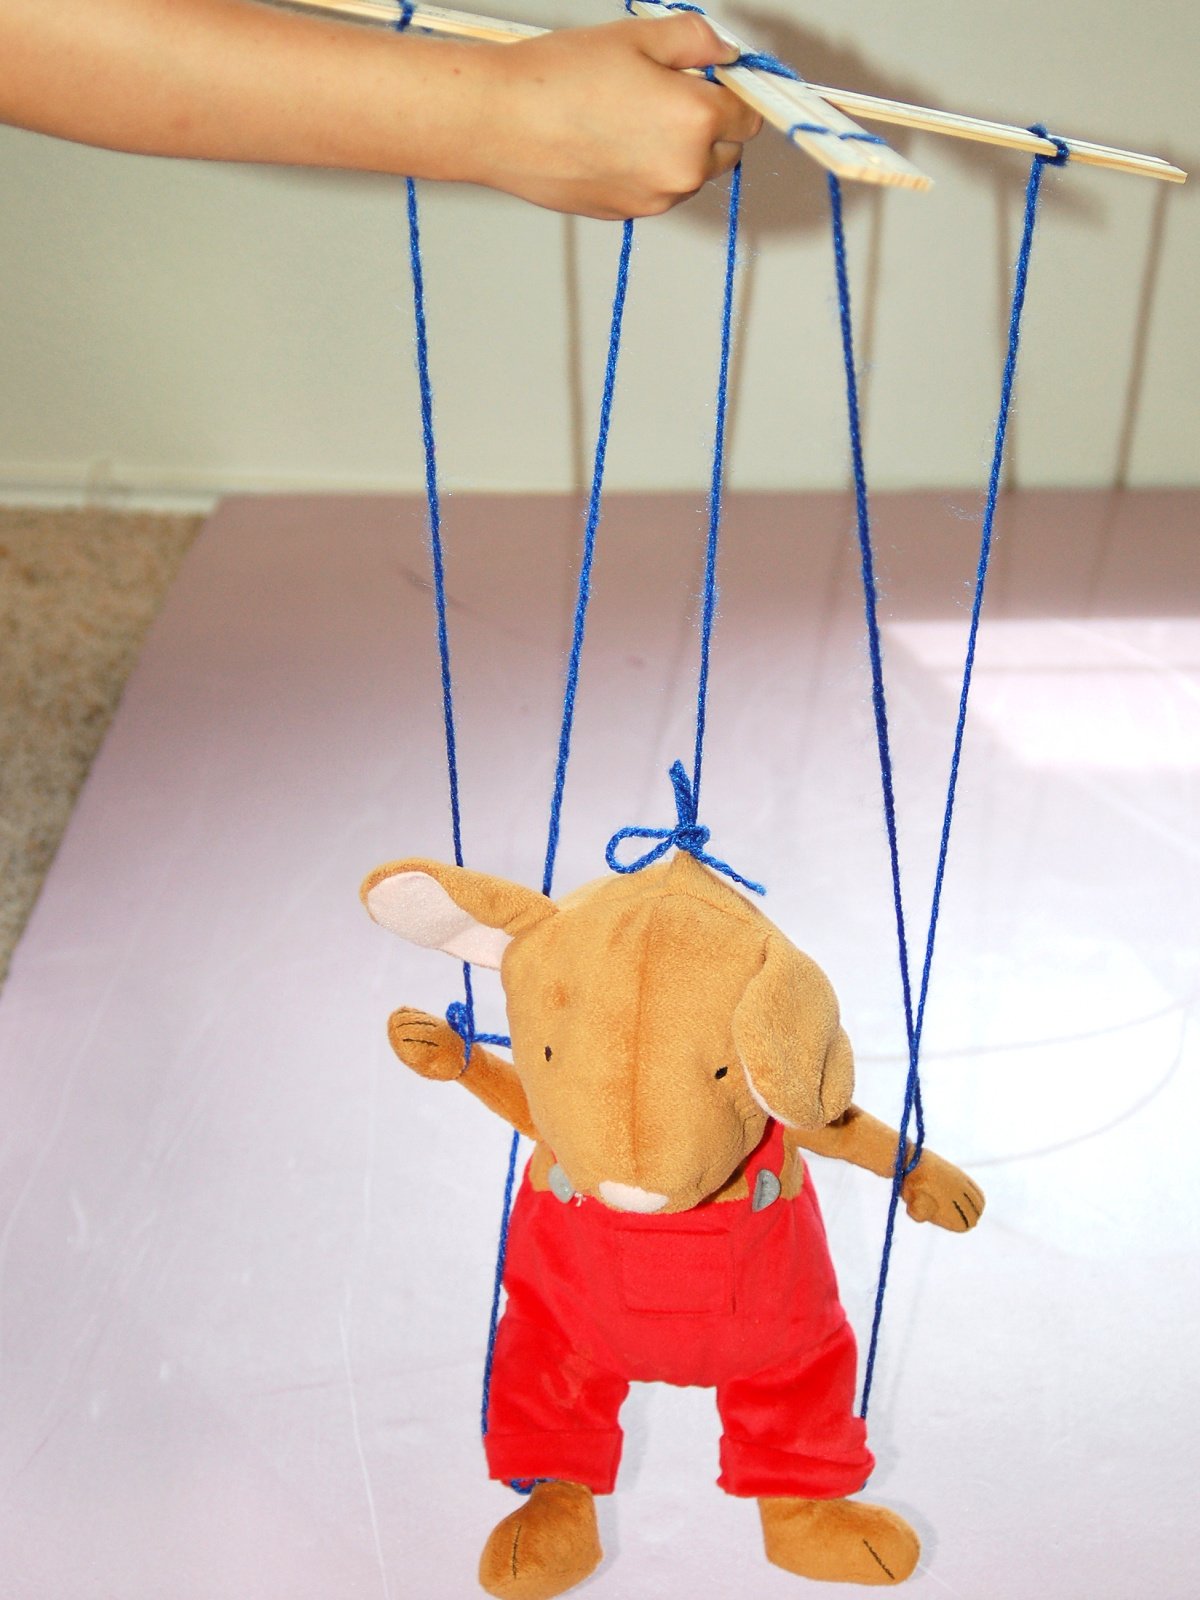
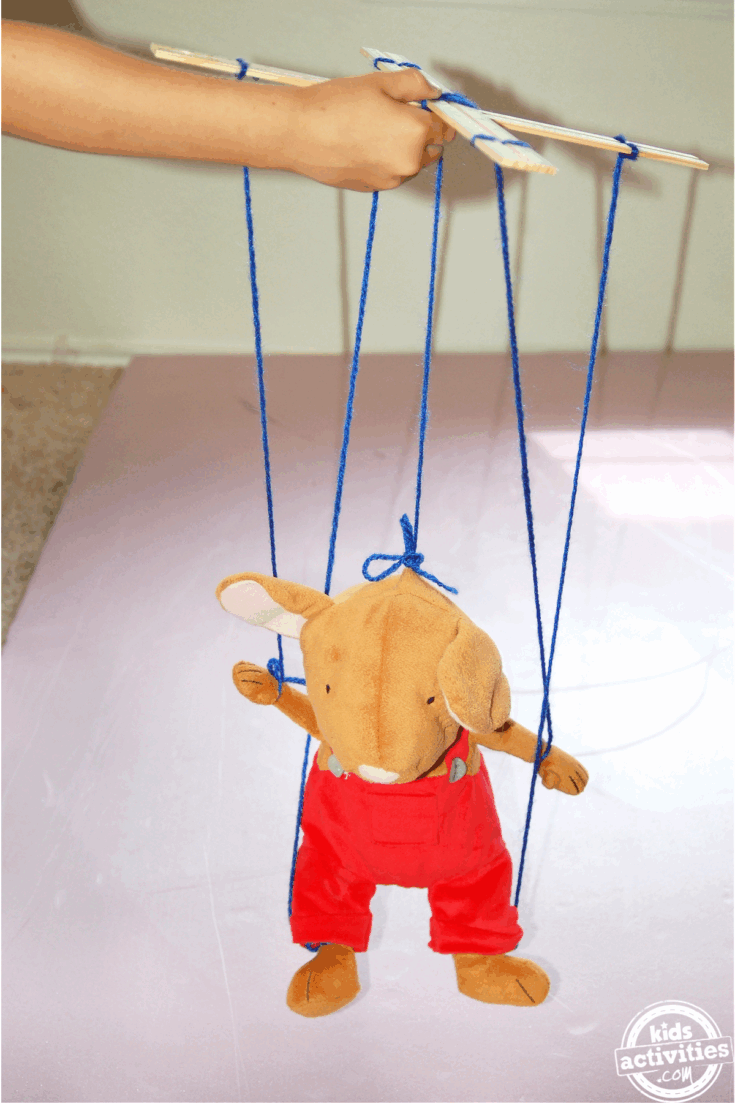
Step 1
Cross the rulers to make an x or + sign.
Step 2

Wrap the yarn around the area the rulers cross. Loop the string diagonally from top left to the bottom right and wrap it around a few times.
Step 3
Do the same things from the top right to the bottom left as well, wrapping it a few times.
Step 4
Tie a small knot to secure the x, trimming the excess string.
Step 5
Measure the amount of string you want for your marionette and cut 5 of them.
Step 6
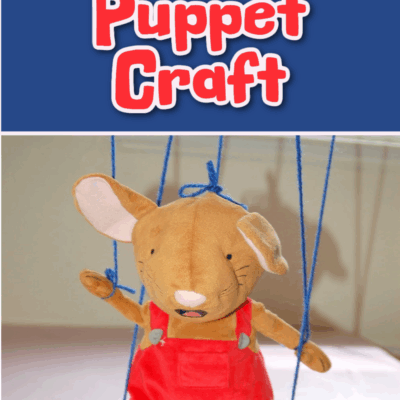
Tie the strings to the legs and arms of your stuffed animal.
Step 7
Tie the arm strings to the side ends of the from bar (the horizontal stick.)
Step 8
Tie the leg strings to the side of the back bar (vertical stick.)
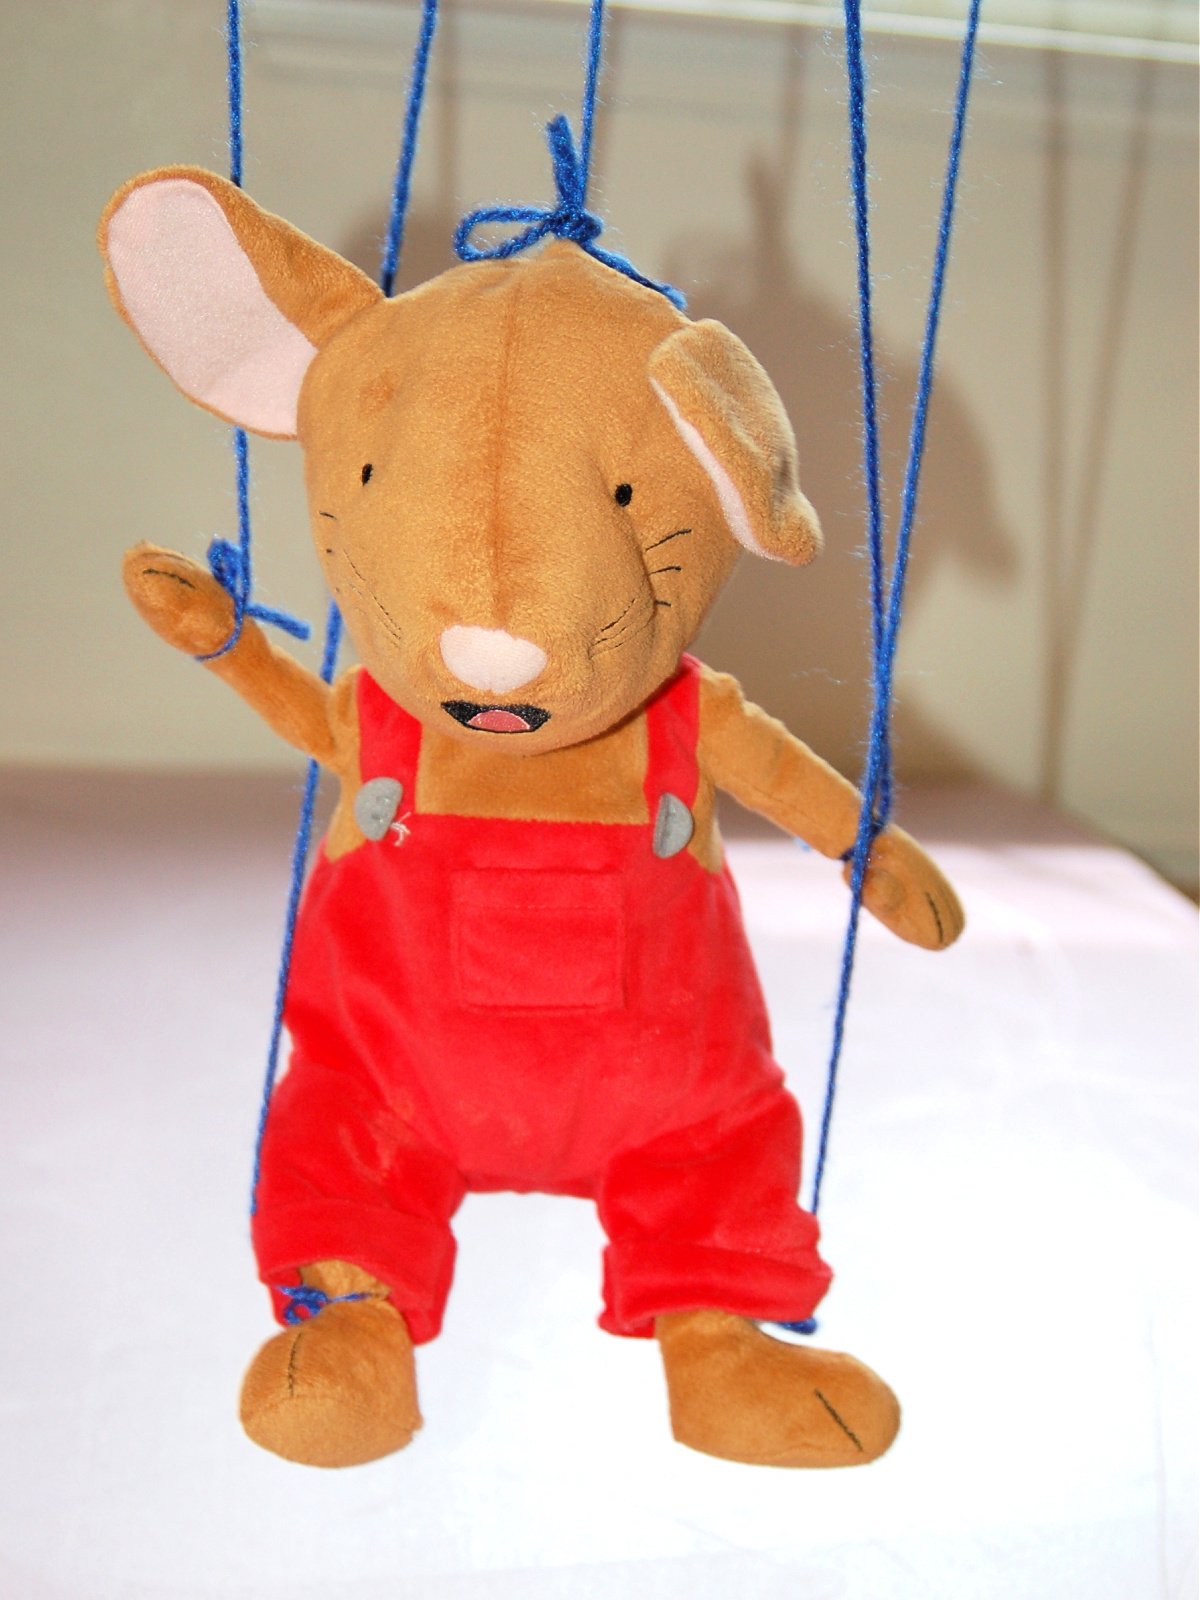
Step 9
Tie a string around the stuffed animals neck or head and knot it. Then you’ll loop that string around the center point of your front bar (the horizontal bar).
How To Modify This Marionette Craft For Younger Children
Let your younger child pick the colors of their strings and the stuffed animals, but do the tying for them so that the marionette stays together.
How To Modify This Marionette Craft For Older Children
Let your child make a number of different puppets and put on a puppet show! Or they can make their own puppets using wire and clay and decorate them before tying them to the hand piece.
Our Experience With This DIY Marionette Craft
We love telling stories and playing with hand puppets. But I thought it would be fun to make a new type of puppet! A marionette. It did take us a minute to figure out how to put them together and how to move them around.
But it was worth it! We used them to tell so many stories like Little Red Riding Hood. We also made up silly stories. It was fun.
Turns out all those Beanie Babies I saved from the 90s was finally able to be put to good use since they never were worth the fortune I thought they would be when I was a kid. But, I hope your family has as much fun with this DIY marionette craft as mine did.
Homemade Puppet Craft
Using a few craft supplies and a stuffed animal you can make your own puppet! Once you have your marionette you can make it dance, move, and sing! Tell a story.
Materials
- 2 Wooden Rulers
- Yarn
- Stuffed Animals
- Scissors
Instructions
- Cross the rulers to make an x or + sign.
- Wrap the yarn around the area the rulers cross. Loop the string diagonally from top left to the bottom right and wrap it around a few times.
- Do the same things from the top right to the bottom left as well, wrapping it a few times.
- Tie a small knot to secure the x, trimming the excess string.
- Measure the amount of string you want for your marionette and cut 5 of them.
- Tie the strings to the legs and arms of your stuffed animal.
- Tie the arm strings to the side ends of the from bar (the horizontal stick.)
- Tie the leg strings to the side of the back bar (vertical stick.)
- Tie a string around the stuffed animals neck or head and knot it. Then you’ll loop that string around the center point of your front bar (the horizontal bar).
More Puppet Crafts From Kids Activities Blog
- Check out this ferocious shark puppet craft.
- I love this turkey puppet craft.
- We have some easy animal shadow puppets.
- You can make silly puppets using brown paper bags.
- Try making these super cute mermaid paper bag puppets.
- Make these easy clown stick puppets.
- We have 28 creative DIY finger puppets you can make.
- Make 5 little ghost finger puppets!
- Check out these 26 puppets for kids to make and play.
- Use our free penguin template to make a puppet.
- Take a look at these Halloween shadow puppet printables.
- These heart felt puppets are cute.
- Use this template to make a Charmander puppet.
- You can even make a Light Fury puppet!
- We also have a Finding Dory foam puppet.
- You have to check out these Teenage Mutant Ninja Turtle puppets.
How did your DIY marionette turn out?


0