
Let’s make decorations for winter out of paper snowflakes! We have 6 ways how to make a snowflake with paper and scissors that can be turned into beautiful winter decorations like a snowflake garland for your home or classroom. Making homemade snowflakes is as easy as folding paper, cutting and then unfolding! Let’s learn how to cut paper snowflakes…

How to make a Paper Snowflake
Just like snowflakes falling from the sky are all different, your paper snowflakes are unique too. See how many different snowflakes your kids can make. We have put together some great snowflake making ideas to try!
Related: More paper snowflake patterns
All you need to make these beautiful paper snowflakes is paper, scissors, a pencil, and your imagination!
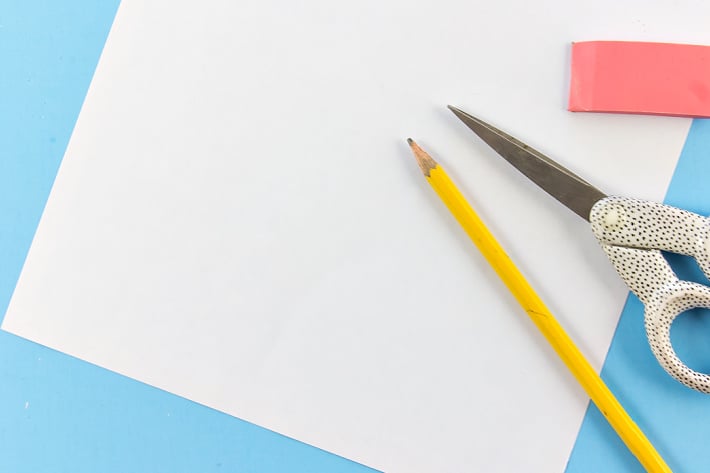
How to make a Snowflake Supplies
How to fold paper to make a Snowflake
Step 1

To turn your snowflakes into decorations you can make them smaller by cutting your paper in half (as shown in the image above).
Paper snowflakes craft tip: We cut our piece of paper in half to make two snowflakes to save on paper and make smaller snowflakes. However, younger kids will find it easier to cut snowflakes that are larger. To make larger snowflakes, don’t cut your paper in half but continue to follows the instructions below.
Step 2

Fold the top right corner of your piece of paper over to make a triangle. Press firmly along the crease in the paper, and then cut off the excess at the bottom.
Step 3

Use the image above as a guide for folding and cutting your paper.
- Fold your paper into a smaller triangle.
- Take the right side of the triangle and fold it just like the 2nd step.
- Take the left side of the triangle and fold it behind so you have two points.
- Using your scissors, cut off those two points.
- Make sure to run your finger over the creases to press them down.
Step 4

Keep your paper triangle folded exactly as it was in the last step. Use your pencil to sketch shapes or designs along the edge of the right side. You can add small shapes on the top, bottom, and left side, but keep the majority of the designs to the right. If you decide to change your shapes, use your eraser to remove them and start over.
There is no right or wrong way to sketch your shapes or design. I’ve demonstrated three designs that we made above, and here are another three below.

Using scissors, carefully cut out the shapes that you’ve sketched. Parents, you might need to help younger children with this step. Very carefully open your snowflake so that you don’t accidentally tear it.

Paper snowflake decorations
This final step is optional, but so much fun. We turned our snowflakes into a garland to hang (see the image above). Here are some more fun ideas for you to try:
- Paint cheap wood frames and glue a snowflake to each to display or hang them.
- Use fishing line to hang snowflakes from the ceiling at different lengths so it looks like they are falling.
- Tape snowflakes to the inside of your window so that you can see them both inside and outside.
- Make snowflakes in assorted colors or spray them with glitter paint to make them really stand out and sparkle.
- Make a mobile out of snowflakes but attaching fishing line to a large embroidery hoop.
- Glue the corners of snowflakes on top of each other to make a winter tablerunner for your dining table.
- Make large snowflakes to put underneath your dinner plates for meals.
- Glue snowflakes over the top of each other in a ring shape to make a wreath for your front door.
How to make Paper Snowflakes Decorations

How to make a Paper Snowflake
Materials
- Paper
- Pencil
Tools
- Eraser
- Scissors
Instructions
- Take the right corner of your paper and fold it down to make a triangle. Cut off the excess paper below the triangle.
- Fold the triangle in half again.
- Place your triangle on a flat surface with the point at the bottom. Take the right edge and fold it about 1/3rd of the way, and then take the left side and fold it behind. Your triangle should now be folded into three equal pieces.
- Using scissors cut off the top section (that looks like rabbit ears) so that only a triangle remains.
- Sketch designs and shapes along the edge of the triangle and then cut them out.
- Carefully open up your paper snowflake.
Notes
The time listed is for making 1 snowflake. We made 6 in different designs.
More snowflake crafts from Kids Activities Blog
- Make a Mando and Baby Yoda snowflake
- Q-Tip snowflake ornaments
- Craft stick snowflakes
- Snowflakes coloring pages
- Snowflake slime
- Foil snowflake craft
- Geometric snowflake coloring page
- Make a snow village with this paper house template
- Check out these fun and easy paper snowflake patterns!
Have you made paper snowflakes with your kids?


0