
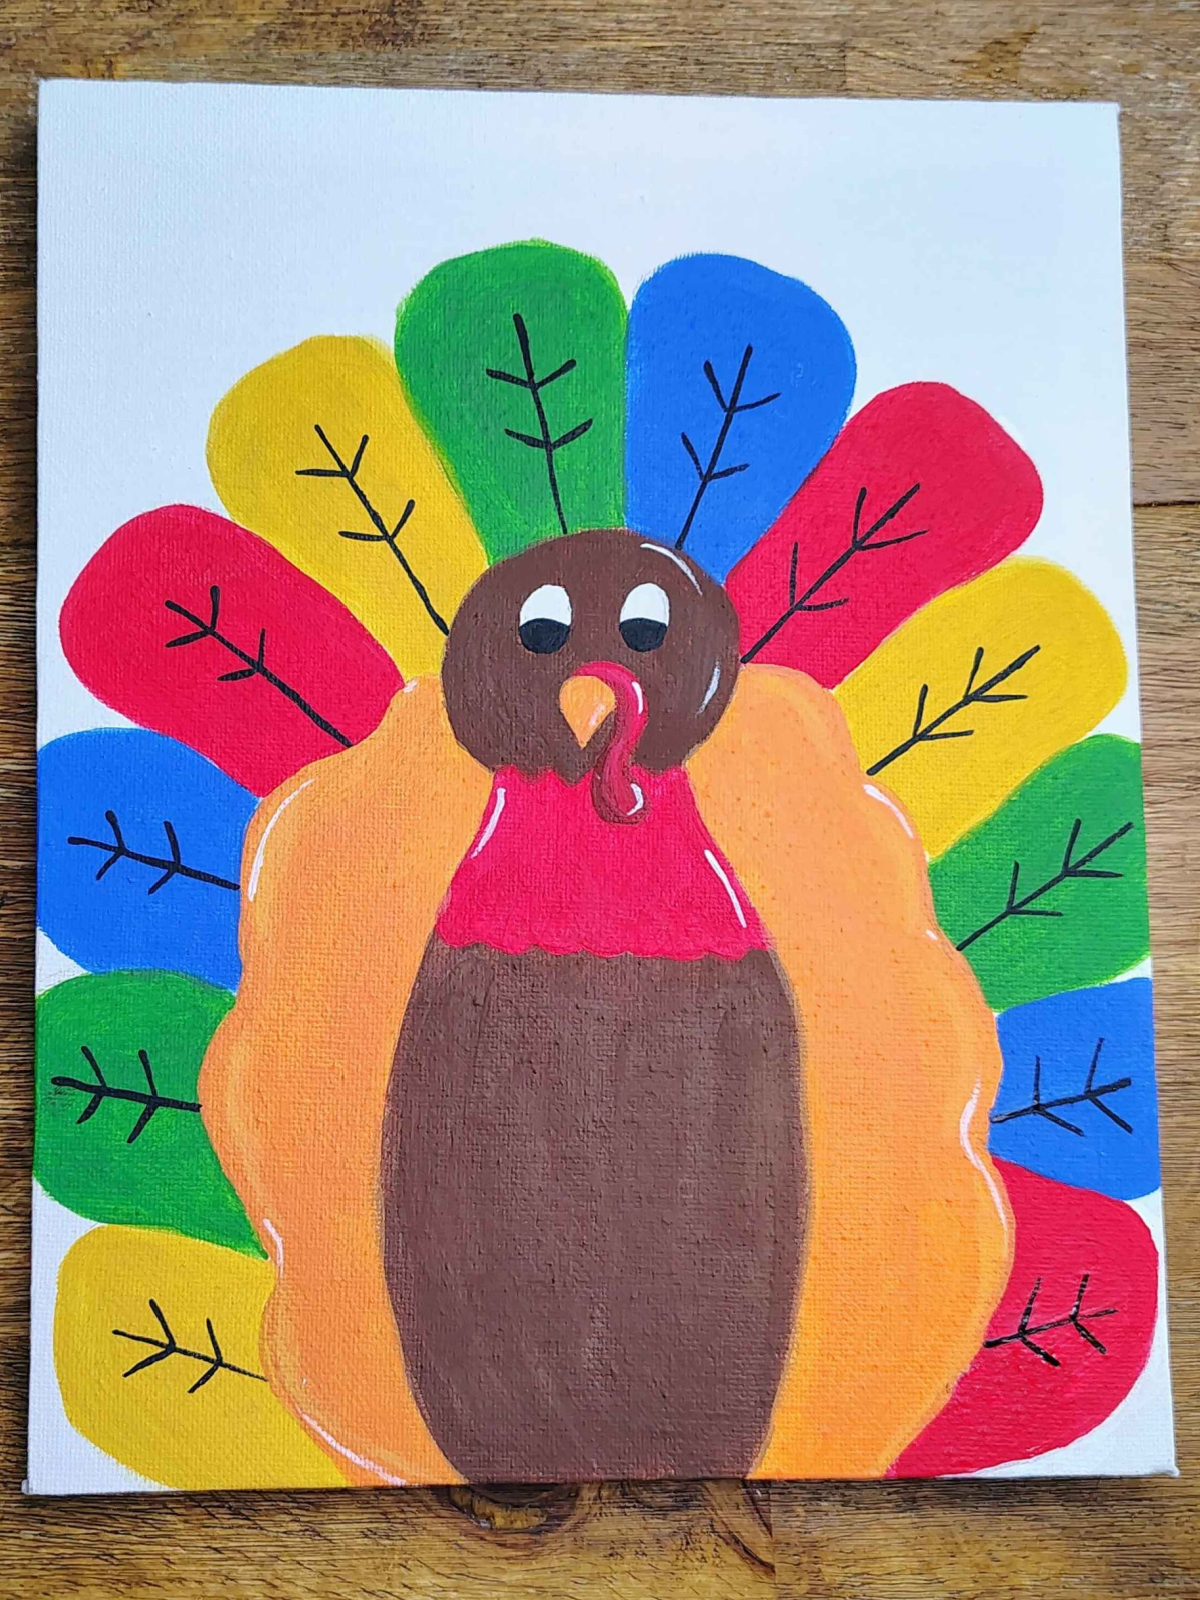
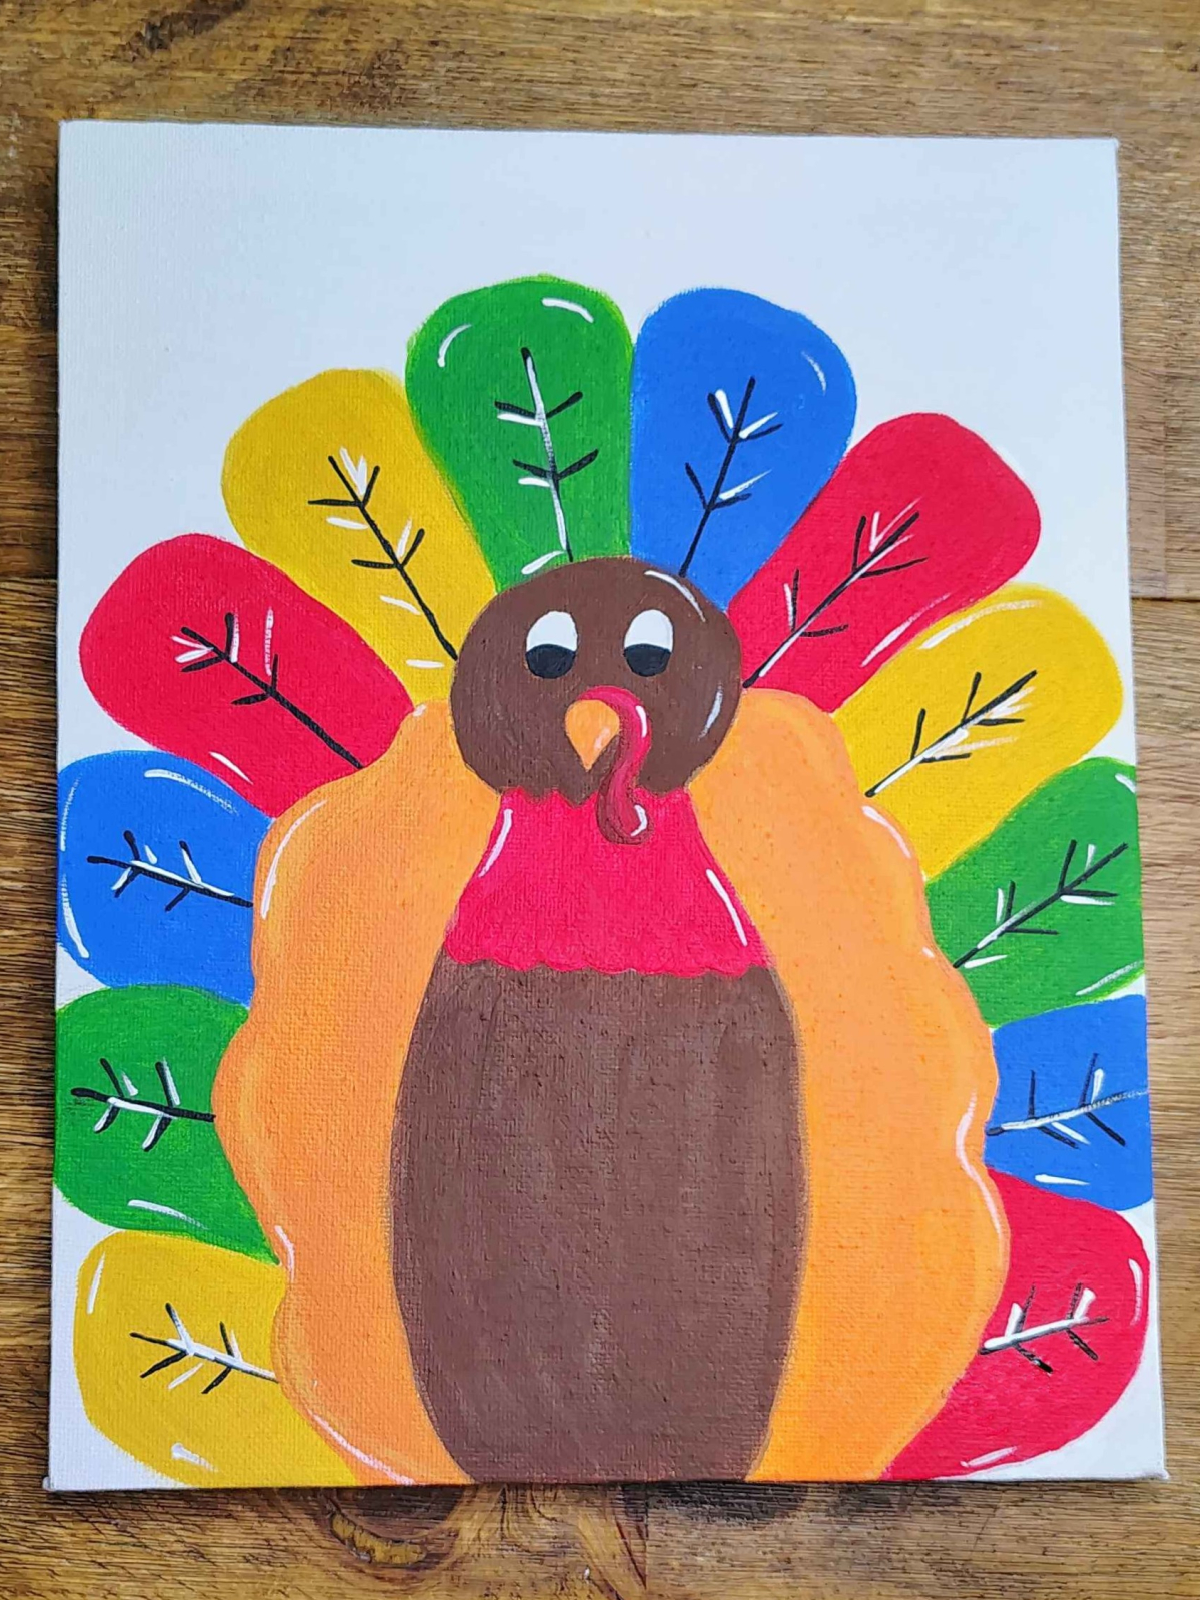
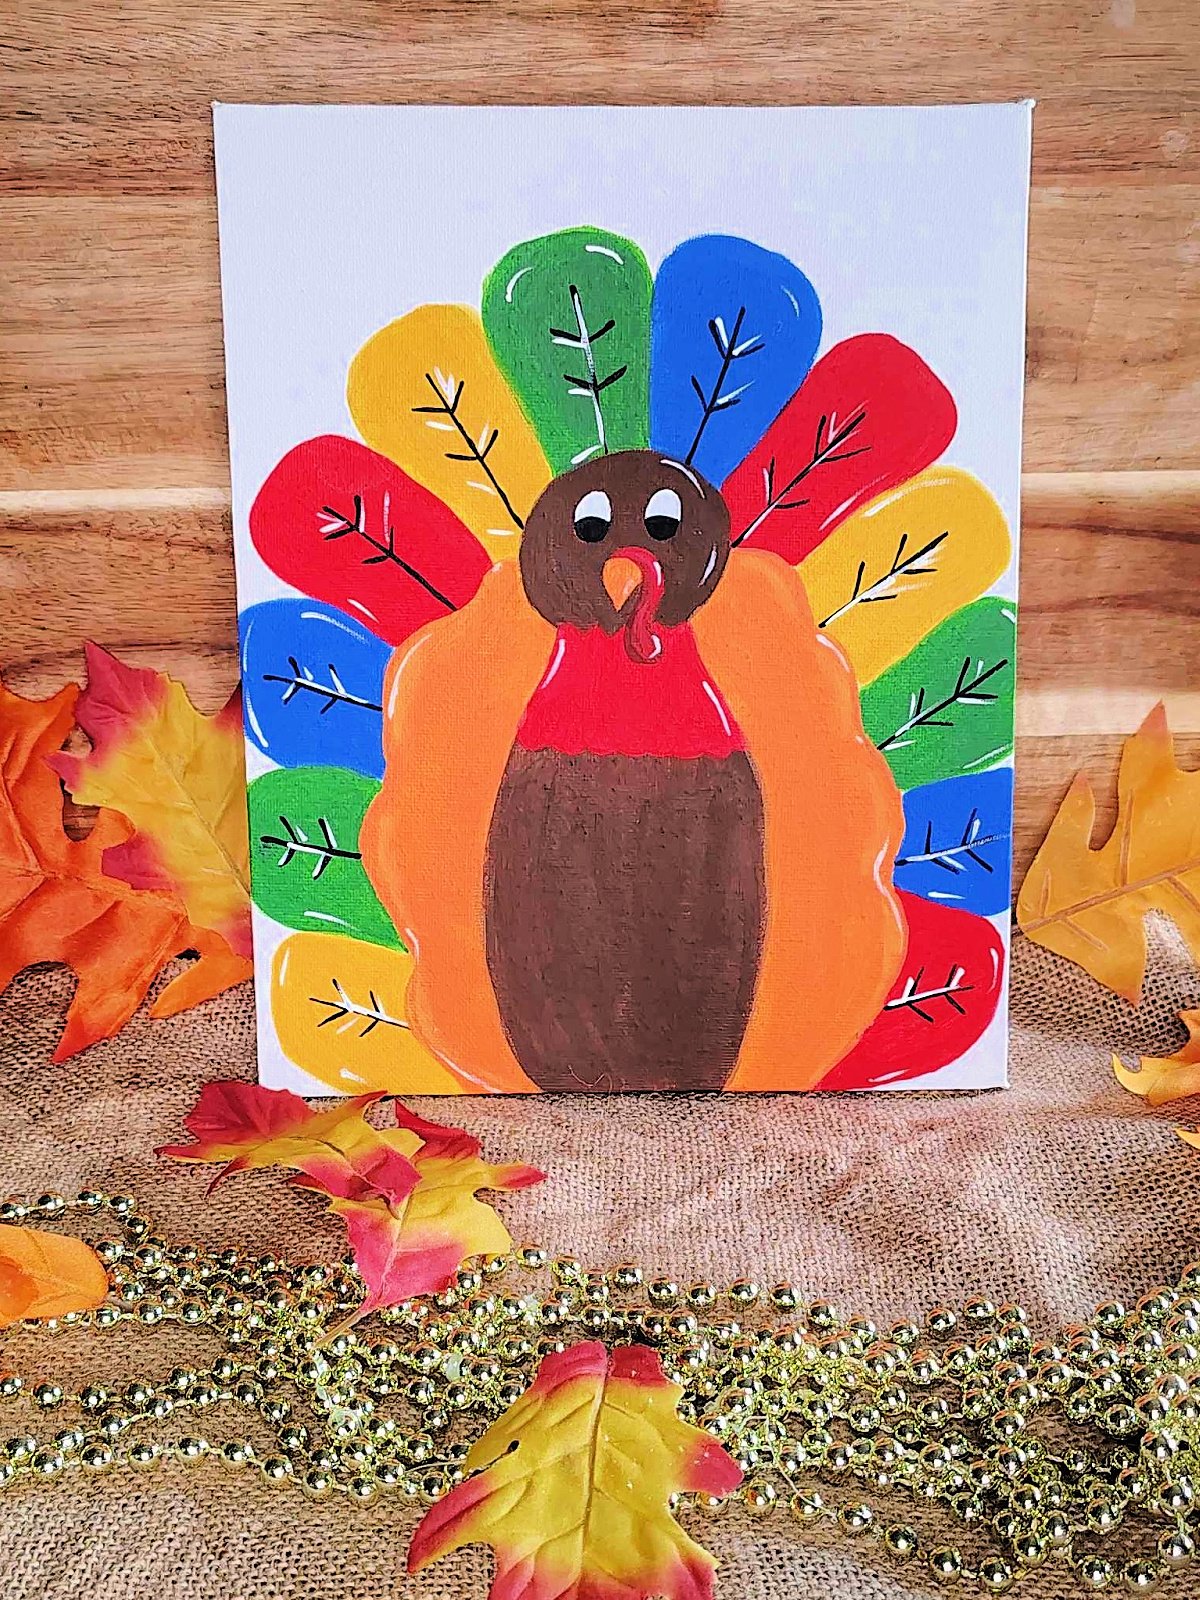
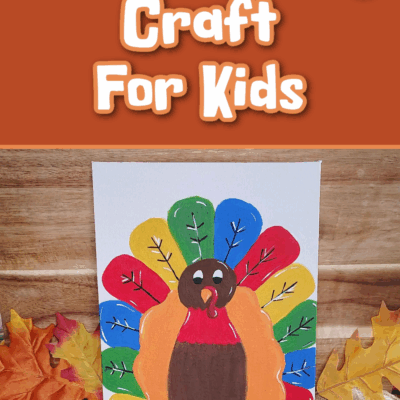
Today we are making a turkey painting! Thanksgiving is around the corner and what better way to get into a festive mood than paint a turkey! Kids of all ages will love making this simple, cartoonish, and colorful turkey painting. This Thanksgiving craft requires only basic art supplies and is budget-friendly. Make this turkey painting at home or in the classroom!
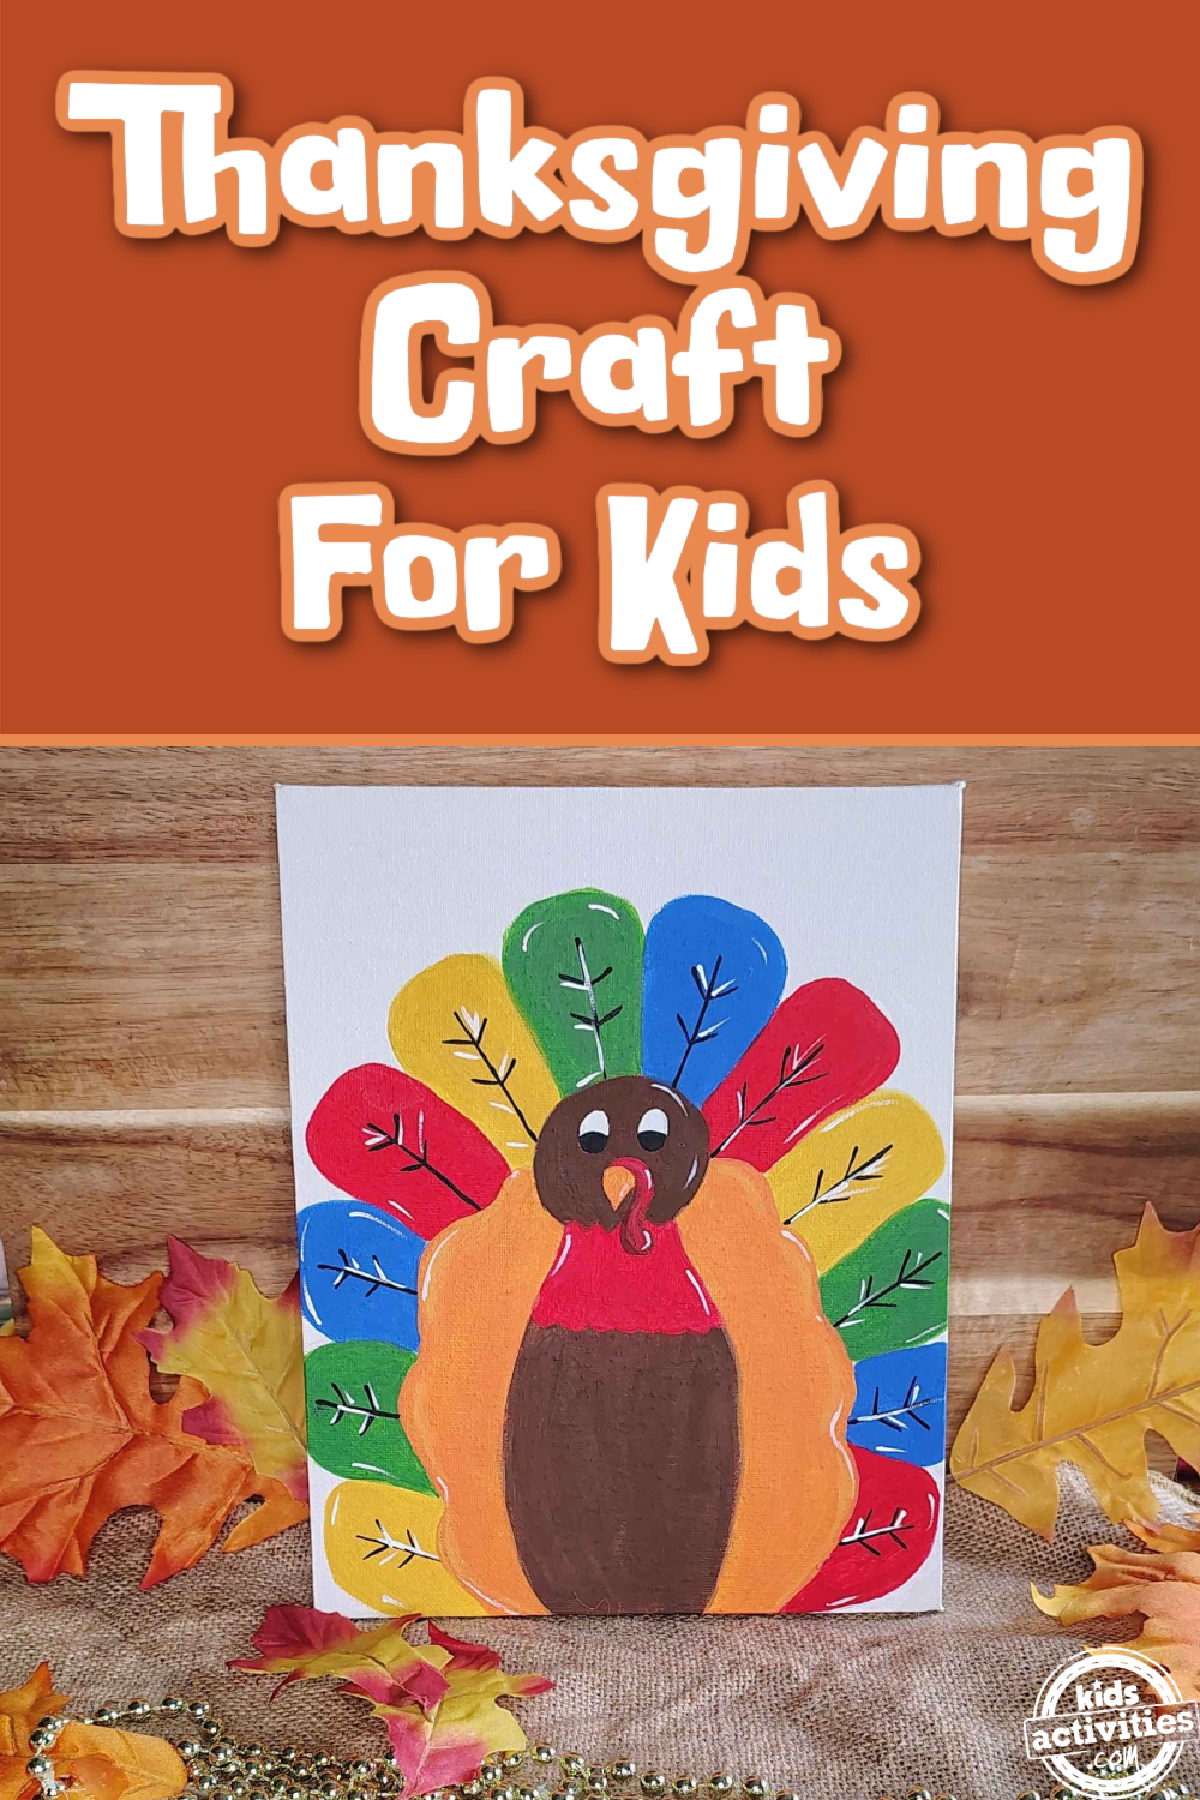
Turkey Painting
This turkey painting is so simple to make. It is a great Thanksgiving painting that younger children and older children alike can do. They will be able to practice fine motor skills as well as explore colors. Plus, kids can use this painting as an awesome Thanksgiving decoration!
This painting does require some free hand drawing, so if you’re not comfortable with that you can also you our How To Draw A Turkey guide.
This post contains affiliate links.
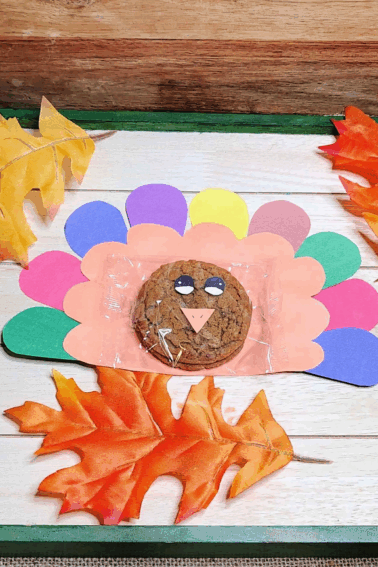
Related: Create these festive paper turkey puppets for kids.
Supplies Needed For This Turkey Painting
How To Create This Festive Turkey Painting For Thanksgiving
Step 1
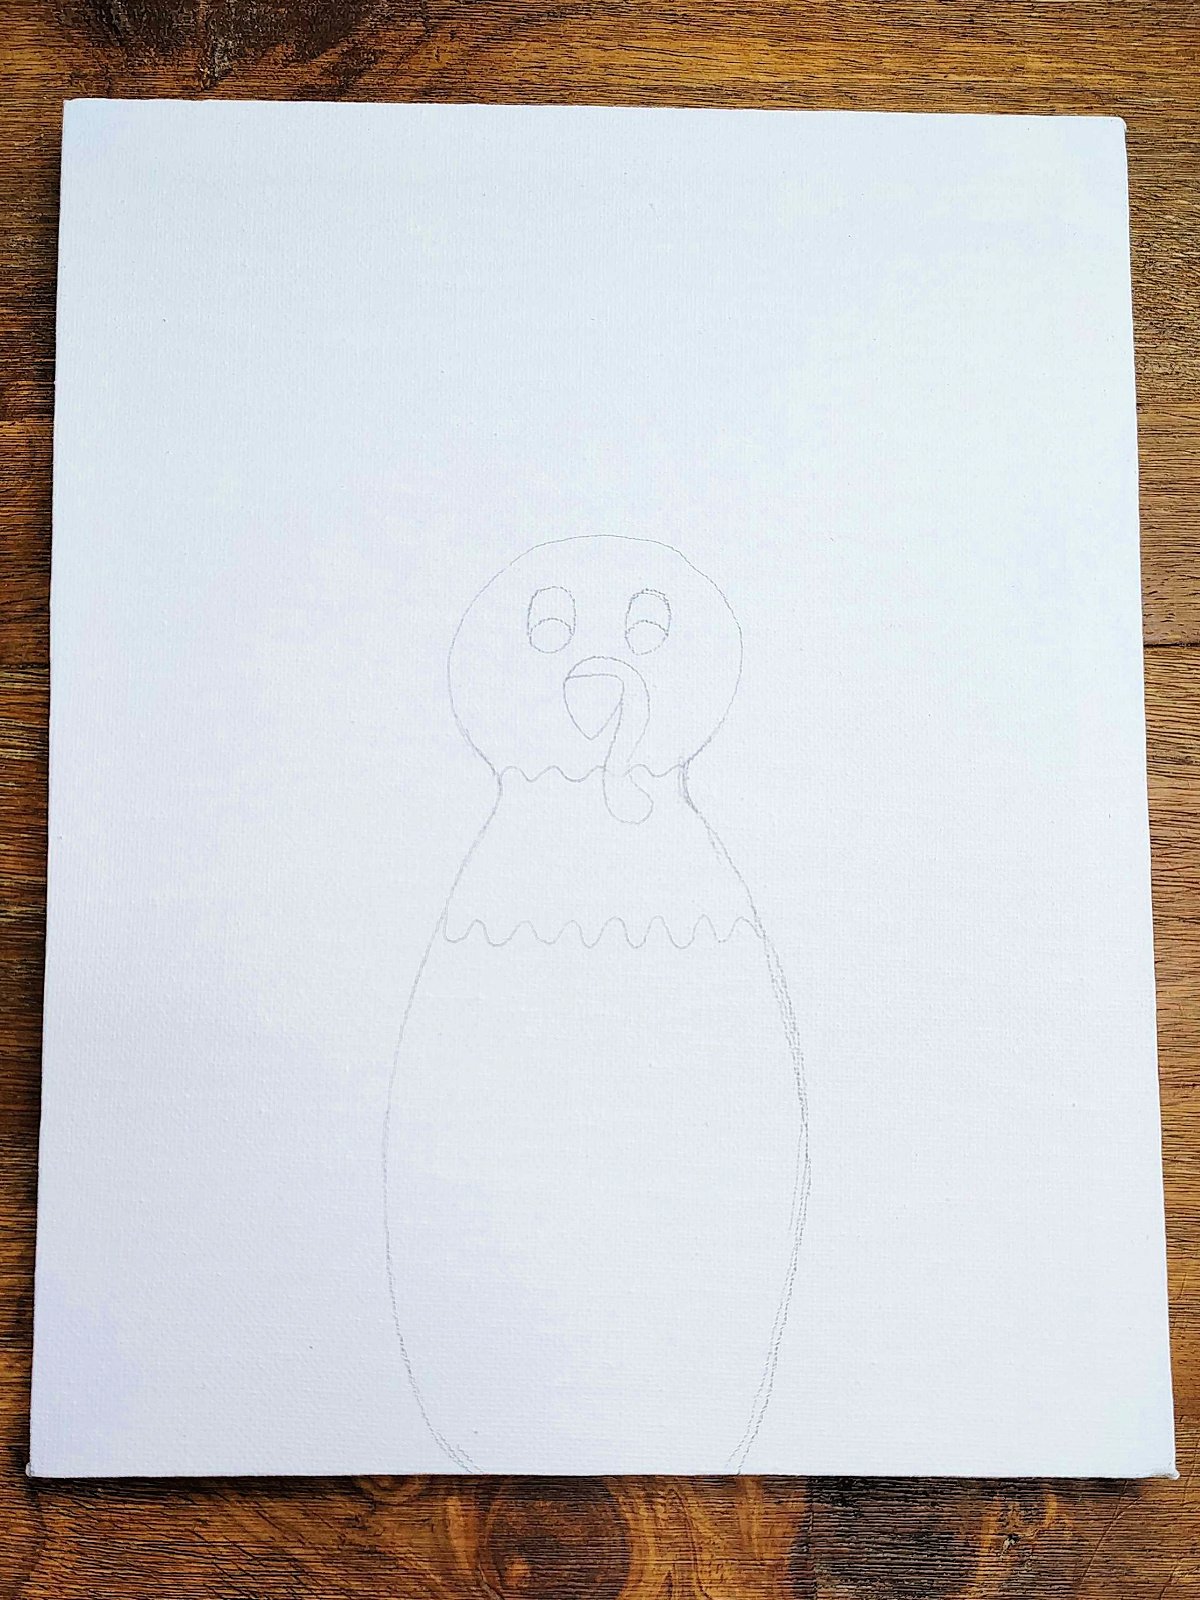
Draw what looks like a bowling pin. Then add some squiggles around the neck. An upside triangle for the beak. Then a closed curve for the snood (draw a worm, kind of). Then add two ovals for eyes and add two half circles in the eyes.
Step 2
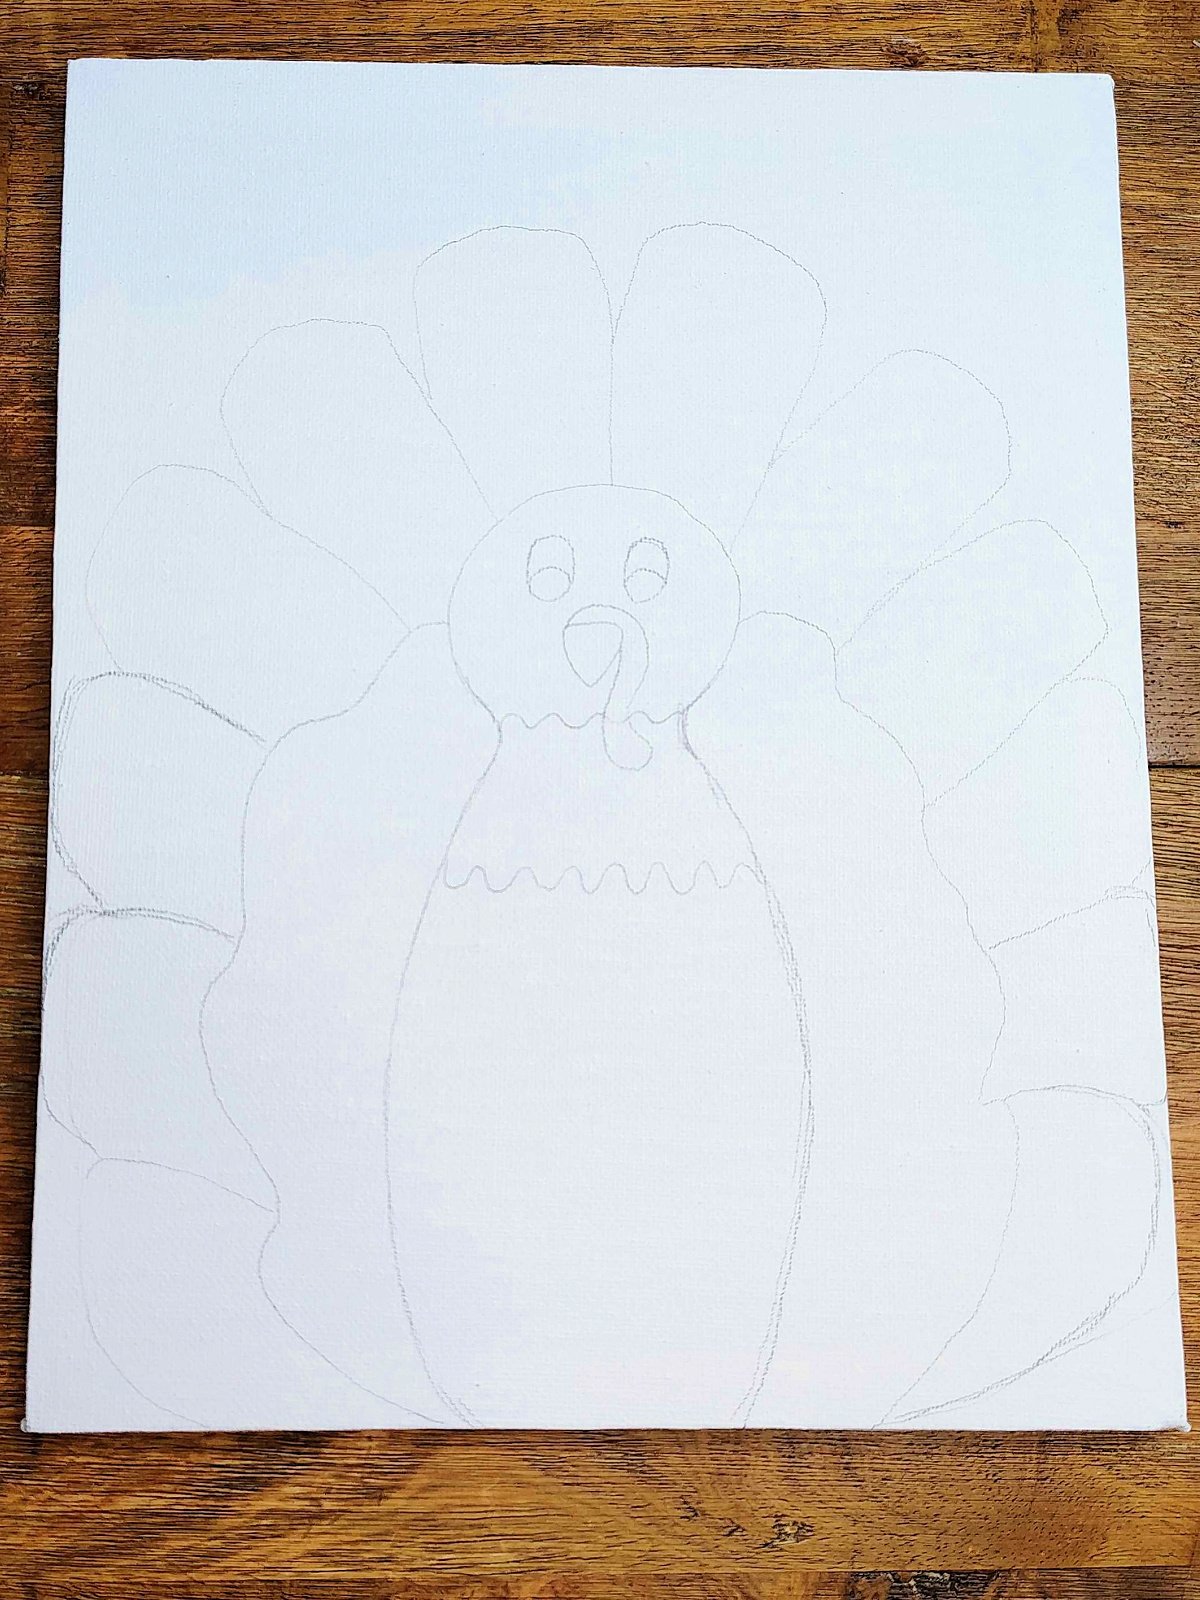
Add some large “feathers” aka squiggles to create the first layer of feathers and then create more defined feathers on the outside of that. It’s okay if they’re not all perfectly the same.
Craft Note:
- Not every feather will look the same. That’s okay. Nothing is perfect in the wild.
- Also, don’t draw too hard. You want to be able to erase the pencil as you draw. If you do draw too hard, put down white paint, allow it to dry, and then add your color to hide the pencil marks.
Step 3
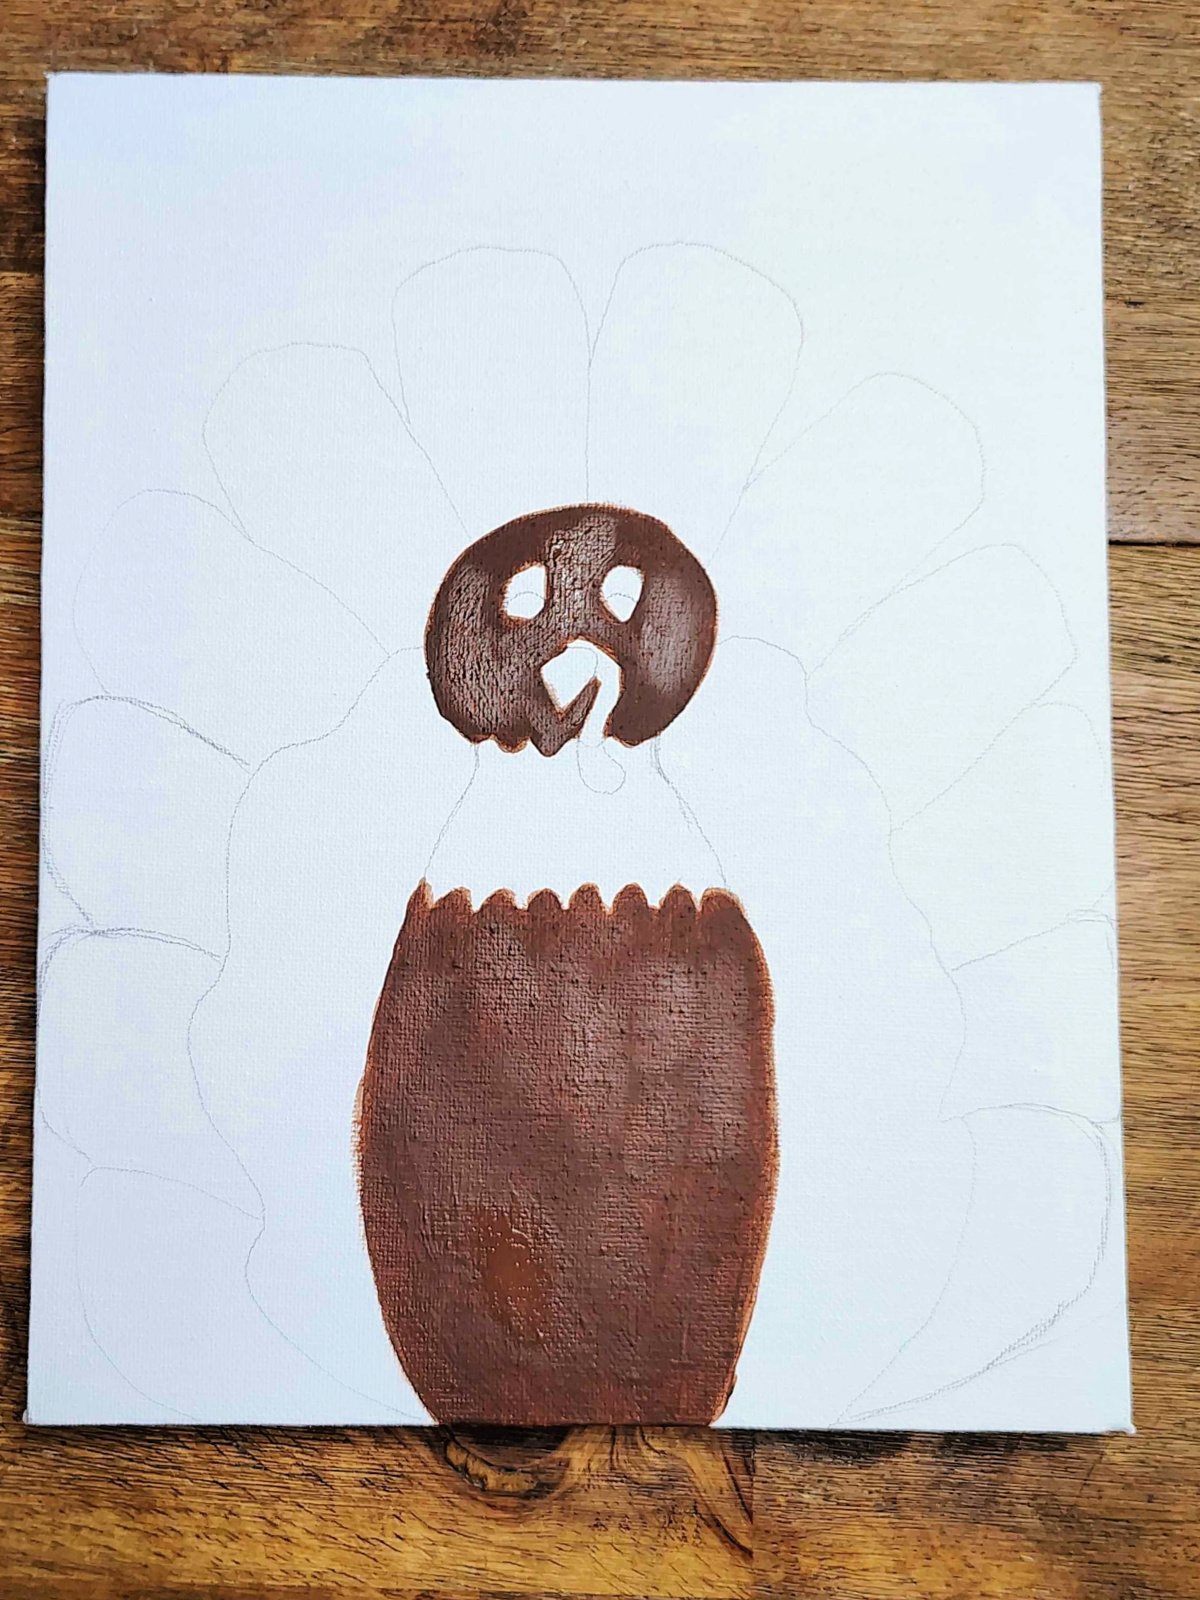
Paint the head and body brown. Allow it to dry.
Step 4
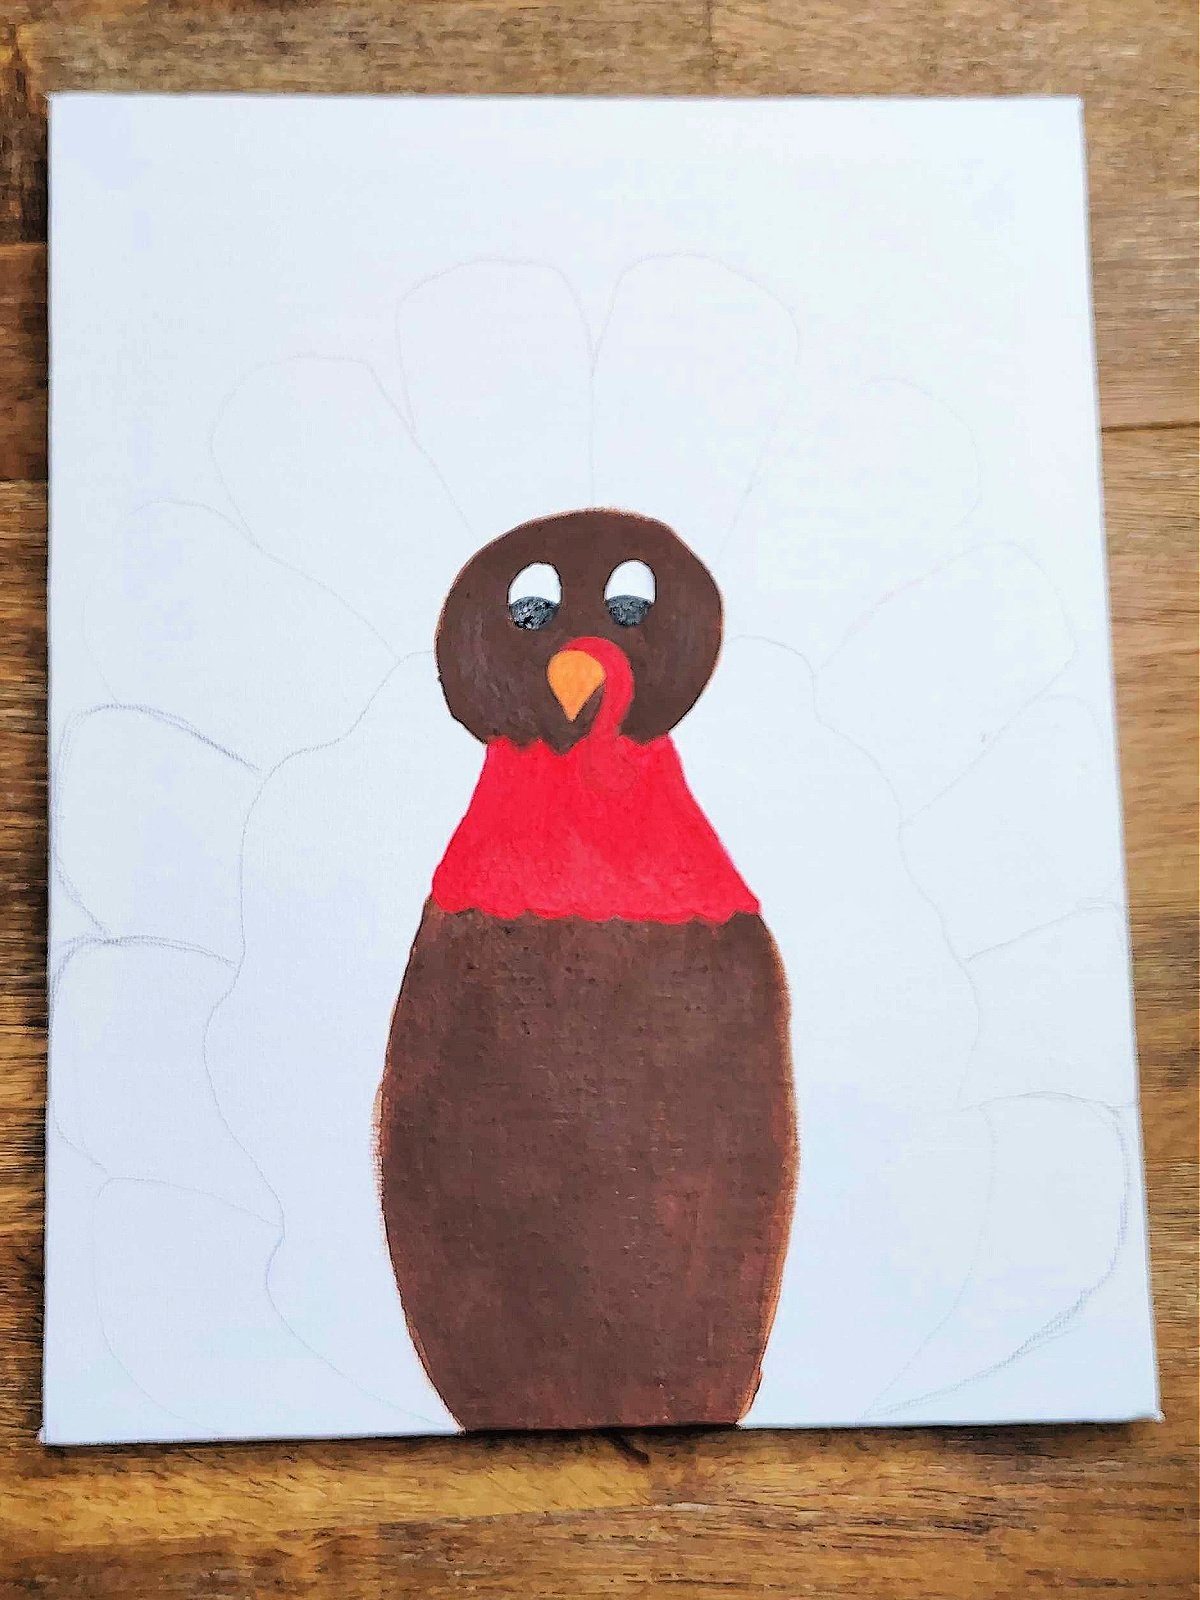
Let’s paint the neck feathers and the snood red. Paint the beak orange, and the eye balls black.
Craft Note:
Depending on your paint you might need a couple layers to make it more opaque. Allow the first layer to fully dry before adding more or you’ll take paint off the canvas.
Step 5
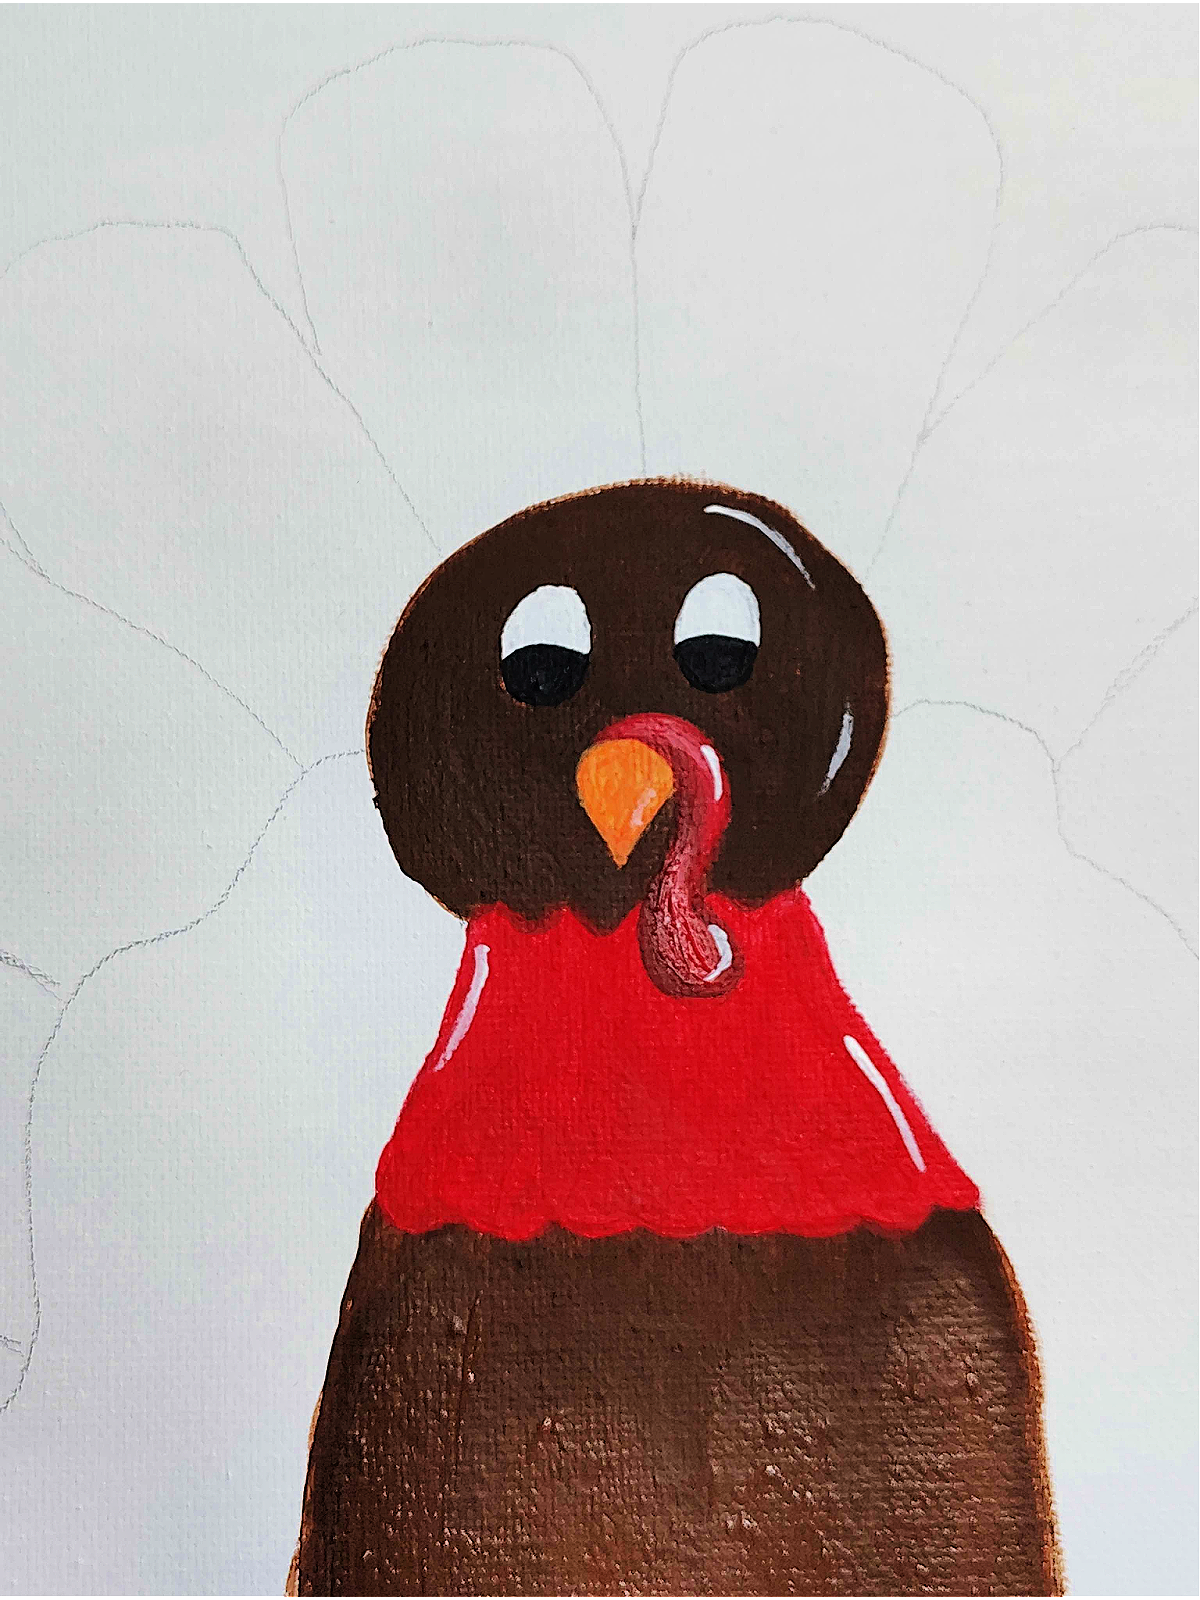
Now, add detail! Add some white lines to the head and the neck. Now, for the snood, mix some red and brown to make a darker red. Use it on the inner side of the snood and around the bottom to create defining shadows. Use a lighter red in the middle of the “round” part of the snood and at the top. Add a white mark at the top and around the bottom of the snood.
Step 6
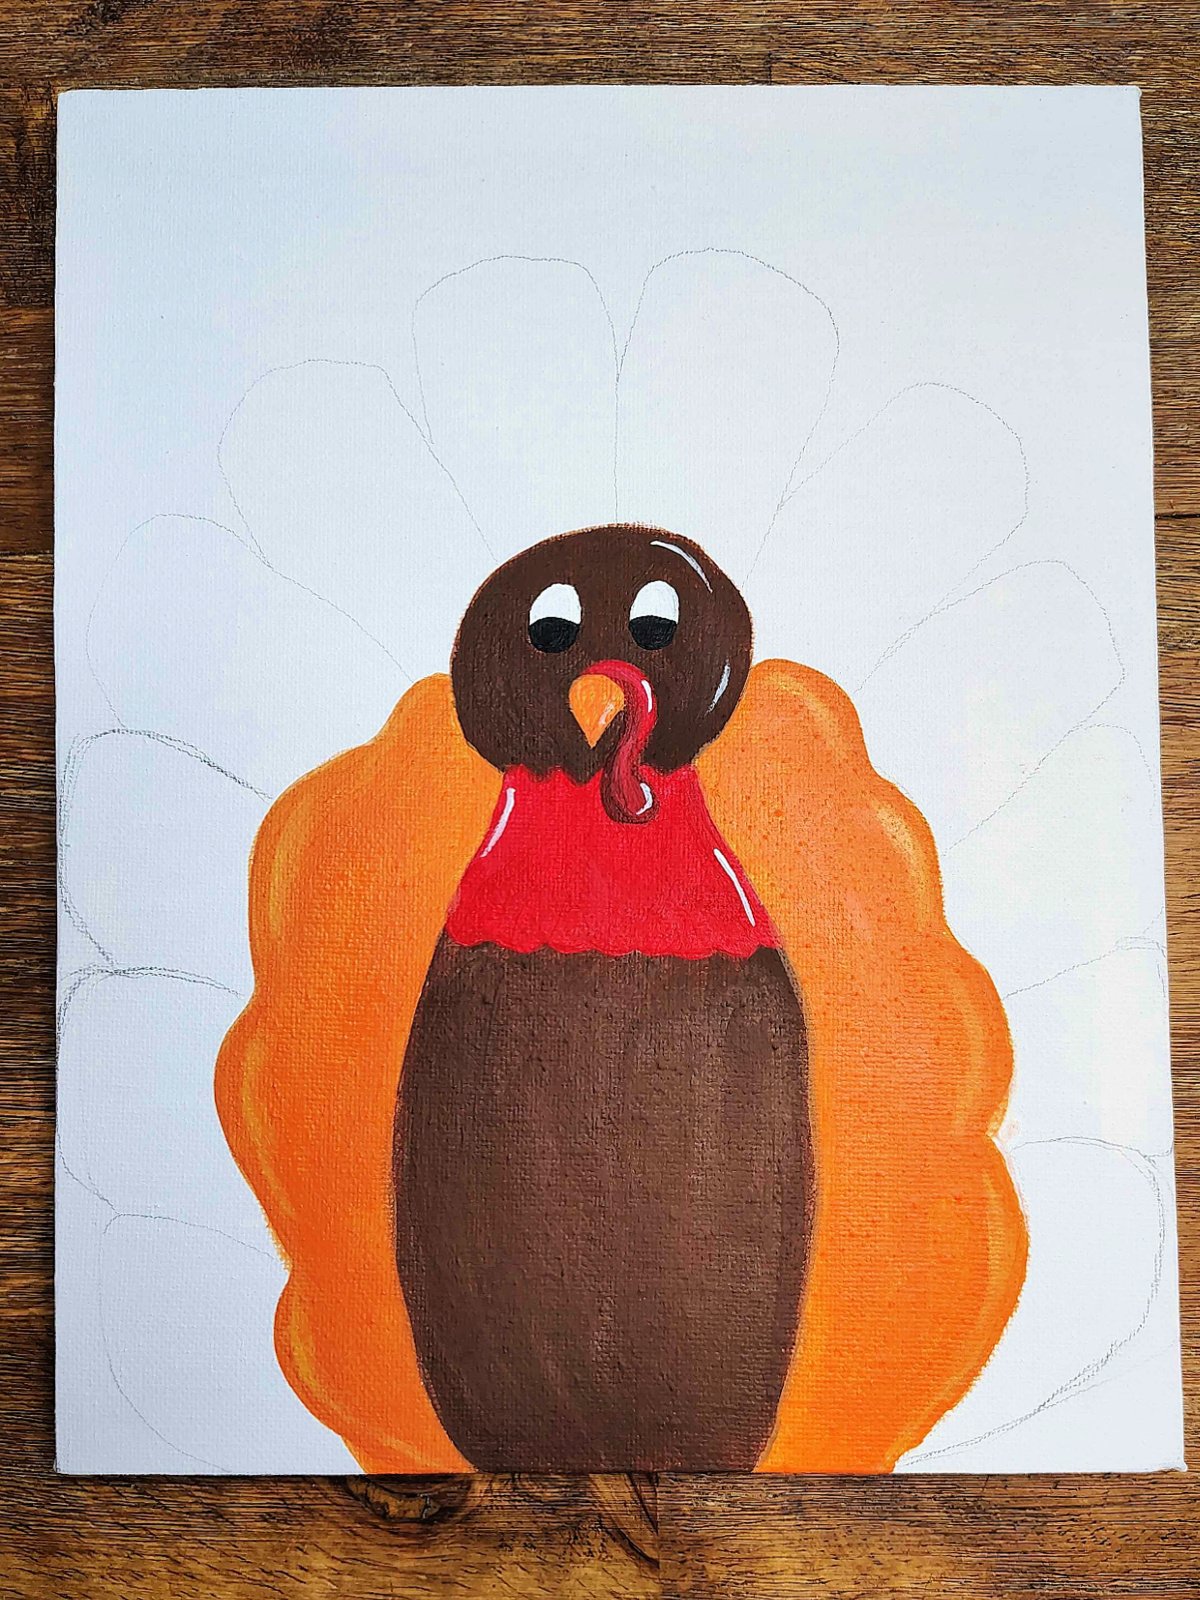
Paint the first layer of feathers orange. Once that dries add some yellow paint around the edges of feathers for definition.
Step 7
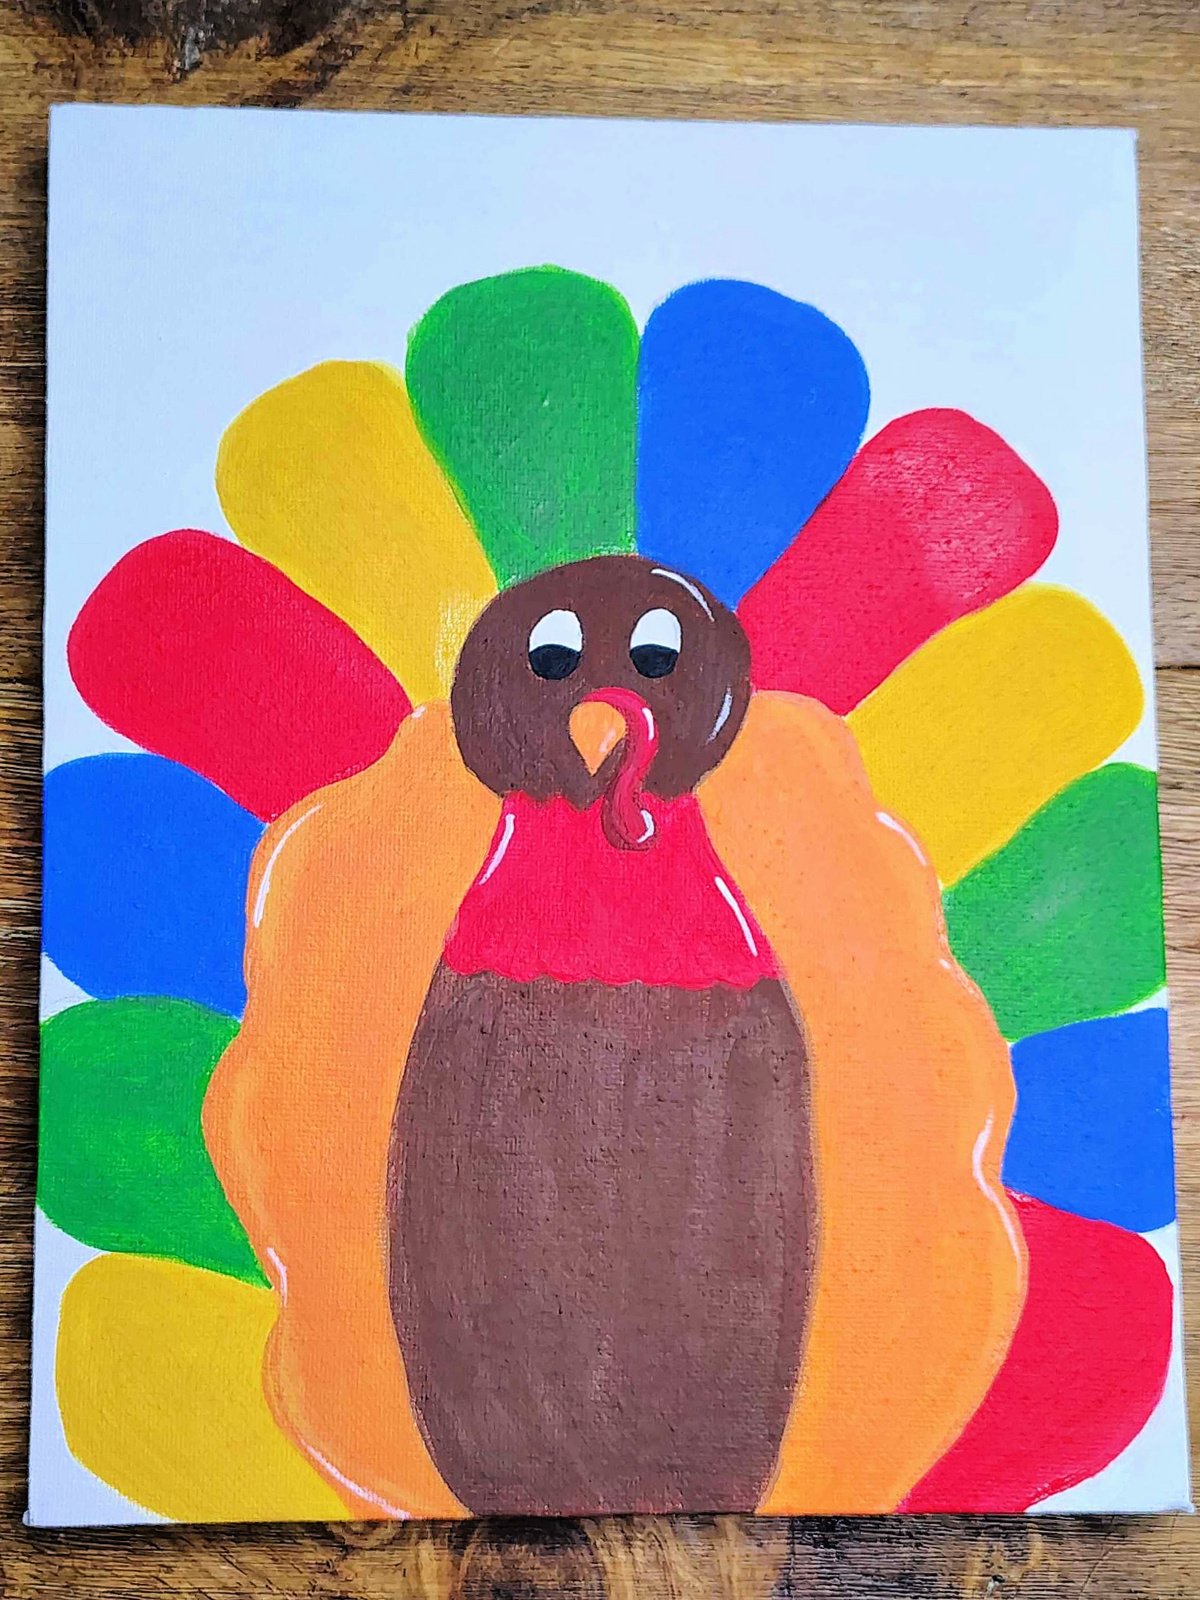
Add some white lines to the edge of the orange feathers and then color in the rest of your feathers different colors. We used yellow, green, blue, and red paint. Allow them to dry.
Step 8
Once your feathers are dry, use black paint to make details on the feathers. Draw a line down the middle and then add two “branches” pointing up at the top and towards the middle of the line. Allow it to dry.
Step 9
Now add more detail! Use white paint to start tracing the feather details and add some white lines on the top and sides of your feathers. And you’re done! You have a turkey!
How To Make This Turkey Painting Your Own
Just like all our fun crafts, there are a number of things you can do to make this turkey painting your own. You could:
- Paint a background on your painting
- Add more details to the body, like wings
- Add another row of feathers
- Paint it smaller and add legs
- Give it a pilgrim hat
There are so many things you can do to make this turkey painting special and unique.
Our Experience With The Turkey Painting
We actually had a lot of fun. I will say the hardest part was trying to get the feathers pretty close to the same shape, and they’re not perfect, but I told my kids, just like we all are different and have different things about us. So do animals. And that’s okay.
They each made their own turkey…unique. We had the whole spectrum of colors when it came to my kids turkeys… we had pink feathers, purple feathers, green feathers, black feathers. They were all unique and wonderful paintings!
We hope your family had as much with these Thanksgiving paintings as my family did.
Thanksgiving Painting For Kids

Grab your paints and paint brushes, we're making a fun painting this November in honor of Thanksgiving! We are painting a colorful turkey!
Materials
- Acrylic Paints
- Water Cup
- Paint Palette
- Paint Brushes
- Canvas
Instructions
- Draw what looks like a bowling pin.
- Then add some squiggles around the neck. An upside triangle for the beak.
- Then a closed curve for the snood (draw a worm, kind of).
- Add two ovals for eyes and add two half circles in the eyes.
- Add some large “feathers” aka squiggles to create the first layer of feathers and then create more defined feathers on the outside of that.
- Paint the head and body brown. Allow it to dry.
- Let’s paint the neck feathers and the snood red.
- Paint the beak orange, and the eye balls black.
- Now, add detail! Add some white lines to the head and the neck.
- For the snood, mix some red and brown to make a darker red. Use it on the inner side of the snood and around the bottom to create defining shadows.
- Use a lighter red in the middle of the “round” part of the snood and at the top.
- Add a white mark at the top and around the bottom of the snood.
- Paint the first layer of feathers orange.
- Once that dries add some yellow paint around the edges of feathers for definition.
- Add some white lines to the edge of the orange feathers and then color in the rest of your feathers different colors. We used yellow, green, blue, and red paint. Allow them to dry.
- Once your feathers are dry, use black paint to make details on the feathers. Draw a line down the middle and then add two “branches” pointing up at the top and towards the middle of the line. Allow it to dry.
- Now add more detail! Use white paint to start tracing the feather details and add some white lines on the top and sides of your feathers. And you’re done! You have a turkey!
Notes
Depending on your paint you might need a couple layers to make it more opaque. Allow the first layer to fully dry before adding more or you’ll take paint off the canvas.
Not every feather will look the same. That’s okay. Nothing is perfect in the wild.
Also, don’t draw too hard. You want to be able to erase the pencil as you draw. If you do draw too hard, put down white paint, allow it to dry, and then add your color to hide the pencil marks.
More Thanksgiving Crafts From Kids Activities Blog
- Make Thanksgiving day crafts with this turkey feather template.
- We have a great free printable Thanksgiving board game!
- Check out our pilgrim hat Thanksgiving coloring template.
- I love this Thanksgiving I-Spy worksheet for kids.
- How cute are these printable preschool Thanksgiving coloring pages.
- Wow, look at this HUGE list of Thanksgiving crafts for kids.
- Here are 15 more Thanksgiving crafts for kids.
- We have 12 great Thanksgiving fun facts for you.
How did you turkey painting turn out?


0