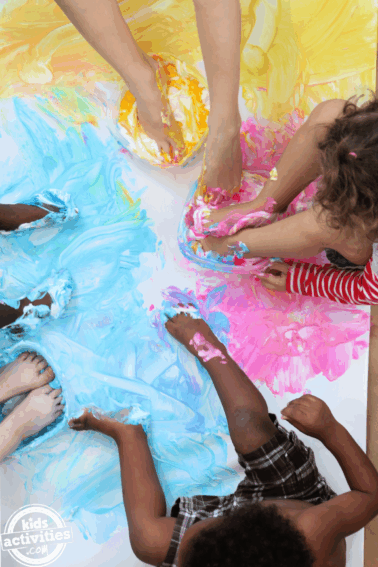
How to make paint at home is answered in a simple way with this easy flour paint recipe. You can make flour paint in a few minutes with 3 kitchen ingredients: food coloring, flour & dish soap. Kids love to participate in the paint making process and then use the homemade paint for their next artwork masterpiece. Use this homemade flour paint recipe at home or in the classroom.

Easy Homemade Paint Recipe
Whip up a batch of homemade craft paint also known as flour paint and spend hours painting masterpieces to decorate your home.
Related: More how to make paint ideas
This flour paint recipe is one of our favorites and works really well as homemade paint.
This article contains affiliate links.
This Flour Paint Recipe:
- Yields: 3 colors
- Prep Time: 10 minutes
- Cook Time: 5 minutes
Ingredients Needed for Flour Paint

- 1 ½ cups cold water
- 1/3 cup all-purpose flour
- 1 tablespoon cold water
- 1 tablespoon liquid dish soap
- Coloring, gel paste works the best
How to Make Flour Paint
Step 1

In a small saucepan, whisk together the 1 ½ cups water and flour until smooth. Stir the flour well so you don’t end up with lumpy paint!
Step 2

Heat on the stove until thickened, stirring constantly over medium high heat. The mixture should be the consistency of pudding and should coat the sides of the pan.
Step 3

Remove from heat and place a piece of plastic wrap on the surface of the mixture. Be careful not to burn yourself on the hot paint mixture or pan.
Step 4

Cool to lukewarm, about 20 minutes.
Step 5

Remove plastic wrap and whisk in 1 tablespoon water and dish soap until combined well and smooth.
Step 6

Divide paint into separate containers and add coloring, mix until well combined.

Step 7
Transfer to jar with lid for storing.
How long does homemade flor paint last, and how should I store it?

I generally just whip up enough to be used in one sitting for a crafting project. If you do want to store leftovers, refrigerate for up to a week.
Finished Homemade Paint Recipe
Homemade craft paint placed into cute little jars, along with a printed copy of the recipe, a plastic palette, table easel, paintbrushes, small canvas, and a smock would make the sweetest gift for your favorite little artist!
Best Painting Tools for Kids
- Did you know that there are different paintbrushes for kids, based on their age? Larger paintbrushes are easier for toddlers to hold!
- Don’t forget an art smock! Not only will your little one feel the part of being an artist, it will help protect their clothing!
- An artist needs an easel! There also cute tabletop easels that are inexpensive and take up less room.
- Mix up amazing colors in your artist palette!
OUr Experience Making Flour Paint at Home
When my daughter was little, I could easily fill an entire day with preparations for her “art show” that we would enjoy later on that night. She would spend hours painting, and creating art show invitations.
Using either fishing line and mini clothespins, or a retractable clothing line, I hung her paintings–with a dual purpose of allowing them to dry, while being on display. Then, I helped her create little tags with titles for her drawings that we would hang on the wall next to the paintings.
Once we were dressed up, I prepped a small charcuterie board with cheese, crackers, grapes, and other little treats, along with shatterproof champagne flutes filled with sparking cider. With quiet jazz playing in the background, we snacked on our treats while discussing her beautiful creations.
This is a very inexpensive way to make amazing memories, and maybe even encourage a future artist!
Homemade Flour Paint

There's no need to run out to the store the next time you run out of craft paint! It's super easy to make from 4 non-toxic household items!
Materials
- 1 ½ cups cold water
- ⅓ cup all-purpose flour
- 1 tablespoon cold water
- 1 tablespoon liquid dish soap
- Coloring, gel paste works the best
Instructions
- In a small saucepan, whisk together the 1 ½ cups water and flour until smooth.
- Heat until thickened, stirring constantly. The mixture should be the consistency of pudding and should coat the sides of the pan.
- Remove from heat and place a piece of plastic wrap on the surface of the mixture.
- Cool to lukewarm, about 20 minutes.
- Remove plastic wrap and whisk in 1 tablespoon water and dish soap until combined well and smooth.
- Divide paint into separate containers and add coloring, mix until well combined.
- Transfer to jar with lid for storing.
EASY HOMEMADE PAINT RECIPES From Kids Activities Blog
- Now that you know how to make homemade craft paint, learn how to make homemade watercolor paint!
- Kids will get a kick out of this homemade scratch and sniff paint!
- There is something for everyone in these 15 homemade paint recipes!
- Looking for a fun craft that will help your child develop their eye hand coordination? Make a batch of homemade finger paint!
- Try painting with this exploding paint bombs activity!
What homemade flour paint colors did you make?


I may have missed it, so I apologize ahead of time. How long will this store for? Thank you so much for the great recipe.
Hi, Kendra! Thank you for asking, I meant to add that in the post and will go back and do that! I generally just use it all in a sitting for a crafting activity. If you do want to keep it I would refrigerate it for up to a week!