
Learning how to make paper mache is a traditional kids craft with newspaper that we love even for the youngest crafters. This easy recipe for paper mache has only 2 ingredients and is perfect to do with kids of all ages with a pile of old paper pieces!

How to Make Paper Mache with Kids
We are starting with the simplest paper mache craft, a paper mache bowl, but this easy technique will inspire you to make more paper mache crafts!
Papier Mache started as a French term meaning chewed paper referring to the mixture of paper pulp and paste that will harden when dried.
Making paper mache was the first craft I ever remember doing. I remember the joy of taking strips of newspaper with some water and flour and transforming those simple ingredients into a paper mache bowl or making a paper mache ball from an inflated balloon covered with layers of paper mache, waiting for it to dry and pop the balloon inside.
Paper mache just seems like magic!
Related: 20+ Easy Crafts Kids Can Make With Only 2-3 Supplies

Best Paper Mache Recipe
For every paper mache craft or paper mache project, you will need paper mache paste and old newspaper strips.
Supplies Needed to Make Paper Mache Paste
- 1 Part Water
- 1 Part Flour
–>A small batch of paper mache glue would be a cup of water and a cup of flour.
Directions to Make Paper Mache Paste
- In a medium bowl, add 1 part warm water* to 1 part plain flour
- Mix thoroughly with a wooden spoon to combine flour and water into a thick paste about the consistency of wallpaper paste
*Warm water seems to mix faster with the flour than cold water
How to make a paper mache bowl Craft
Step 1 – Select a Small Bowl as a Paper Mache Template
Start with a small bowl – plastic is best – to use as a paper mache bowl template for your newspaper craft. If you don’t have a plastic one, you can use a metal or ceramic bowl, just slide a layer of plastic wrap like Saran wrap over it first.
It is easiest to place the bowl upside down to use the bottom side as the template.
Step 2 – Tear Old Newspaper into Strips
Prepare a stack of old newspaper for the paper mache craft by tearing the newspaper into strips. You can also use scissors or a paper cutter to cut strips.
Step 3 – Mix Up Your Easy Paper Mache Paste
Grab your pre-made paper mache paste or mix of paper mache paste recipe by combining 1:1 flour and water.
Step 3 – Dip & Cover with Paper Mache
Making paper mache is messy so cover your work area with additional newspapers or a plastic covering.
Dip a strip of newspaper into the paste, slide through the paper mache paste and gently run fingers over the gooey newspaper strips to remove excess paper mache paste. Lay the strips of paper onto the bottom of the bowl template as the first layer of paper mache.
Keep adding strips covering the entire bowl template smoothing as you go to push out any air bubbles our of the paper mache mixture.
Tip: You can place your paper mache paste into a large bowl and use the edge of the top of the bowl to help remove the excess flour mixture paste.
Step 4 – Layer Paper Mache Strips
Continue adding layers – second layer, third layer, fourth layer…the more the better. We made about 5 layers so that the bowl would be sturdy and fully covered. Depending on the amount of time you have, you may end up with layers of newspaper strips!
Step 4 – Dry
Leave the paper mache bowl to to dry overnight. Drying times will vary based on the size of your project, your temperature and humidity level.
Step 5 – Remove Craft Template
After the paper mache is dry, gently press out the bowl. If you have a plastic bowl, just give it a bit of a squeeze and it will pop out. If you covered another type of bowl, pull on the plastic wrap to dislodge.
Step 6 – Paint and Decorate Your Paper Mache Bowl

Once our paper mache creation dried over night and popped off the plastic form, we opened up our craft supplies and used what we could find.
- We painted our paper mache bowl white with white acrylic paint and a paint brush and applied blue tissue paper strips for color.
- Our white acrylic paint that took several coats to cover the newsprint type. The blue tissue paper strips were applied to the wet paint and were a great way to add some color to the bottom of the bowl.
Finished Paper Mache Craft for Kids

Our paper mache bowl turned out so pretty! The bowl is the perfect size to hold some little treasures or just to keep collect some coins.
Easy Paper Mache Bowl Project for Kids
My 4.5 yr old son Jack loves to create. He draws everyday, paints and builds models. I knew he would love paper mache; gooey paste, sculpting, what’s not to love?
This was our first time working with paper mache together and it was oh so much fun. Instead of using a balloon, we used a bowl because it is really easy and perfect for beginners:
- A bowl is nice and stable for small hands who are just beginning at paper mache coordination.
- Everything I am about to describe as to how to do paper mache with kids can be modified for a more complex paper mache idea.
My son, Jack loved this paper mache craft so much, we’ll definitely be making more paper mache fun projects soon.
Maybe next time we’ll make an animal mask just like I used to when I was a child. Or maybe we will cover a beach ball…one good idea after another!
How to Make Paper Mache

Making paper mache is so easy and versatile it is easy to see why it is such a good craft for even the youngest crafters. Preschoolers and above will think it is magical to turn newspaper, water and flour into whatever they can dream up!
Materials
- Strips of newspaper
- 1 cup Water
- 1 cup Flour
Tools
- Shallow pan to put the paper mache paste in for dipping the paper strips.
- For beginners: small plastic bowl, if you don't have a suitable plastic bowl, line the outside of a metal or ceramic bowl with plastic wrap first.
- For more advanced crafters: balloon to cover & pop once craft has dried overnight.
Instructions
- Mix up the Paper Mache Paste by adding equal parts of flour and water.
- Put paper mache paste in a shallow pan.
- One at a time, drag and dip a paper strip in the paper mache paste completely covering the paper strip with the concoction.
- While the strip is still over the shallow pan, gently run fingers over the paper strip to remove excess paste with the goal of it not being "drippy".
- Place the paper strip over the upside-down bowl covering it as smoothly as possible. Keep adding strips until the entire bowl surface is covered.
- Make at least 5 layers of paper mache strips over the surface.
- Let the bowl dry overnight.
- Gently squeeze the plastic bowl allowing the paper mache shell to dislodge.
- Paint and decorate.
More Paper Mache Ideas from Kids Activities Blog
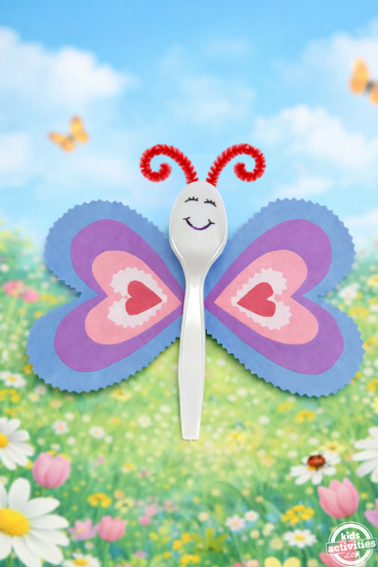
- Make a beautiful paper mache craft butterfly with these simple instructions.
- Use paper mache on plastic bottle for this rainstick craft.
- Make a paper mache head…as in a moose head which is a really fun art project!
- Make a tissue paper suncatcher craft which is a similar technique as paper mache, just using traditional glue and tissue paper instead of flour, water and newspaper. Different ways to make a good idea!
- You gotta try these water bottle crafts!
Fun Paper Crafts for kids
- Choose from 8 paper lantern craft ideas kids can make!
Have you made easy paper mache projects with your kids like this paper mache bowl? How did it go?


You are such an inspiration Kate, love how you are not afraid to do messy projects 🙂 I am seriously considering trying this.
:)! We love paper mache!
i did so many of these as a kid and loved them, can’t believe I haven’t shared the fun with my own girls yet. thanks so much for the reminder and inspiration. Jack’s looks great! Pinned!
YES! I know! It is so easy to overlook the OBVIOUS kids crafts like paper mache, but it will be an adventure.
This is one of those must-do tried-and-true activities that most people did as kids. I love that they can be decorated, used and cherished afterwards. Pinning to remind myself to do this with Cameron and Lucy outside one day.
Yes! Paper mache is one of those things you remember doing as a kid and so will they! Can’t wait to hear what type of paper mache project you tackled with the kids.
What a sweet bowl! My children enjoy paper mache – we have used this technique to make table decorations for Halloween and Easter. We’ve also used paper mache to create a fairy house. It is such a fun process for children.
This looks gorgeous. I must admit when I’ve thought about making paper mache with the girls I’ve been a bit put off by the mess and remembering how long it took to wait for every layer to dry with the balloon technique. You’ve made it look so simple and easy and I’ll bet the girls would love decorating their own pieces – we’ll have to try!
Paper mache can definitely be messy, but there are ways to make it manageable even inside. Be brave! They will love it.
I remember really loving paper mache when I was a kid. I think mine would really enjoy this. Thanks for sharing 🙂
Oh yes! Have so much fun making paper mache!
Oh I’d forgotten all about paper mache. My mind is boggling with ideas now. 🙂
Paper mache is definitely on the traditional kids craft bucket list!!
Classic! Using a bowl is a great idea & thanks for the glue ratio I never get the right consistency
Ha! That is the magic of paper mache…it sometimes needs some tweaking.
We could use one of these bowls for hair ties and hair clips. Thanks for the idea.
Love that idea for customizing your own paper mache project for kids!
Do you have any problems with keeping it? (From when you were young)
I have heard horror stories of cockroaches eating the project. We have not tried it.
I don’t have any left from my childhood but I remember keeping them for years in our dress-up box. You should have a try. It really is so much fun 🙂
When the project was completely dry, my mom used to coat it inside and outside with a coat of varnish. Not only did this make the project somewhat waterproof but we never had a problem with bugs eating it. I recently had to sell my mom’s home she lived in for 50 some years and had to dismantle it pretty much single handedly. When I was in the attic, I found a 60 year old space helmet out of thick paper mache that my brother made and it was still fine– no bugs and the mice that were there had left it alone as well. The only thing I could think was the varnish deterred them.
I have not had issues saving paper mache projects as long as they are dried completely. I think one of the issues might be that if the paper mache is still damp or gets wet again, then there could be a problem! Good luck!