
School-aged kids will practice painting a tree with watercolors in this fun project. This technique can easily be used at home or in the classroom.

Bleeding WAtercolors
When wet watercolor paints make contact with water or other wet watercolor paints, they will bleed or mix into one another. This wet-on-wet technique is fun to experiment with as it has many uses. Today, we’ll be using this technique to create an abstract style tree.
Related: Learn more Watercolor Techniques with our free printable.
Supplies Needed to Make this Watercolor Tree Art Project
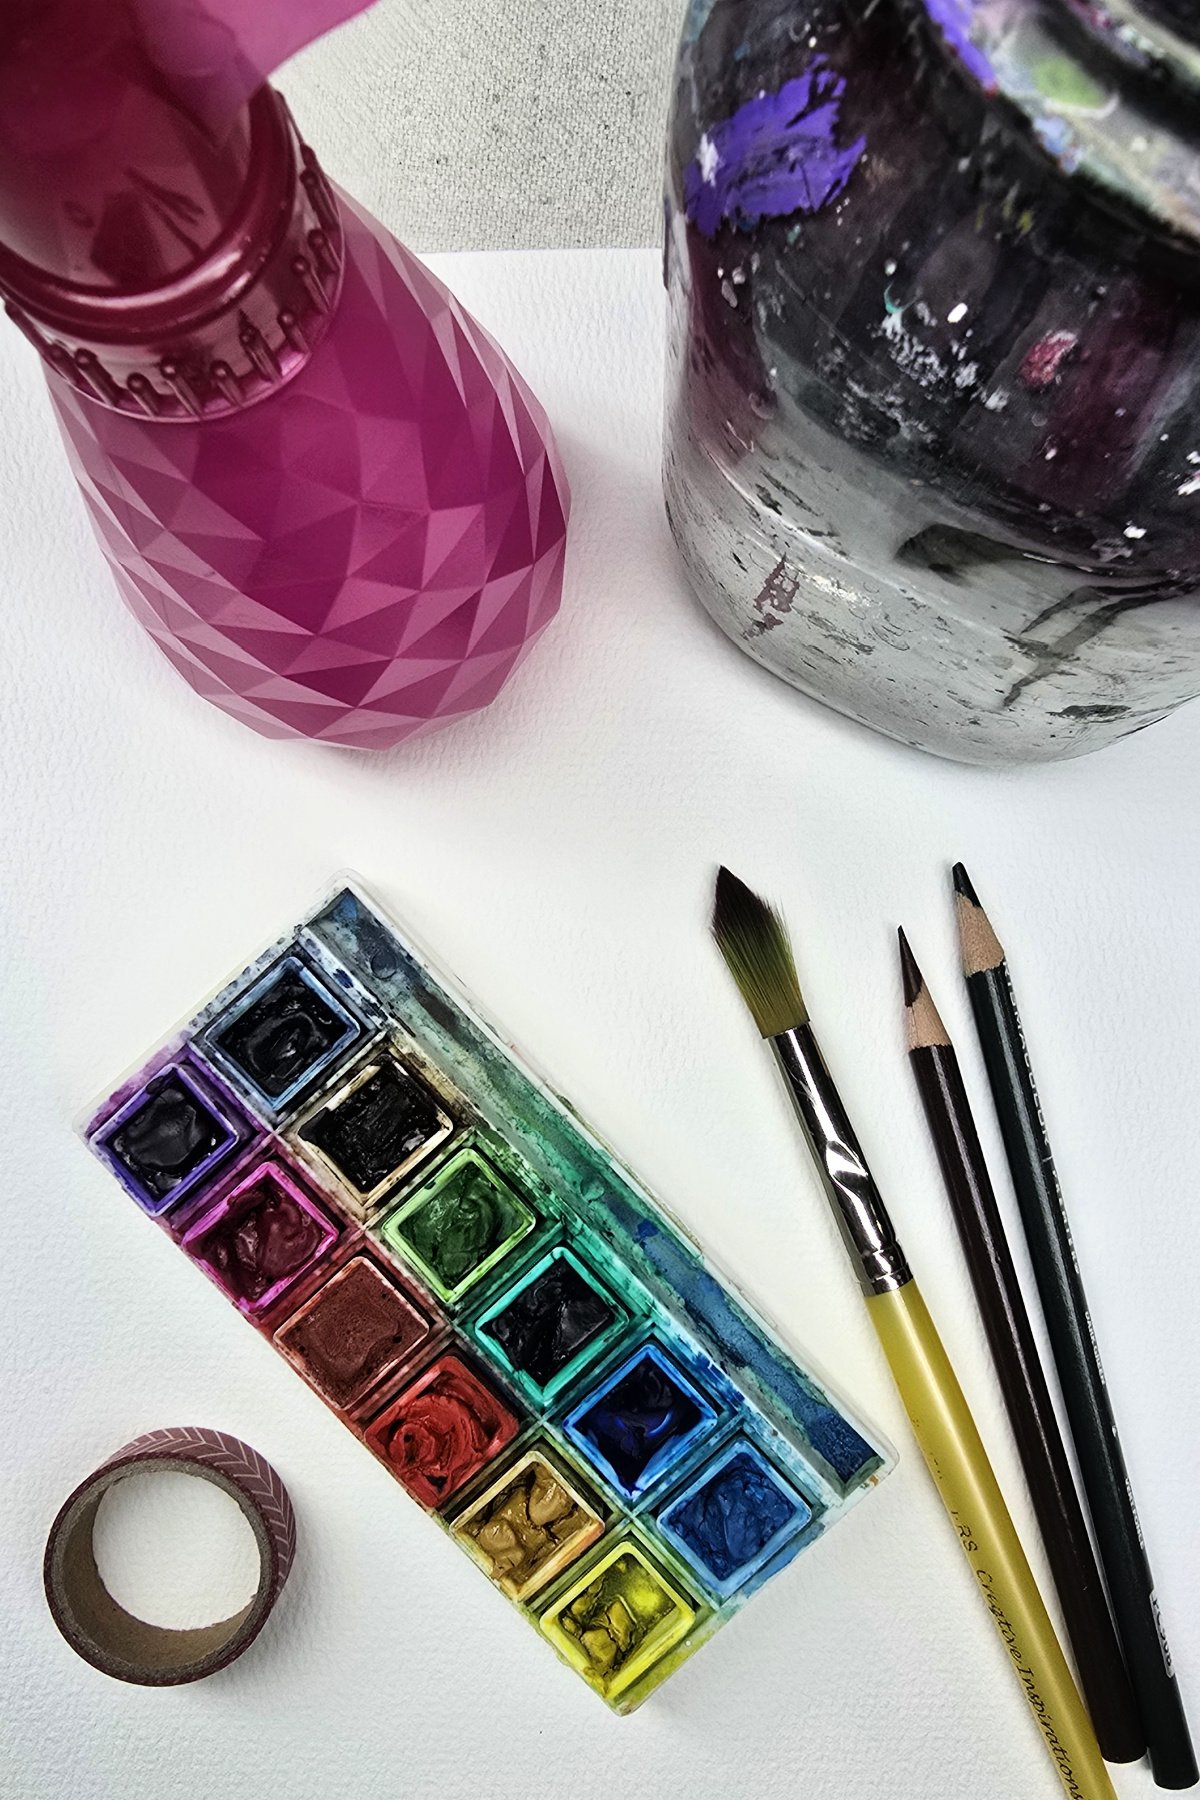
- Watercolor Paper
- Watercolor Paints
- Paintbrushes
- Washi Tape – or Painter’s Tape
- Colored Pencils, Crayons, or Markers
- Spray Bottle with Water
- Cardboard or Firm Surface
- Water
- Paper Towels
Directions to Make a Watercolor Tree
Step 1
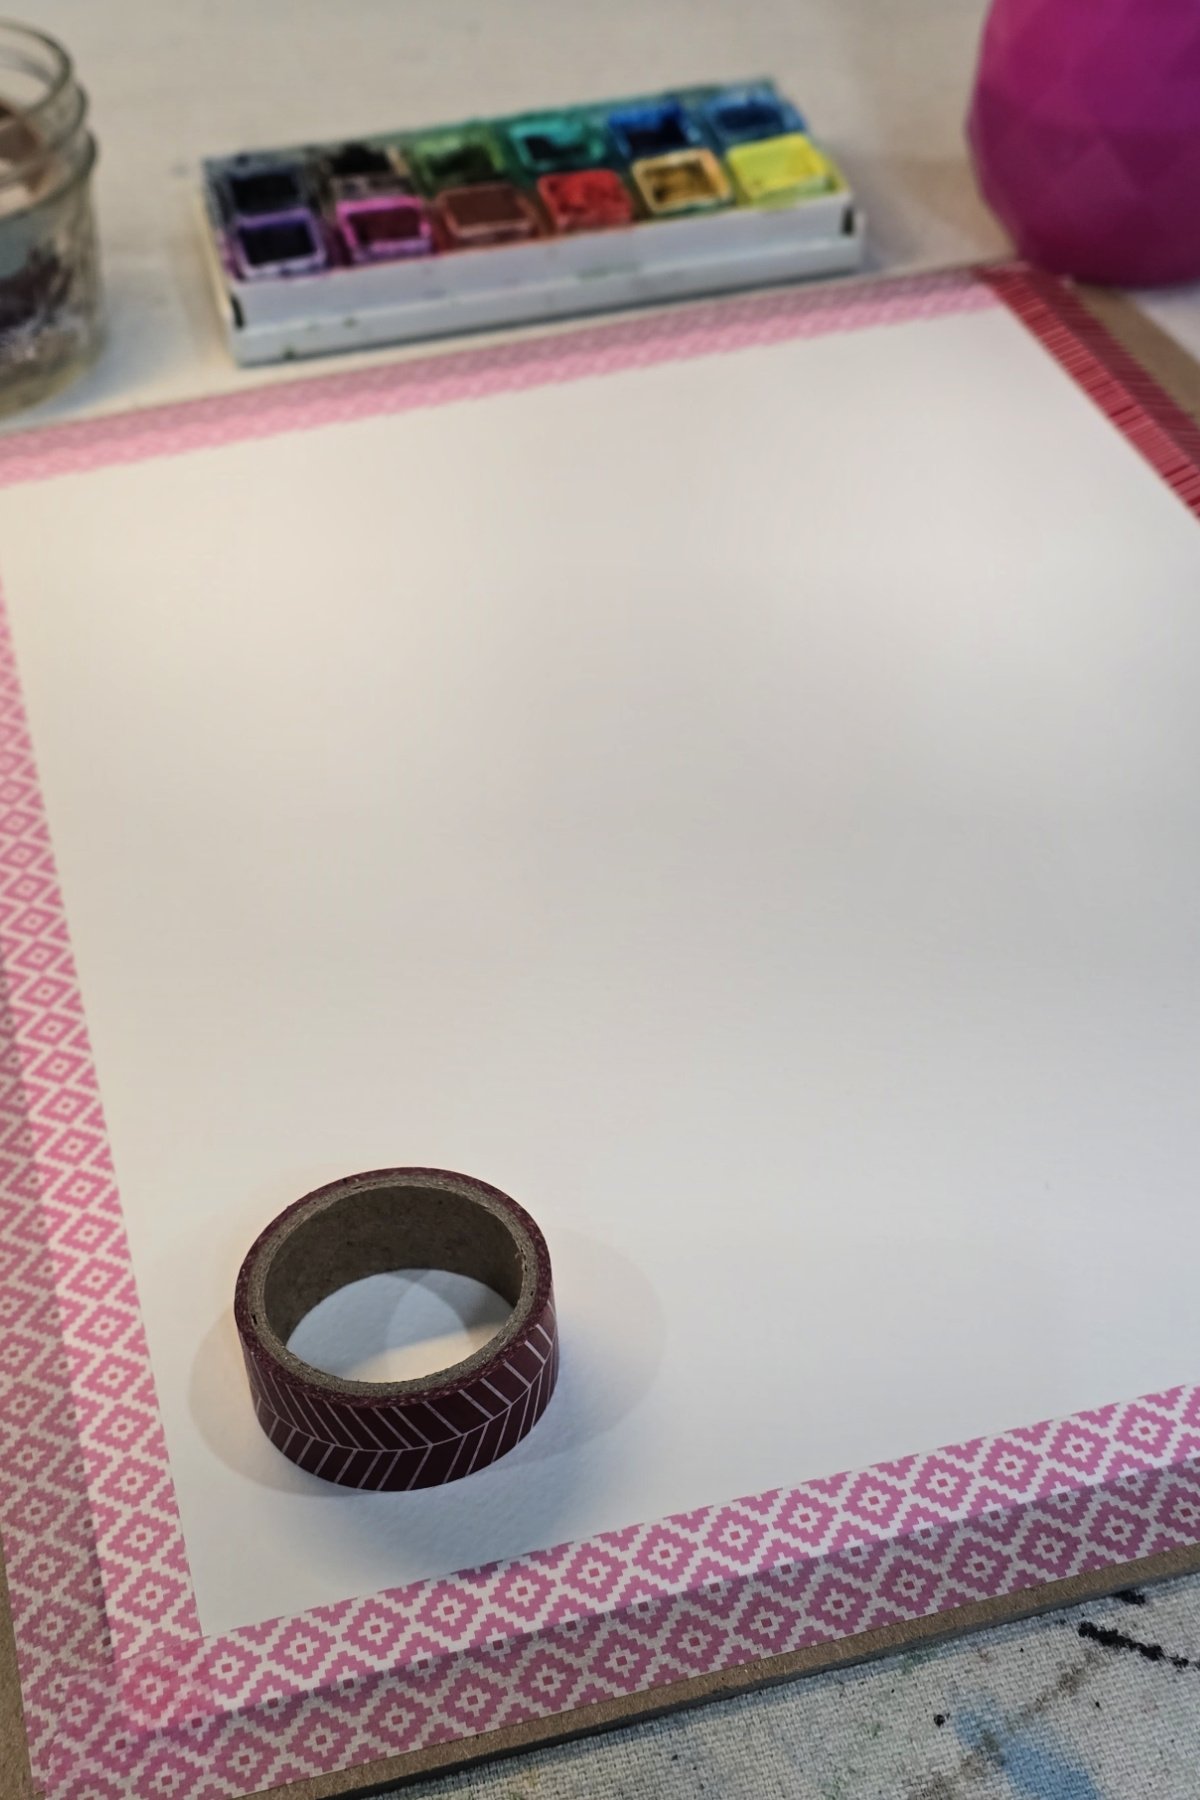
First, use washi tape to attach watercolor paper to cardboard or other firm surface. Ensuring the tape is smooth and even will create a cleaner border for your finished project.
Tip: If using painters tape or masking tape instead of washi tape, stick tape to your shirt or pants before attaching it to the paper, This will lessen the stickiness of the tape and it will be less likely to tear your paper.
Step 2
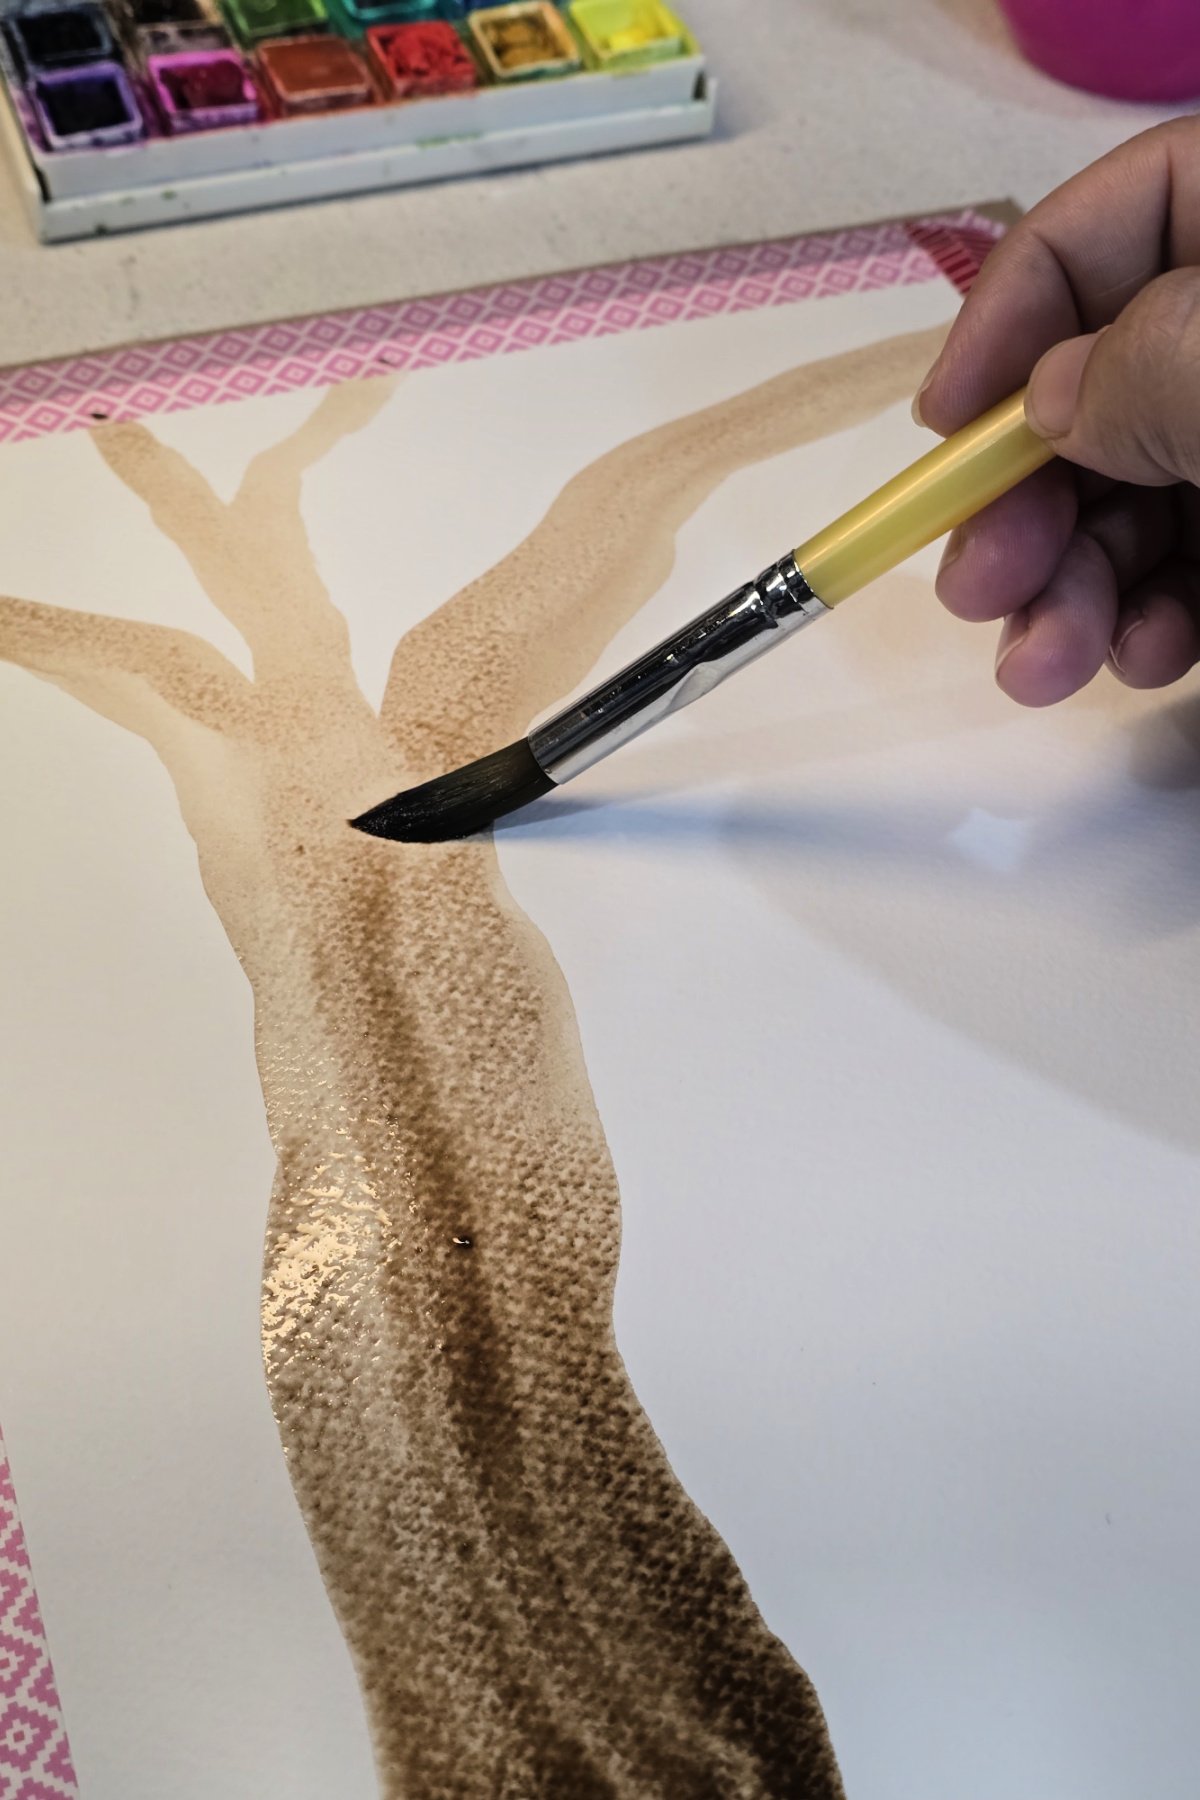
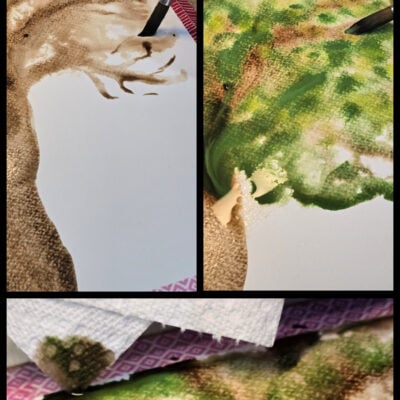
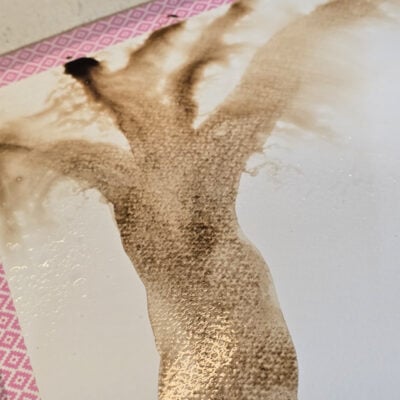
Then, use watercolors to paint a tree trunk and branches onto the watercolor paper. Note: Branches need to still be wet for the next step, it is recommended to paint them last.
Step 3
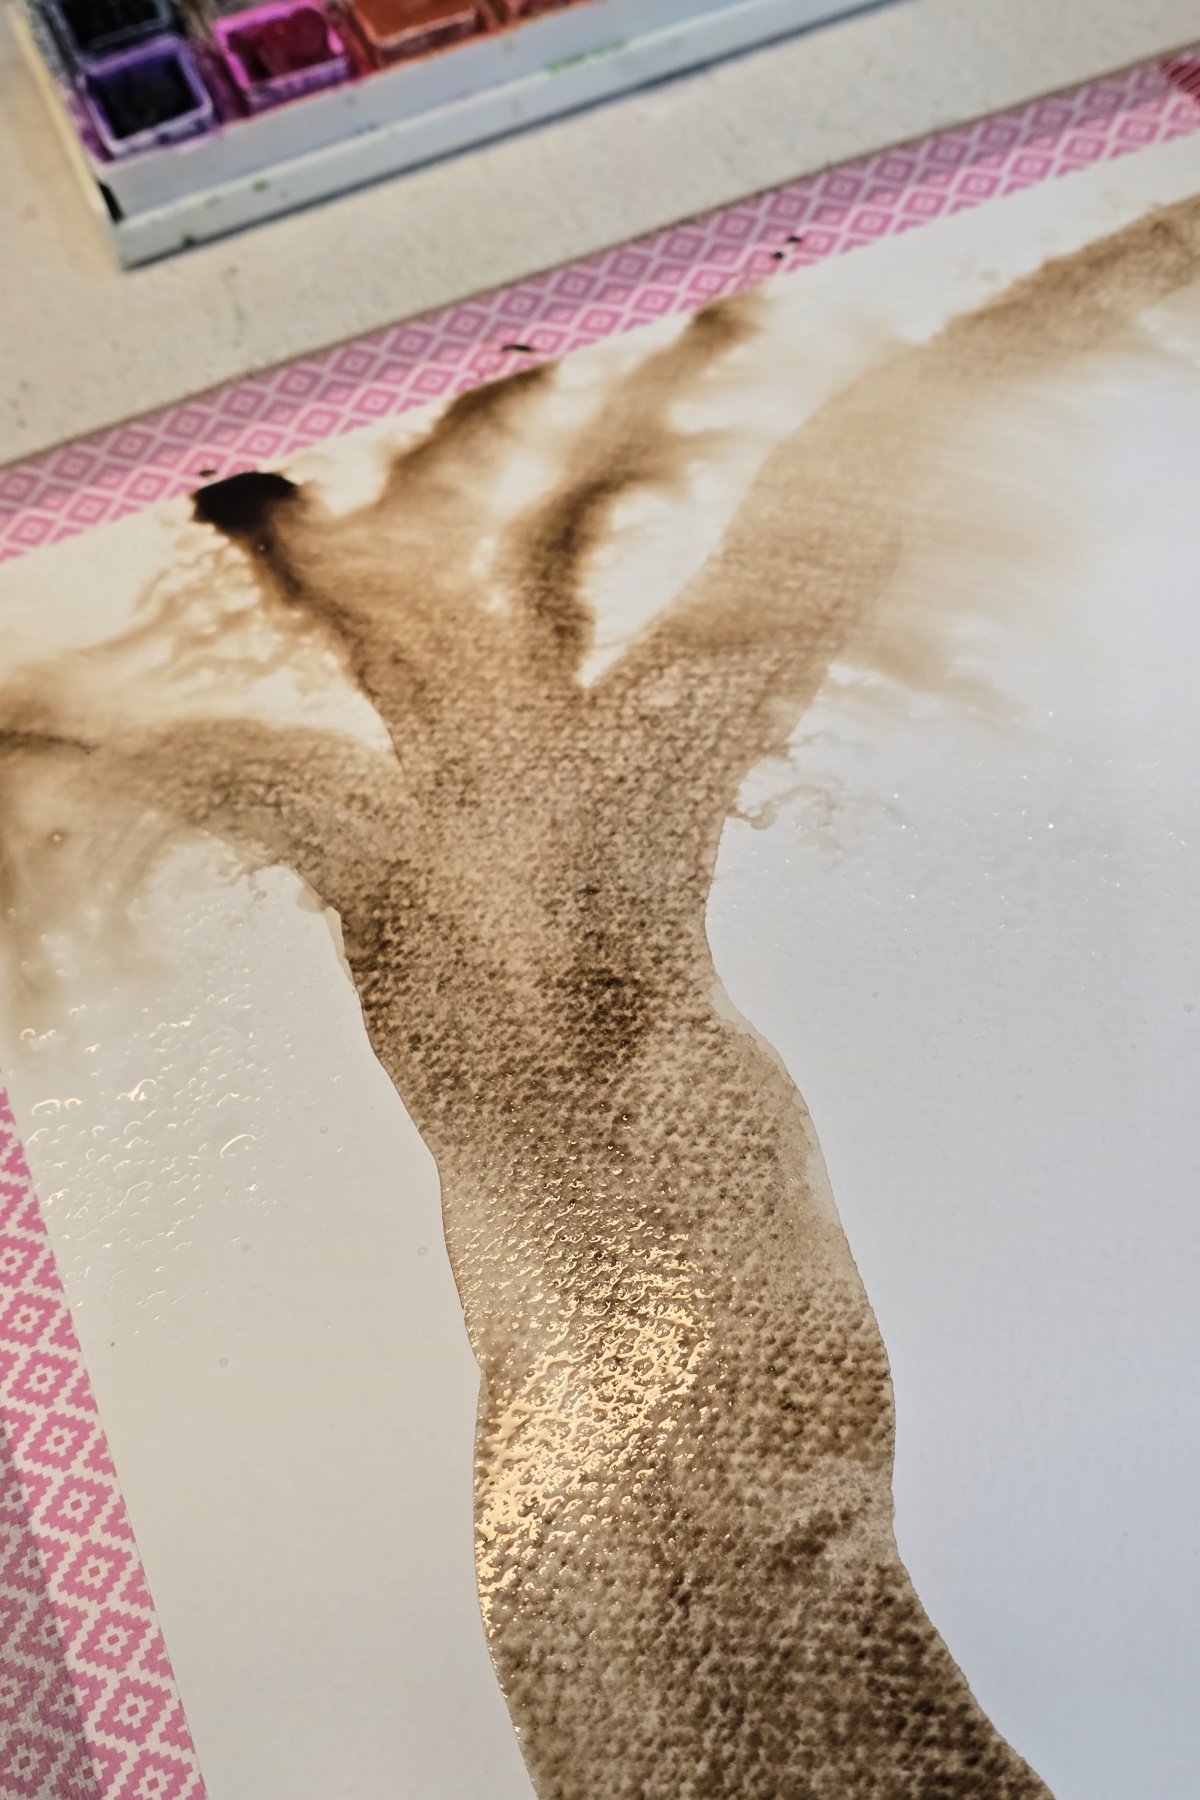
Using a spray bottle filled with clean water, lightly spray branches and surrounding area. This will cause the paint from the branches to flow and bleed into the areas that have been sprayed. Refrain from spraying around the tree trunk as we don’t want that portion of the painting to bleed.
Step 4
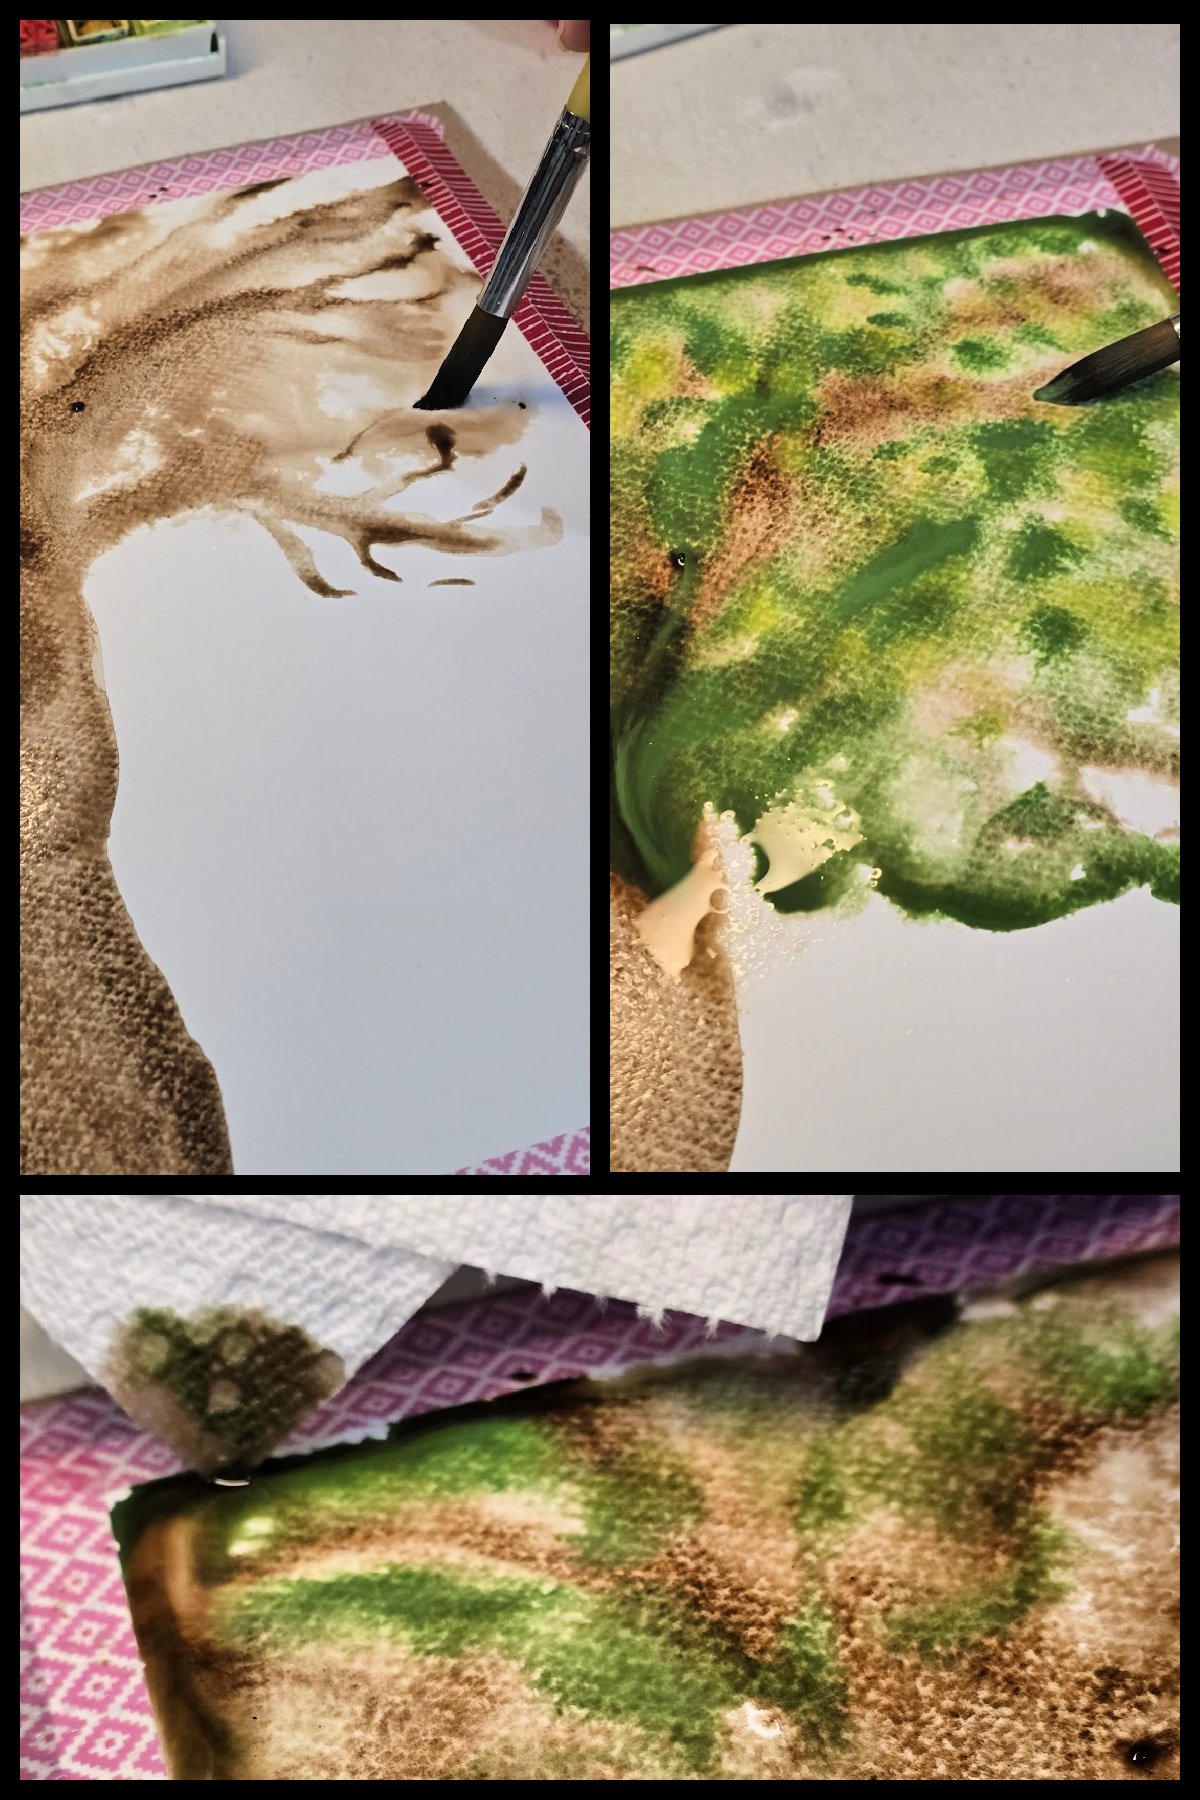
Next, work watercolor paint onto the wet paper to create an abstract tree design. Loosely paint the branches and leaf areas onto the paper, allowing the paints to bleed and mix into one another.
Tip: If paints begin to pool up on the paper, carefully use the edges of a paper towel to soak up the excess paint.
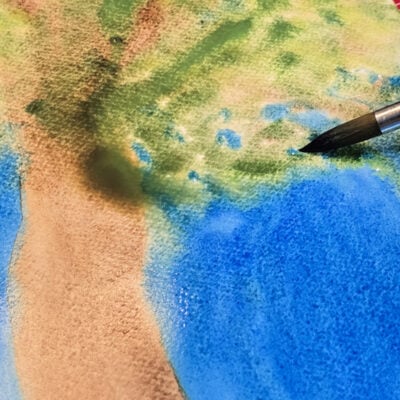
Step 5
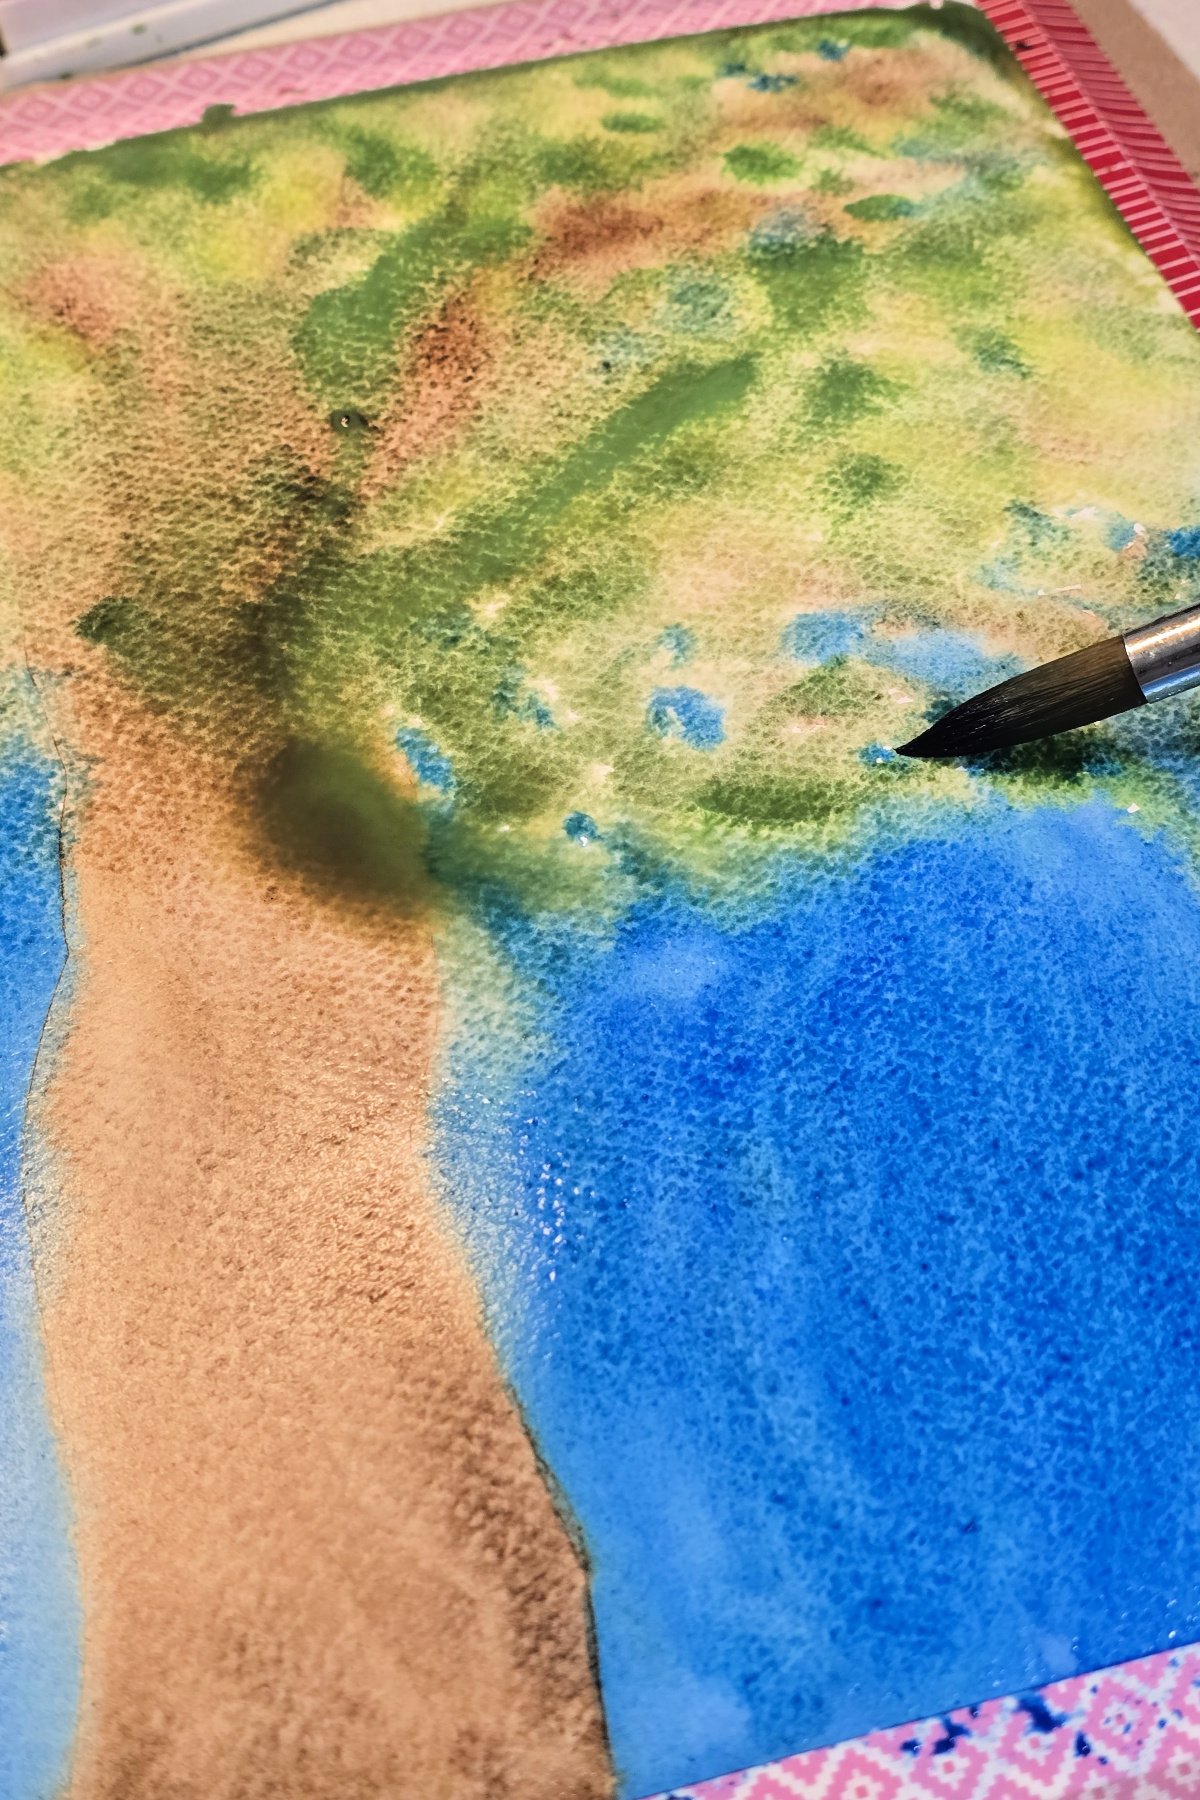
Then, use watercolors to paint the sky or background surrounding the tree. Use caution when painting near the wet watercolor paints as they will bleed into one another. Consider allowing the painting to dry a bit before completing this step to prevent unwanted bleeding.
Set painting aside to dry.
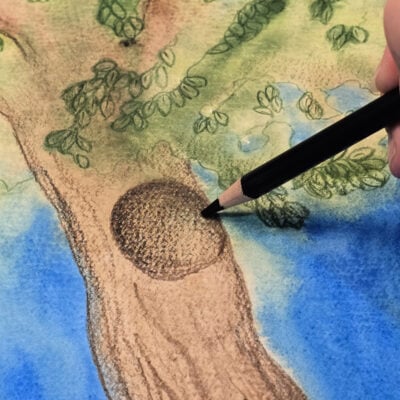
Step 6
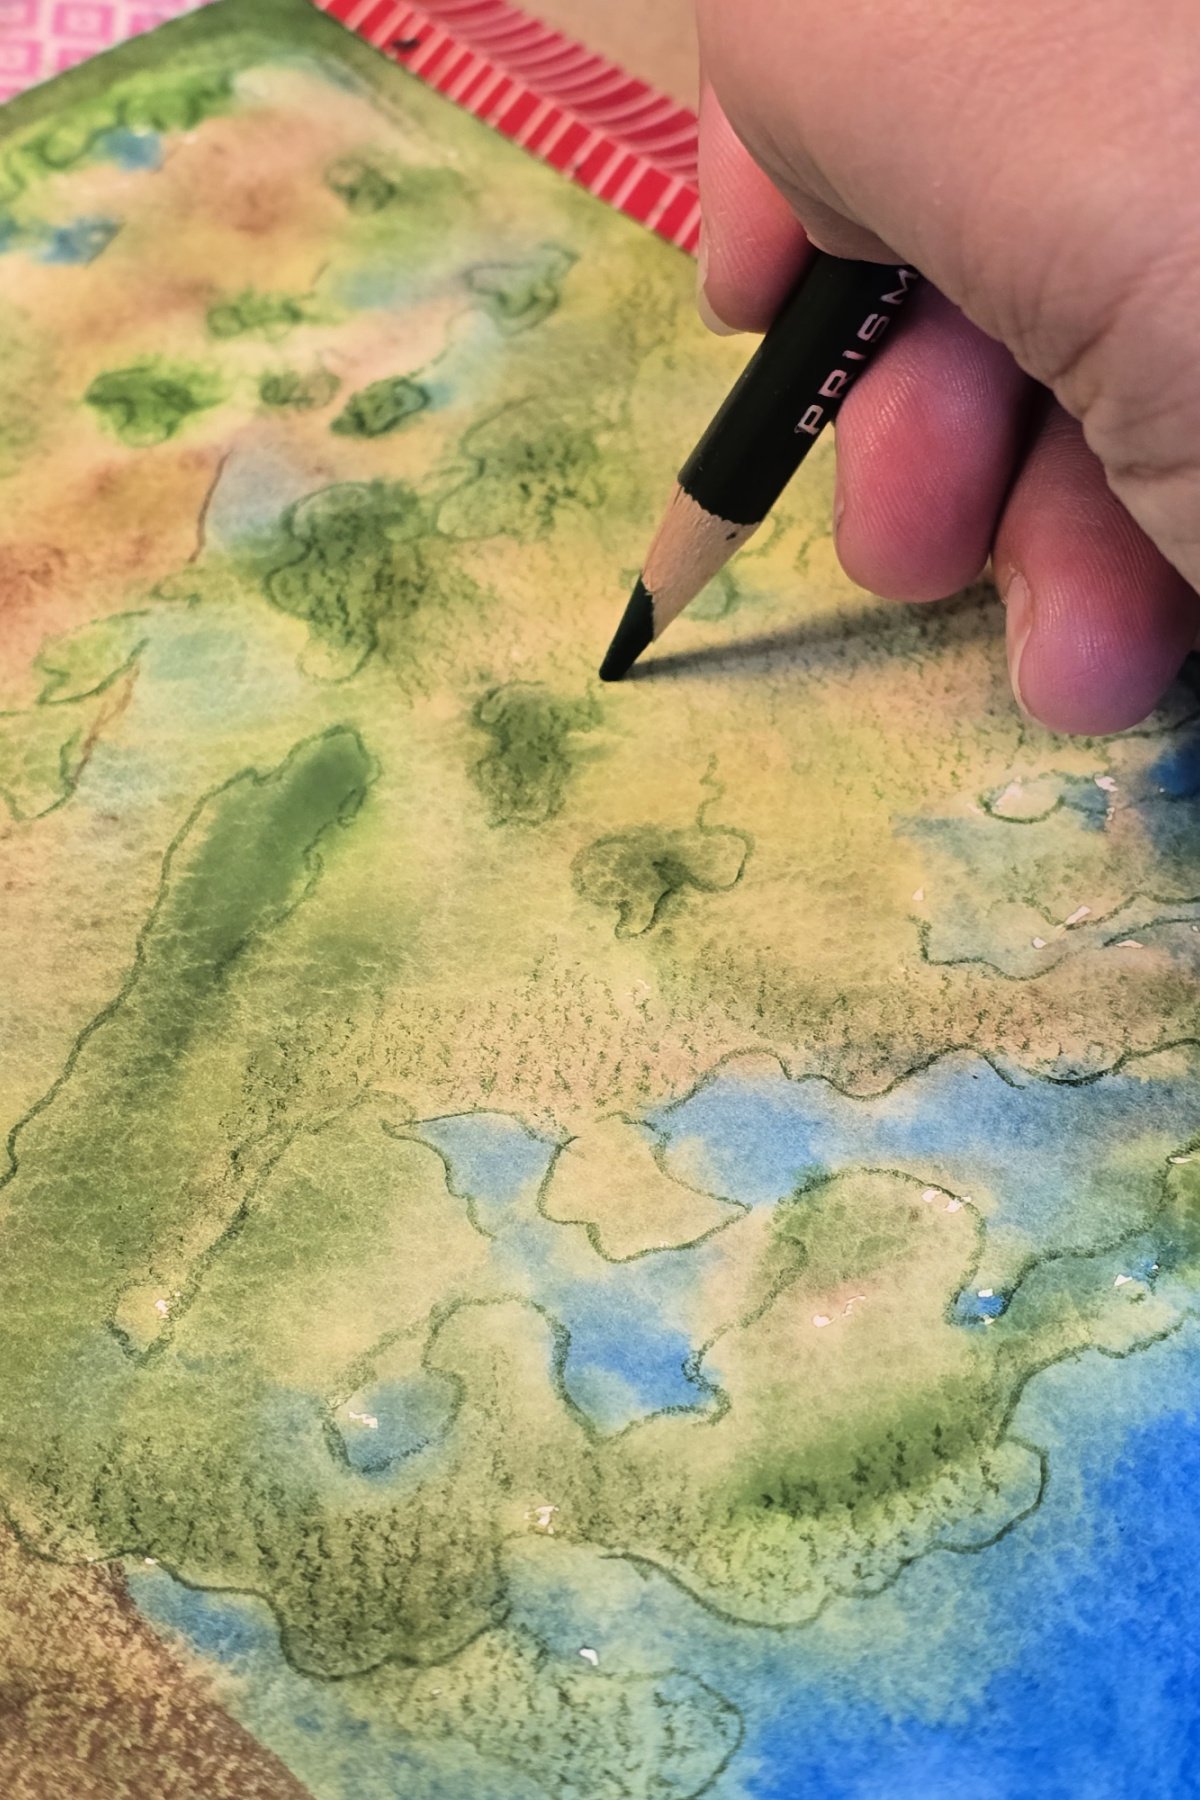
When the painting is dry, loosely trace edges of leaf color with a colored pencil.
Step 7
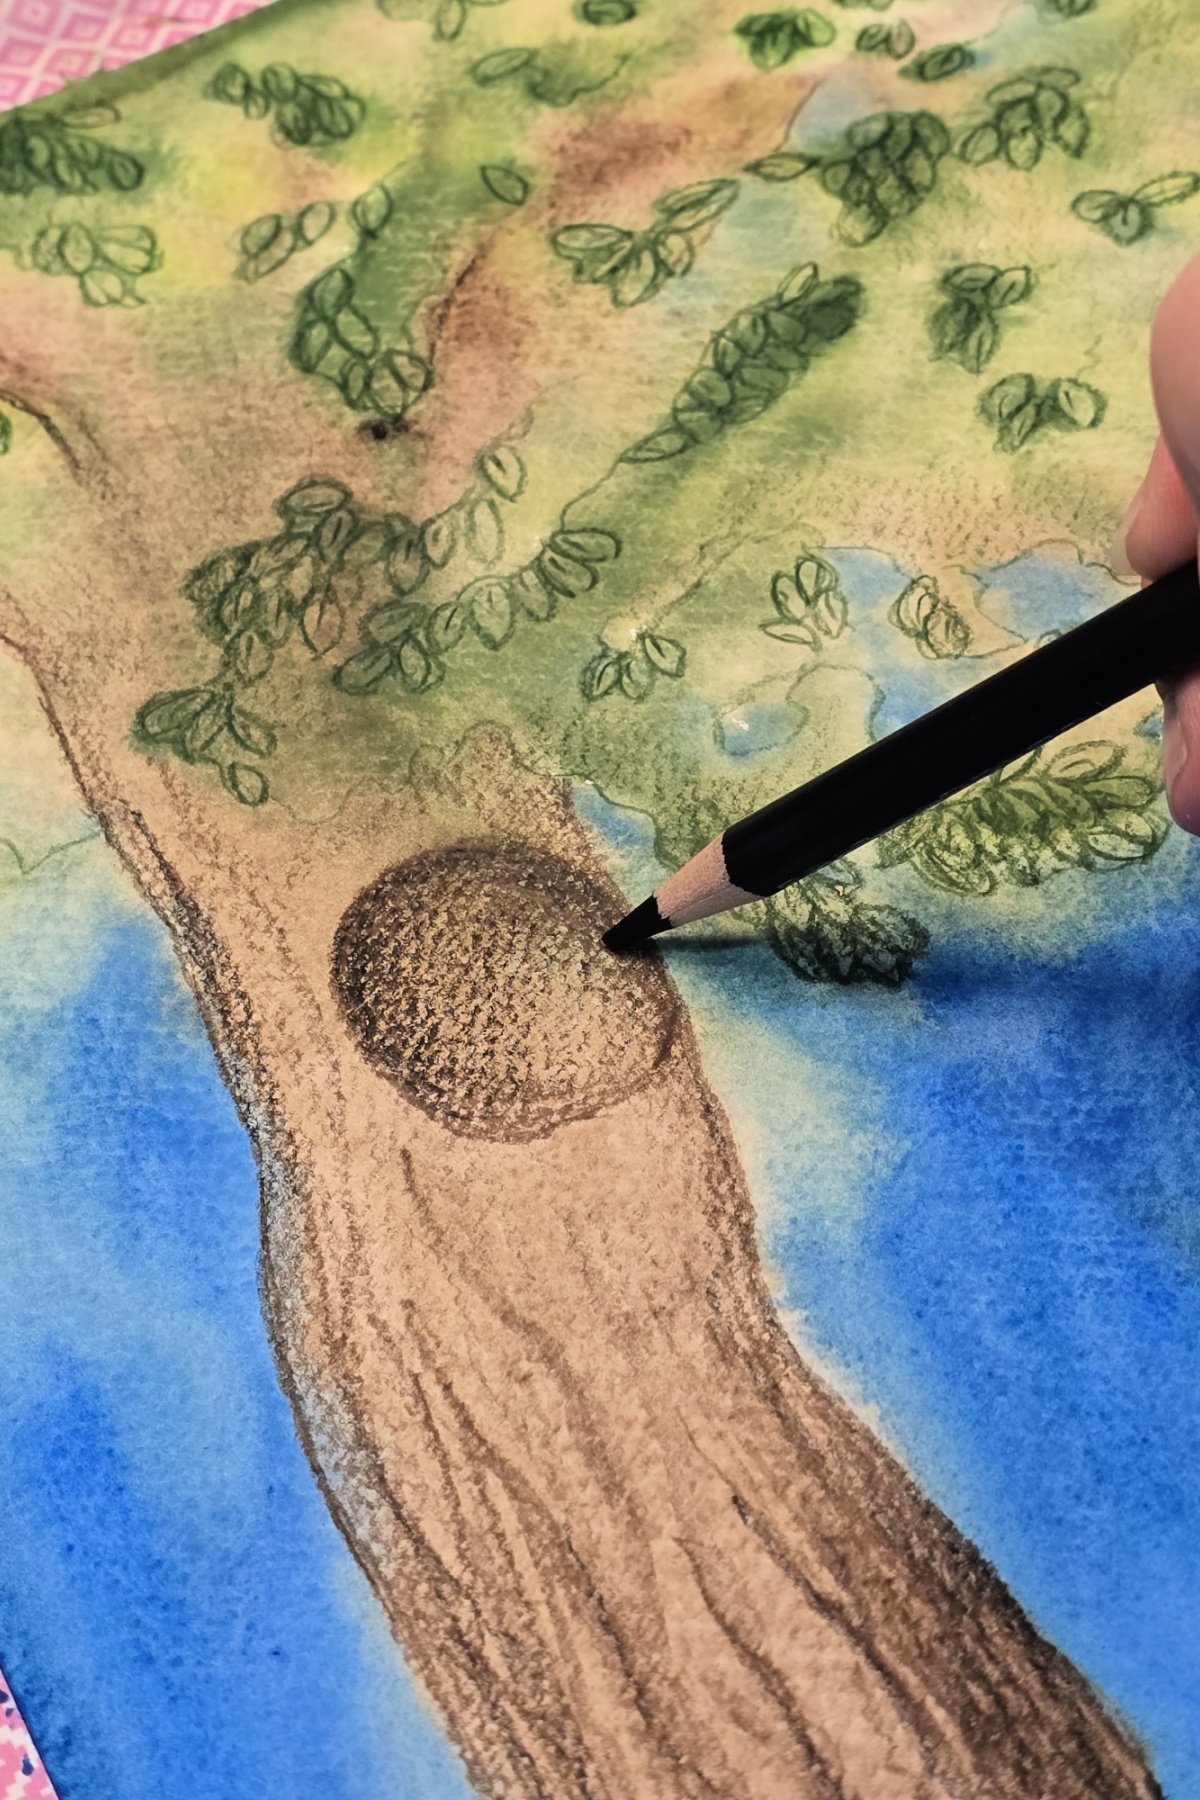
Finally, complete the project by adding colored pencil details to your tree.
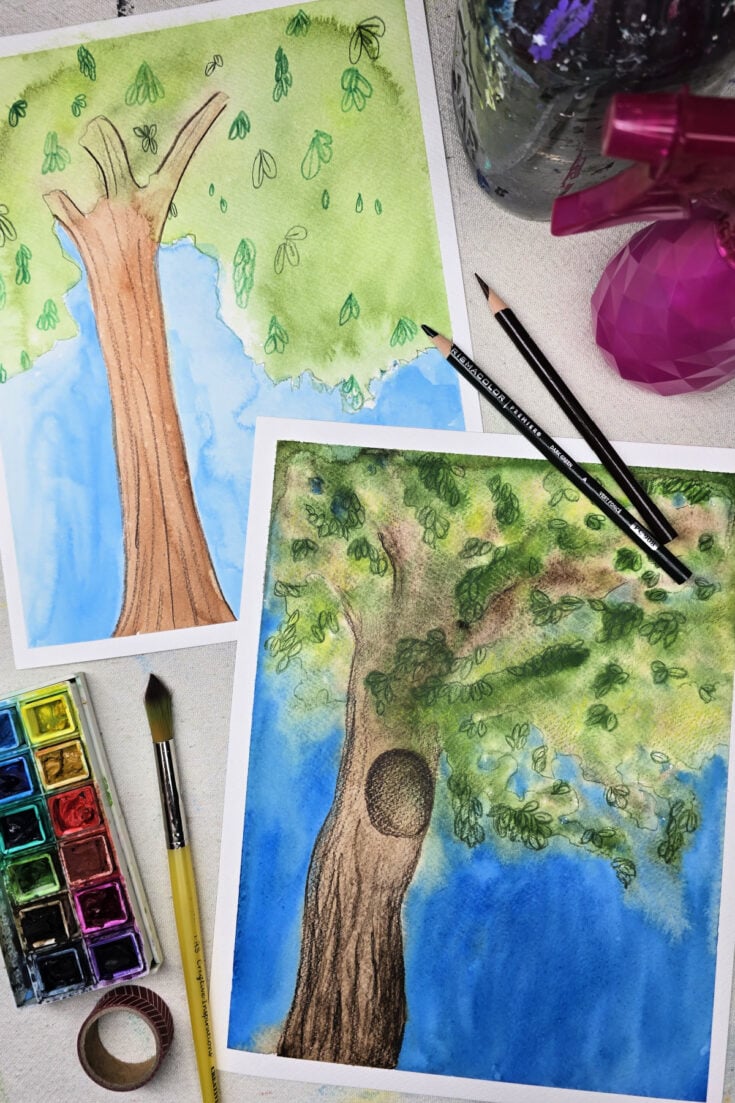
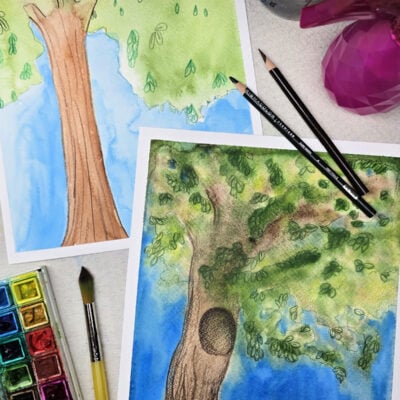
Finished Watercolor Tree Art Project
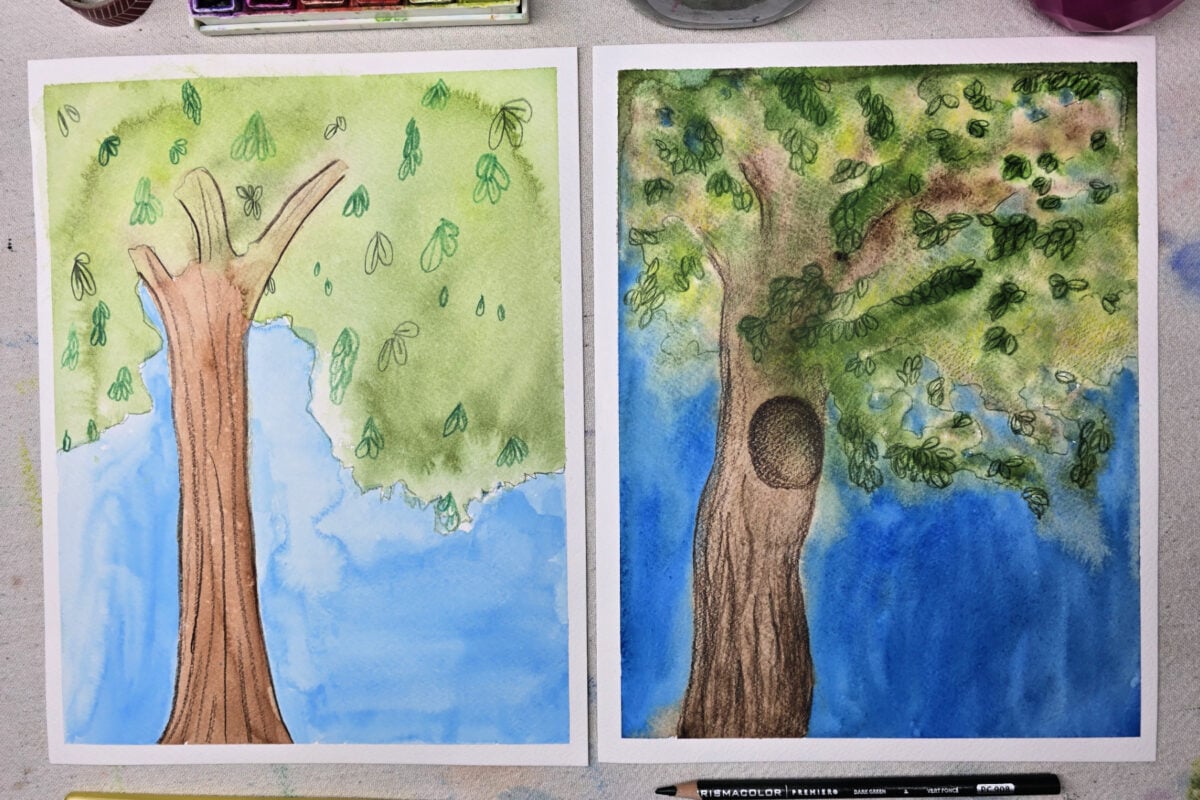
I love this fun project that allows kids to easily create tree paintings. Since these projects are made on paper, they can be framed, clipped, or displayed in your preferred style.
Our Experience Making this Watercolor Tree Art Project
I love the loose abstract design of this watercolor tree. I have always found trees a bit intimidating to draw or paint. This process removes the perfectionist related stress and allows artists to follow the tree designs created by the wet watercolor paints blending together. Adding a few basic details to the painting gives the tree a bit more character and definition, allowing each kid the chance to create their own unique designs.
Watercolor Tree Art Project for Kids
School-aged kids will practice painting a tree with watercolors in this fun project.
Materials
- Watercolor Paper
Tools
- Watercolor Paints
- Paintbrushes
- Washi Tape – or Painter’s Tape
- Colored Pencils, Crayons, or Markers
- Spray Bottle with Water
- Cardboard or Firm Surface
- Water
- Paper Towels
Instructions
- Use washi tape to attach watercolor paper to cardboard or other firm surface. Ensuring the tape is smooth and even will create a cleaner border for your finished project.
Tip: If using painters tape or masking tape instead of washi tape, stick tape to your shirt or pants before attaching it to the paper, This will lessen the stickiness of the tape and it will be less likely to tear your paper. - Use watercolors to paint a tree trunk and branches onto the watercolor paper. Note: Branches need to still be wet for the next step, it is recommended to paint them last.
- Using a spray bottle filled with clean water, lightly spray branches and surrounding area. This will cause the paint from the branches to flow and bleed into the areas that have been sprayed. Refrain from spraying around the tree trunk as we don’t want that portion of the painting to bleed.
- Work watercolor paint onto the wet paper to create an abstract tree design. Loosely paint the branches and leaf areas onto the paper, allowing the paints to bleed and mix into one another.
Tip: If paints begin to pool up on the paper, carefully use the edges of a paper towel to soak up the excess paint. - Use watercolors to paint the sky or background surrounding the tree. Use caution when painting near the wet watercolor paints as they will bleed into one another. Consider allowing the painting to dry a bit before completing this step to prevent unwanted bleeding.
Set painting aside to dry. - When the painting is dry, loosely trace edges of leaf color with a colored pencil.
- Complete the project by adding colored pencil details to your tree.
Other Fun Tree Art Projects from Kids Activities Blog
- Learn about Analogous Colors with this free printable.
- Use Wax Resist to create a tree scene.
- Take your sketchbooks outside to study trees with a Nature Journal entry.
- Use leaves to create Salt Dough decorations.
- Younger kids can use a Cardboard Tube to stamp leaves in this fun art project.
Did your kids have fun creating this watercolor tree? What unique details did they add to their designs?


This watercolor tree art project is a beautiful blend of creativity and nature! It’s a great way for kids to experiment with color mixing and brush techniques while expressing their imagination through seasonal tree designs.
“This watercolor tree art project is a fun and creative way for kids to explore colors and textures. It helps develop fine motor skills and artistic expression while making beautiful, seasonal artwork!”